m (Protected "Wild West - Day 4 (Chinese version)" ([move=sysop] (indefinite))) |
No edit summary |
||
| (2 intermediate revisions by 2 users not shown) | |||
| Line 2: | Line 2: | ||
:''For the international version of this level, see [[Wild West - Day 4]].'' |
:''For the international version of this level, see [[Wild West - Day 4]].'' |
||
:''For the level before the v1.8 update, see [[Wild West - Day 4 (Chinese version: pre-1.8)]].'' |
:''For the level before the v1.8 update, see [[Wild West - Day 4 (Chinese version: pre-1.8)]].'' |
||
| + | |||
{{Quote|A not O.K. Corral! Better plant something before they get loose.|Crazy Dave}} |
{{Quote|A not O.K. Corral! Better plant something before they get loose.|Crazy Dave}} |
||
{{Levelintro2C|level = Wild West - Day 4|no = second|area = Wild West|type=[[Not OK Corral]]|unique=unlocks the [[Chili Bean]]}} |
{{Levelintro2C|level = Wild West - Day 4|no = second|area = Wild West|type=[[Not OK Corral]]|unique=unlocks the [[Chili Bean]]}} |
||
| Line 14: | Line 15: | ||
|Game = Plants vs. Zombies 2 (Chinese version) |
|Game = Plants vs. Zombies 2 (Chinese version) |
||
|Loc = Wild West (Chinese version){{!}}Wild West |
|Loc = Wild West (Chinese version){{!}}Wild West |
||
| − | |Plant = {{S|Peashooter| |
+ | |Plant = {{S|Peashooter|2C}} {{S|Repeater|2}} {{S|Split Pea|2}} |
| − | |Zombie = {{S|Cowboy Zombie|2}} {{S|Conehead Cowboy |
+ | |Zombie = {{S|Cowboy Zombie|2}} {{S|Conehead Cowboy|2}} {{S|Prospector Zombie|2}} |
|Type = [[Not OK Corral]] |
|Type = [[Not OK Corral]] |
||
|EM = Six |
|EM = Six |
||
| − | |Flag = One (divided into |
+ | |Flag = One (divided into five waves) |
|FR = Coins, a star, {{S|Chili Bean|2}} |
|FR = Coins, a star, {{S|Chili Bean|2}} |
||
|NR = Coins |
|NR = Coins |
||
| Line 39: | Line 40: | ||
{{Waves |
{{Waves |
||
|zombie1 = {{S|Cowboy Zombie|2}}<sup>2</sup> |
|zombie1 = {{S|Cowboy Zombie|2}}<sup>2</sup> |
||
| + | |note1 = 1x {{S|Peashooter|2C}} is given. |
||
|zombie2 = {{S|Cowboy Zombie|2}}<sup>4</sup> {{S|Cowboy Zombie|2}}<sup>5</sup> |
|zombie2 = {{S|Cowboy Zombie|2}}<sup>4</sup> {{S|Cowboy Zombie|2}}<sup>5</sup> |
||
| + | |note2 = 1x {{S|Peashooter|2C}} is given. |
||
|zombie3 = {{S|Cowboy Zombie|2}}<sup>1</sup> {{S|Cowboy Zombie|2}}<sup>5</sup> {{S|Prospector Zombie|2}}<sup>2</sup> |
|zombie3 = {{S|Cowboy Zombie|2}}<sup>1</sup> {{S|Cowboy Zombie|2}}<sup>5</sup> {{S|Prospector Zombie|2}}<sup>2</sup> |
||
| − | |note3 = {{S|Split Pea|2}} |
+ | |note3 = 1x {{S|Split Pea|2}} is given. |
| − | |zombie4 = {{S|Cowboy Zombie|2}}<sup> |
+ | |zombie4 = {{S|Cowboy Zombie|2}}<sup>4</sup> {{S|Cowboy Zombie|2}}<sup>5</sup> {{S|Conehead Cowboy|2}}<sup>1</sup> {{S|Prospector Zombie|2}}<sup>2</sup> {{S|Prospector Zombie|2}}<sup>3</sup> |
| + | |note4 = 1x {{S|Split Pea|2}} is given. |
||
| ⚫ | |||
| ⚫ | |zombie5 = {{S|Cowboy Zombie|2}}<sup>1</sup> {{S|Cowboy Zombie|2}}<sup>2</sup> {{S|Cowboy Zombie|2}}<sup>3</sup> {{S|Cowboy Zombie|2}}<sup>3</sup> {{S|Cowboy Zombie|2}}<sup>4</sup> {{S|Cowboy Zombie|2}}<sup>5</sup> {{S|Conehead Cowboy|2}}<sup>1</sup> {{S|Prospector Zombie|2}}<sup>2</sup> {{S|Prospector Zombie|2}}<sup>5</sup> |
||
| − | |note5 = {{S|Repeater|2}} are available. {{S|Split Pea|2}} are no longer available. |
||
| + | |note5 = Final wave.<br>1x {{S|Repeater|2}} is given.}} |
||
| ⚫ | |||
| ⚫ | |||
| ⚫ | | |
||
| − | |note8 = {{S|Threepeater|2}} are available. {{S|Repeater|2}} are no longer available. |
||
| ⚫ | | |
||
| − | |zombie10 = {{S|Cowboy Zombie|2}}<sup>3</sup> {{S|Cowboy Zombie|2}}<sup>5</sup> {{S|Conehead Cowboy|2}}<sup>2</sup> {{S|Conehead Cowboy|2}}<sup>4</sup> {{S|Buckethead Cowboy|2}}<sup>1</sup> {{S|Prospector Zombie|2}}<sup>3</sup> {{S|Prospector Zombie|2}}<sup>5</sup> {{S|Pianist Zombie|2}}<sup>4</sup> |
||
| − | |note10 = 500%/7 [[Plant Food]], final flag}} |
||
==Strategies== |
==Strategies== |
||
| Line 72: | Line 69: | ||
NewWW4R.png|First time reward |
NewWW4R.png|First time reward |
||
</gallery> |
</gallery> |
||
| + | |||
| + | ==Walkthroughs== |
||
| + | <gallery widths="250"> |
||
| + | Plants vs. Zombies 2 (Chinese) Peashooter - 5 MAX Level - Level Up Wild West Day 4 (Ep.57)|By {{U|Alex5432000}} |
||
| + | </gallery> |
||
| + | |||
|-| |
|-| |
||
Hard mode= |
Hard mode= |
||
| Line 81: | Line 84: | ||
|EM = Ten |
|EM = Ten |
||
|Type = [[Not OK Corral]] |
|Type = [[Not OK Corral]] |
||
| − | |Flag = One (divided into |
+ | |Flag = One (divided into six waves) |
|Plant = {{S|Kernel-pult|2}} {{S|Bonk Choy|2}} |
|Plant = {{S|Kernel-pult|2}} {{S|Bonk Choy|2}} |
||
|Zombie = {{S|Cowboy Zombie|2}} {{S|Conehead Cowboy|2}} {{S|Buckethead Cowboy|2}} |
|Zombie = {{S|Cowboy Zombie|2}} {{S|Conehead Cowboy|2}} {{S|Buckethead Cowboy|2}} |
||
| Line 92: | Line 95: | ||
==Difficulty== |
==Difficulty== |
||
*The Kernel-pults here are pretty weak so the player can present a big danger when Buckethead Cowboy comes. Bonk Choys must be used to deal with Conehead and Buckethead Cowboys. |
*The Kernel-pults here are pretty weak so the player can present a big danger when Buckethead Cowboy comes. Bonk Choys must be used to deal with Conehead and Buckethead Cowboys. |
||
| + | |||
| + | ==Waves== |
||
| + | {{Waves |
||
| + | |zombie1 = {{S|Cowboy Zombie|2}}<sup>2</sup> |
||
| + | |note1 = 1x {{S|Kernel-pult|2}} is given. |
||
| + | |zombie2 = {{S|Cowboy Zombie|2}}<sup>3</sup> {{S|Cowboy Zombie|2}}<sup>5</sup> |
||
| + | |note2 = 1x {{S|Kernel-pult|2}} is given. |
||
| ⚫ | |||
| + | |note3 = 1x {{S|Kernel-pult|2}} is given. |
||
| ⚫ | |||
| + | |note4 = 1x {{S|Kernel-pult|2}} is given.<br>Carries 1x [[Plant Food]]. |
||
| ⚫ | |||
| + | |note5 = 1x {{S|Bonk Choy|2}} is given. |
||
| ⚫ | |zombie6 = {{S|Cowboy Zombie|2}}<sup>1</sup> {{S|Cowboy Zombie|2}}<sup>3</sup> {{S|Cowboy Zombie|2}}<sup>4</sup> {{S|Cowboy Zombie|2}}<sup>5</sup> {{S|Conehead Cowboy|2}}<sup>2</sup> {{S|Conehead Cowboy|2}}<sup>4</sup> {{S|Conehead Cowboy|2}}<sup>5</sup> {{S|Buckethead Cowboy|2}}<sup>2</sup> {{S|Buckethead Cowboy|2}}<sup>4</sup> |
||
| + | |note6 = Final wave.<br>1x {{S|Bonk Choy|2}} is given.<br>Carries 1x Plant Food.}} |
||
==Strategies== |
==Strategies== |
||
| Line 103: | Line 121: | ||
NewWW4HG3.png|Final wave |
NewWW4HG3.png|Final wave |
||
NewWW4HR.png|First time reward |
NewWW4HR.png|First time reward |
||
| + | </gallery> |
||
| + | |||
| + | ==Walkthroughs== |
||
| + | <gallery widths="250"> |
||
| + | Plants vs. Zombies 2 (Chinese) Peashooter - 5 MAX Level - Level Up Wild West Day 4 (Ep.57)|By {{U|Alex5432000}} |
||
</gallery> |
</gallery> |
||
Revision as of 15:17, 5 August 2019
- For the international version of this level, see Wild West - Day 4.
- For the level before the v1.8 update, see Wild West - Day 4 (Chinese version: pre-1.8).
| “ | ” | |
—Crazy Dave | ||
Wild West - Day 4 is the second level of Wild West in the Chinese version of Plants vs. Zombies 2. It is a Not OK Corral level. When this level is finished for the first time, the player unlocks the Chili Bean.
The mechanic of this level is simple, survive the zombie attack with only ten plants given. Plants are given one at a time meaning, the player will only be given one plant for every zombie that will appear on the lawn.
In the Normal Mode of this level, the player has to play a Not OK Corral tutorial level.
Dialogue
(Penny appears)
Penny: It appears the zombies have been gathered in that corral.
(Crazy Dave appears)
Crazy Dave: A not O.K. Corral!
Crazy Dave: Better plant something before they get loose.
(Crazy Dave and Penny leave)
Difficulty
- First, it is easy if one understands its tutorial or it becomes hard: This level is just like a puzzle. A plant will be given in the conveyor-belt. Once the player plants that plant, the conveyor-belt will disappear and they need to kill all the zombies to plant another plant. This is a wave. There are ten waves in total. There will be always a lot of minecart tracks. The player take advantage of them as he or she can only plant one plant each wave. However, planted plants will be saved if they survive. The player will not get any lawn mowers and the player will get Plant Food at the end of this level, so they need to make a certain strategy. The player should keep moving minecart tracks and they will never lose, unless they did something wrong.
Waves
- The small number next to the zombie icon means that zombie will always appear in that lane, with 1 being the topmost lane and 5 being the bottommost one.
| Waves | Non-dynamic zombies | Ambush zombies | Note(s) |
|---|---|---|---|
| 1 | None | 1x | |
| 2 | None | 1x | |
| 3 | None | 1x | |
| 4 | None | 1x | |
| 5 | None | Final wave. 1x |
Strategies
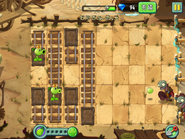
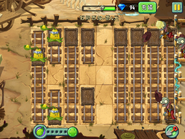
- Plant a Peashooter on the last minecart track. Attack the zombie.
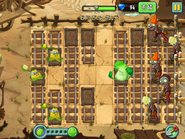
- Then, plant another Peashooter on the lane having the zombie. Remember do not plant on minecart tracks.
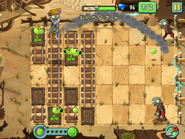
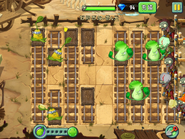
- A Prospector Zombie will appear. Plant a Split Pea on the second minecart track (on the second column). Move that minecart to the lane having that zombie.
- Do the same. Now create your own strategy.
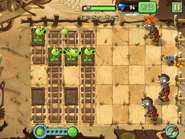
- Plant a Repeater on the third minecart track on the lane having the Conehead Cowboy.
- Focus on killing the Pianist Zombie and the Buckethead Cowboy.
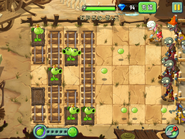
- Do as the same. Remember to plant on minecart tracks if important.
- Threepeaters will appear, so use them wisely.
Gallery
Walkthroughs
In the Hard Mode of this level, the player has to beat a medium-difficulty Not OK Corral level.
Difficulty
- The Kernel-pults here are pretty weak so the player can present a big danger when Buckethead Cowboy comes. Bonk Choys must be used to deal with Conehead and Buckethead Cowboys.
Waves
- The small number next to the zombie icon means that zombie will always appear in that lane, with 1 being the topmost lane and 5 being the bottommost one.
| Waves | Non-dynamic zombies | Ambush zombies | Note(s) |
|---|---|---|---|
| 1 | None | 1x | |
| 2 | None | 1x | |
| 3 | None | 1x | |
| 4 | None | 1x Carries 1x Plant Food. | |
| 5 | None | 1x | |
| 6 | None | Final wave. 1x Carries 1x Plant Food. |
Strategies
- Plant Kernel-pults on the left minecart tracks. Plant Bonk Choys on the minecart tracks near the zombies.
- Keep moving the minecarts to kill Conehead Cowboys and Buckethead Cowboys.
Gallery
Walkthroughs
| ||||||||||||||||||||||||||||||||||||||||||||||||||


