(Created page with "{{ChinaArticle}} {{Pix}} {{Construction}} :''For the international version of this level, see Wild West - Day 16.'' {{Infobox level |name = Wild West - Day 16 |image = |G...") Tag: sourceedit |
No edit summary |
||
| (19 intermediate revisions by 11 users not shown) | |||
| Line 1: | Line 1: | ||
{{ChinaArticle}} |
{{ChinaArticle}} |
||
| − | {{Pix}} |
||
| − | {{Construction}} |
||
:''For the international version of this level, see [[Wild West - Day 16]].'' |
:''For the international version of this level, see [[Wild West - Day 16]].'' |
||
| + | {{Levelintro2C|It is a [[Save Our Seeds]] level. The player must protect a [[Wall-nut]] to complete the level.|level = Wild West - Day 16|no = 16th|area = Wild West|unique = gets coins}} |
||
| + | |||
| + | <tabber> |
||
| + | Normal mode= |
||
{{Infobox level |
{{Infobox level |
||
|name = Wild West - Day 16 |
|name = Wild West - Day 16 |
||
| − | |image = |
+ | |image =WW16C.png |
| + | |EM = One |
||
|Game = Plants vs. Zombies 2 (Chinese version) |
|Game = Plants vs. Zombies 2 (Chinese version) |
||
|Loc = Wild West (Chinese version){{!}}Wild West |
|Loc = Wild West (Chinese version){{!}}Wild West |
||
| + | |Plant = Choice<br>'''Pre-placed plants:''' One {{S|Wall-nut|2}} |
||
| − | |Plant = |
||
| + | |Zombie = {{S|Cowboy Zombie|2}} {{S|Conehead Cowboy|2}} {{S|Flag Cowboy Zombie|2}} {{S|Prospector Zombie|2}} {{S|Poncho Zombie|2}} {{S|Zombie Bull|2}}<br>Summoned: {{S|Zombie Bull Rider|2}} |
||
| − | |Zombie = |
||
| − | |Type = |
+ | |Type = [[Save Our Seeds]] |
| − | |Flag = |
+ | |Flag = One |
| + | |Objective 1 = Survive and protect the endangered plants |
||
| − | |Diff = |
||
| − | |FR = |
+ | |FR = Coins, a star |
| − | |NR = |
+ | |NR = Coins |
|before = Wild West - Day 15 (Chinese version) |
|before = Wild West - Day 15 (Chinese version) |
||
|after = Wild West - Day 17 (Chinese version)}} |
|after = Wild West - Day 17 (Chinese version)}} |
||
| + | In the Normal Mode of this level, the player has to protect the endangered plants from Level 1 zombies. |
||
| − | {{Levelintro2C|level = Wild West - Day 16|no = sixteenth|area = Wild West}} |
||
| + | |||
| − | {{Stub}} |
||
| + | ==Difficulty== |
||
| + | *The player must protect a Wall-nut on a minecart that is very close to the zombies. In addition the zombies come quickly into the lawn and includes the [[Poncho Zombie]]. This zombie is detrimental and should be dealt with fast. In addition a close set up should be used to protect the Wall-nut. This will be useful combatting the [[Prospector Zombie]], if the player doesn't want to use a backwards attacking plant. Using multi-lane attacks will help trying to set up a proper defense during the course of the level. |
||
| + | *Remember, '''keep watch of the position of the endangered Wall-nut'''. The player can easily ignore this and lose the level because of it. |
||
| + | |||
| + | ==Waves== |
||
| + | {{Waves |
||
| + | |zombie1 = {{S|Cowboy Zombie|2}} |
||
| + | |zombie2 = {{S|Cowboy Zombie|2}} {{S|Cowboy Zombie|2}} |
||
| + | |zombie3 = {{S|Conehead Cowboy|2}} {{S|Poncho Zombie|2}}- |
||
| + | |note3 = Carries 1x [[Plant Food]]. |
||
| + | |zombie4 = {{S|Cowboy Zombie|2}} {{S|Cowboy Zombie|2}} {{S|Prospector Zombie|2}} {{S|Zombie Bull|2}} |
||
| + | |zombie5 = {{S|Cowboy Zombie|2}} {{S|Cowboy Zombie|2}} {{S|Conehead Cowboy|2}} {{S|Prospector Zombie|2}} {{S|Prospector Zombie|2}} {{S|Poncho Zombie|2}}+ {{S|Zombie Bull|2}} |
||
| + | |zombie6 = {{S|Cowboy Zombie|2}} {{S|Cowboy Zombie|2}} {{S|Conehead Cowboy|2}} {{S|Prospector Zombie|2}} {{S|Poncho Zombie|2}}- |
||
| + | |zombie7 = {{S|Cowboy Zombie|2}} {{S|Cowboy Zombie|2}} {{S|Cowboy Zombie|2}} {{S|Conehead Cowboy|2}} {{S|Conehead Cowboy|2}} {{S|Zombie Bull|2}} |
||
| + | |zombie8 = {{S|Cowboy Zombie|2}} {{S|Cowboy Zombie|2}} {{S|Flag Cowboy Zombie|2}} {{S|Prospector Zombie|2}} {{S|Poncho Zombie|2}}-<sup>4</sup> {{S|Poncho Zombie|2}}+<sup>2</sup> |
||
| + | |note8 = First flag. |
||
| + | |zombie9 = {{S|Cowboy Zombie|2}} {{S|Conehead Cowboy|2}} {{S|Conehead Cowboy|2}} {{S|Prospector Zombie|2}} {{S|Prospector Zombie|2}} |
||
| + | |note9 = Carries 1x Plant Food. |
||
| + | |zombie10 = {{S|Cowboy Zombie|2}} {{S|Cowboy Zombie|2}} {{S|Cowboy Zombie|2}} {{S|Cowboy Zombie|2}} {{S|Cowboy Zombie|2}} {{S|Conehead Cowboy|2}} {{S|Flag Cowboy Zombie|2}} {{S|Prospector Zombie|2}} {{S|Prospector Zombie|2}} {{S|Prospector Zombie|2}} {{S|Poncho Zombie|2}}-<sup>1</sup> {{S|Poncho Zombie|2}}-<sup>5</sup> {{S|Poncho Zombie|2}}+<sup>3</sup> {{S|Zombie Bull|2}}<sup>2</sup> {{S|Zombie Bull|2}}<sup>4</sup> |
||
| + | |note10 = Final wave.}} |
||
| + | {{S|Poncho Zombie|2}}- never carries metal grate<br> |
||
| + | {{S|Poncho Zombie|2}}+ always carries metal grate |
||
| + | |||
| + | ==Strategies== |
||
| + | :''See [[Wild West - Day 16#Strategies]]'' |
||
| + | |||
| + | ==Gallery== |
||
| + | <gallery bordercolor="transparent"> |
||
| + | NewWW16M.png|Level menu |
||
| + | NewWW16G1.png |
||
| + | NewWW16G2.png|Final wave |
||
| + | NewWW16R.png|First time reward |
||
| + | </gallery> |
||
| + | |||
| + | ==Walkthroughs== |
||
| + | <gallery widths="250"> |
||
| + | Plants vs. Zombies 2 (Chinese version) Kiwifruit, Toadstool Wild West Day 16 (Ep.74)|By {{U|Alex5432000}} |
||
| + | </gallery> |
||
| + | |||
| + | |-| |
||
| + | Hard mode= |
||
| + | {{Infobox level |
||
| + | |name = Wild West - Day 16 |
||
| + | |image = NewWW16H.png |
||
| + | |EM = One |
||
| + | |Game = Plants vs. Zombies 2 (Chinese version) |
||
| + | |Loc = Wild West (Chinese version){{!}}Wild West |
||
| + | |Plant = Choice<br>'''Pre-placed plants:''' One {{S|Wall-nut|2}} |
||
| + | |Zombie = {{LevelIconNew|2}}: {{S|Cowboy Zombie|2}} {{S|Conehead Cowboy|2}} {{S|Flag Cowboy Zombie|2}} {{S|Prospector Zombie|2}} {{S|Poncho Zombie|2}} {{S|Zombie Bull|2}}<br>Summoned: {{LevelIconNew|2}}: {{S|Zombie Bull Rider|2}}{{HardModeNote}} |
||
| + | |Type = [[Save Our Seeds]] |
||
| + | |Flag = One |
||
| + | |Objective 1 = Survive and protect the endangered plants |
||
| + | |FR = Coins, two stars, Golden Chest |
||
| + | |NR = Coins |
||
| + | |before = Wild West - Day 15 (Chinese version) |
||
| + | |after = Wild West - Day 17 (Chinese version)}} |
||
| + | In the Hard Mode of this level, the player has to protect the endangered plants from the cowboy zombies at Level 2 or above, along with no lawn mowers. |
||
| + | |||
| + | ==Difficulty== |
||
| + | *Once again, the player should be aware of Level 2 Prospector Zombies, Poncho Zombies and especially the Zombie Bull. Strong attacking plants, backwards attacking plants and stalling plants are recommended to beat these zombies. |
||
| + | |||
| + | ==Waves== |
||
| + | {{Waves |
||
| + | |zombie1 = {{S|Cowboy Zombie|2}} |
||
| + | |zombie2 = {{S|Cowboy Zombie|2}} {{S|Cowboy Zombie|2}} |
||
| + | |zombie3 = {{S|Conehead Cowboy|2}} {{S|Poncho Zombie|2}}- |
||
| + | |note3 = Carries 1x [[Plant Food]]. |
||
| + | |zombie4 = {{S|Cowboy Zombie|2}} {{S|Cowboy Zombie|2}} {{S|Prospector Zombie|2}} {{S|Zombie Bull|2}} |
||
| + | |zombie5 = {{S|Cowboy Zombie|2}} {{S|Cowboy Zombie|2}} {{S|Conehead Cowboy|2}} {{S|Prospector Zombie|2}} {{S|Prospector Zombie|2}} {{S|Poncho Zombie|2}}+ {{S|Zombie Bull|2}} |
||
| + | |zombie6 = {{S|Cowboy Zombie|2}} {{S|Cowboy Zombie|2}} {{S|Conehead Cowboy|2}} {{S|Prospector Zombie|2}} {{S|Poncho Zombie|2}}- |
||
| + | |zombie7 = {{S|Cowboy Zombie|2}} {{S|Cowboy Zombie|2}} {{S|Cowboy Zombie|2}} {{S|Conehead Cowboy|2}} {{S|Conehead Cowboy|2}} {{S|Zombie Bull|2}} |
||
| + | |zombie8 = {{S|Cowboy Zombie|2}} {{S|Cowboy Zombie|2}} {{S|Flag Cowboy Zombie|2}} {{S|Prospector Zombie|2}} {{S|Poncho Zombie|2}}-<sup>4</sup> {{S|Poncho Zombie|2}}+<sup>2</sup> |
||
| + | |note8 = First flag. |
||
| + | |zombie9 = {{S|Cowboy Zombie|2}} {{S|Conehead Cowboy|2}} {{S|Conehead Cowboy|2}} {{S|Prospector Zombie|2}} {{S|Prospector Zombie|2}} |
||
| + | |note9 = Carries 1x Plant Food. |
||
| + | |zombie10 = {{S|Cowboy Zombie|2}} {{S|Cowboy Zombie|2}} {{S|Cowboy Zombie|2}} {{S|Cowboy Zombie|2}} {{S|Cowboy Zombie|2}} {{S|Conehead Cowboy|2}} {{S|Flag Cowboy Zombie|2}} {{S|Prospector Zombie|2}} {{S|Prospector Zombie|2}} {{S|Prospector Zombie|2}} {{S|Poncho Zombie|2}}-<sup>1</sup> {{S|Poncho Zombie|2}}-<sup>5</sup> {{S|Poncho Zombie|2}}+<sup>3</sup> {{S|Zombie Bull|2}}<sup>2</sup> {{S|Zombie Bull|2}}<sup>4</sup> |
||
| + | |note10 = Final wave.}} |
||
| + | {{S|Poncho Zombie|2}}- never carries metal grate<br> |
||
| + | {{S|Poncho Zombie|2}}+ always carries metal grate |
||
| + | |||
| + | == Strategies == |
||
| + | *'''Required plants:''' {{S|Twin Sunflower|2}} {{S|Monkeyfruit|2}} {{S|Aspiragus|2}} {{S|Infi-nut|2}} {{S|Lava Guava|2C}} {{S|Magic-shroom|2}} / {{S|Homing Thistle|2C}} (All levelled up) |
||
| + | **You can replace Monkeyfruit and Aspiragus with another strong multi-target attacking plants. |
||
| + | |||
| + | *Do the things you need to get ready. |
||
| + | *Plant Aspiraguses and Monkeyfruits to attack. |
||
| + | *Use Infi-nuts for defense if needed. |
||
| + | *There is only one Zombie Bull at the final wave of the level. Use Lava Guava to stall it. |
||
| + | *Don't forget to use Plant Food. |
||
| + | |||
| + | ==Gallery== |
||
| + | <gallery bordercolor="transparent"> |
||
| + | NewWW16HG1.png |
||
| + | NewWW16HG2.png|Final wave |
||
| + | </gallery> |
||
| + | |||
| + | ==Walkthroughs== |
||
| + | <gallery widths="250"> |
||
| + | Plants vs. Zombies 2 (Chinese version) Kiwifruit, Toadstool Wild West Day 16 (Ep.74)|By {{U|Alex5432000}} |
||
| + | </gallery> |
||
| + | |||
| + | </tabber> |
||
{{PvZ2Chineselevels}} |
{{PvZ2Chineselevels}} |
||
| + | <poll> |
||
| + | How would you rate Wild West - Day 16 (Chinese version)'s difficulty? |
||
| + | Very hard |
||
| + | Hard |
||
| + | Somewhat hard |
||
| + | Medium |
||
| + | Somewhat easy |
||
| + | Easy |
||
| + | Very easy |
||
| + | </poll> |
||
| + | [[Category:Wild West (Chinese version) levels]] |
||
| + | [[Category:Levels with pre-placed plants]] |
||
| + | [[Category:Levels with one flag]] |
||
| + | [[Category:Brain Busters]] |
||
| + | [[Category:Brain Busters (Chinese version)]] |
||
| + | [[Category:Save Our Seeds]] |
||
| + | [[Category:Save Our Seeds (Chinese version)]] |
||
Latest revision as of 16:47, 5 August 2019
This article is about content available solely in the People's Republic of China.
- For the international version of this level, see Wild West - Day 16.
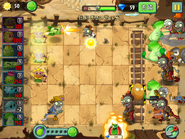
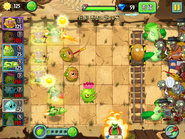
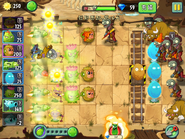
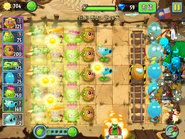
Wild West - Day 16 is the 16th level of Wild West in the Chinese version of Plants vs. Zombies 2. It is a Save Our Seeds level. The player must protect a Wall-nut to complete the level. When this level is finished for the first time, the player gets coins.
In the Normal Mode of this level, the player has to protect the endangered plants from Level 1 zombies.
Difficulty
- The player must protect a Wall-nut on a minecart that is very close to the zombies. In addition the zombies come quickly into the lawn and includes the Poncho Zombie. This zombie is detrimental and should be dealt with fast. In addition a close set up should be used to protect the Wall-nut. This will be useful combatting the Prospector Zombie, if the player doesn't want to use a backwards attacking plant. Using multi-lane attacks will help trying to set up a proper defense during the course of the level.
- Remember, keep watch of the position of the endangered Wall-nut. The player can easily ignore this and lose the level because of it.
Waves
- The small number next to the zombie icon means that zombie will always appear in that lane, with 1 being the topmost lane and 5 being the bottommost one.
| Waves | Non-dynamic zombies | Ambush zombies | Note(s) |
|---|---|---|---|
| 1 | None | ||
| 2 | None | ||
| 3 | None | Carries 1x Plant Food. | |
| 4 | None | ||
| 5 | None | ||
| 6 | None | ||
| 7 | None | ||
| 8 | None | First flag. | |
| 9 | None | Carries 1x Plant Food. | |
| 10 | None | Final wave. |
![]() - never carries metal grate
- never carries metal grate
![]() + always carries metal grate
+ always carries metal grate
Strategies
Gallery
Walkthroughs
In the Hard Mode of this level, the player has to protect the endangered plants from the cowboy zombies at Level 2 or above, along with no lawn mowers.
Difficulty
- Once again, the player should be aware of Level 2 Prospector Zombies, Poncho Zombies and especially the Zombie Bull. Strong attacking plants, backwards attacking plants and stalling plants are recommended to beat these zombies.
Waves
- The small number next to the zombie icon means that zombie will always appear in that lane, with 1 being the topmost lane and 5 being the bottommost one.
| Waves | Non-dynamic zombies | Ambush zombies | Note(s) |
|---|---|---|---|
| 1 | None | ||
| 2 | None | ||
| 3 | None | Carries 1x Plant Food. | |
| 4 | None | ||
| 5 | None | ||
| 6 | None | ||
| 7 | None | ||
| 8 | None | First flag. | |
| 9 | None | Carries 1x Plant Food. | |
| 10 | None | Final wave. |
![]() - never carries metal grate
- never carries metal grate
![]() + always carries metal grate
+ always carries metal grate
Strategies
- Required plants:


 /
/  (All levelled up)
- You can replace Monkeyfruit and Aspiragus with another strong multi-target attacking plants.
- Do the things you need to get ready.
- Plant Aspiraguses and Monkeyfruits to attack.
- Use Infi-nuts for defense if needed.
- There is only one Zombie Bull at the final wave of the level. Use Lava Guava to stall it.
- Don't forget to use Plant Food.
Gallery
Walkthroughs
| ||||||||||||||||||||||||||||||||||||||||||||||||||


