No edit summary Tag: sourceedit |
m (→Dialogue) |
||
| (39 intermediate revisions by 23 users not shown) | |||
| Line 1: | Line 1: | ||
| + | :''For the Chinese version of the level, see [[Wild West - Day 16 (Chinese version)]].'' |
||
| ⚫ | |||
{{Infobox level |
{{Infobox level |
||
|Game = Plants vs. Zombies 2 |
|Game = Plants vs. Zombies 2 |
||
| Line 7: | Line 9: | ||
|Flag = Two |
|Flag = Two |
||
|EM = One |
|EM = One |
||
| − | |Diff = Medium-hard |
||
|Zombie = {{S|Cowboy Zombie|2}} {{S|Conehead Cowboy|2}} {{S|Flag Cowboy Zombie|2}} {{S|Prospector Zombie|2}} {{S|Poncho Zombie|2}} |
|Zombie = {{S|Cowboy Zombie|2}} {{S|Conehead Cowboy|2}} {{S|Flag Cowboy Zombie|2}} {{S|Prospector Zombie|2}} {{S|Poncho Zombie|2}} |
||
|FR = A [[money bag]] |
|FR = A [[money bag]] |
||
| Line 14: | Line 15: | ||
|before = Wild West - Day 15 |
|before = Wild West - Day 15 |
||
|after = Wild West - Day 17}} |
|after = Wild West - Day 17}} |
||
| + | {{Levelintro2|no=16th|area=Wild West|type=[[Save Our Seeds]]|To complete this level, the player must protect a [[Wall-nut]] in a minecart, located at the third column from the right side of the lawn.}} |
||
| ⚫ | |||
| + | |||
| − | '''Wild West - Day 16''' is the 16th [[:Category:Plants vs. Zombies 2 levels|level]] of [[Wild West]]. It is the first [[Save Our Seeds]] level in this world. To complete this level, the player must protect a [[Wall-nut]] in a minecart. |
||
| + | ==Dialogue== |
||
| + | ''(Penny appears)'' |
||
| + | |||
| + | [[Penny]]: These levels can be tough nuts to crack. |
||
| + | |||
| + | ''(Crazy Dave appears)'' |
||
| + | |||
| + | [[Crazy Dave]]: And I want to see the delicious creamy center. |
||
| + | |||
| + | Penny: The point is not to crack them. |
||
| + | |||
| + | ''(Crazy Dave and Penny leave)'' |
||
==Difficulty== |
==Difficulty== |
||
| + | The player must protect a Wall-nut on a minecart that is very close to the zombies. In addition the zombies come quickly into the lawn and includes the [[Poncho Zombie]]. This zombie is detrimental and should be dealt with fast. In addition a close set up should be used to protect the Wall-nut. This will be useful combatting the [[Prospector Zombie]], if the player doesn't want to use a backwards attacking plant. Using multi-lane attacks will help trying to set up a proper defense during the course of the level. |
||
| − | *You need to move the Wall-nut fast or else your Wall-nut will be eaten. Since Wall-nut First Aid does not work on it, [[Plant Food]] is the only way to repair it. |
||
| + | |||
| − | *Like in [[Wild West - Day 9]], there is another similar objective in the older versions. |
||
| + | Remember, '''keep watch of the position of the endangered Wall-nut'''. It is common for the player to ignore this and lose the level because of it. |
||
| − | *Managing the Wall-nut's location is the key. |
||
| + | |||
| + | ==Waves== |
||
| + | {{Waves |
||
| + | |zombie1 = {{S|Cowboy Zombie|2}} |
||
| + | |zombie2 = {{S|Cowboy Zombie|2}} {{S|Cowboy Zombie|2}} |
||
| + | |zombie3 = {{S|Cowboy Zombie|2}} {{S|Cowboy Zombie|2}} {{S|Conehead Cowboy|2}} |
||
| + | |zombie4 = {{S|Conehead Cowboy|2}} {{S|Poncho Zombie|2}}- |
||
| + | |note4 = 100% [[Plant Food]] |
||
| + | |zombie5 = {{S|Cowboy Zombie|2}} {{S|Cowboy Zombie|2}} {{S|Conehead Cowboy|2}} |
||
| + | |zombie6 = {{S|Cowboy Zombie|2}} {{S|Cowboy Zombie|2}} {{S|Conehead Cowboy|2}} {{S|Prospector Zombie|2}} |
||
| + | |zombie7 = {{S|Conehead Cowboy|2}} {{S|Conehead Cowboy|2}} {{S|Prospector Zombie|2}} |
||
| + | |note7 = 400%/7 Plant Food |
||
| + | |zombie8 = {{S|Cowboy Zombie|2}} {{S|Cowboy Zombie|2}} {{S|Conehead Cowboy|2}} {{S|Conehead Cowboy|2}} {{S|Flag Cowboy Zombie|2}} {{S|Prospector Zombie|2}} {{S|Prospector Zombie|2}} {{S|Poncho Zombie|2}}+ |
||
| + | |note8 = First flag |
||
| + | |zombie9 = {{S|Cowboy Zombie|2}} {{S|Cowboy Zombie|2}} {{S|Conehead Cowboy|2}} {{S|Prospector Zombie|2}} |
||
| + | |zombie10 = {{S|Cowboy Zombie|2}} {{S|Cowboy Zombie|2}} {{S|Conehead Cowboy|2}} {{S|Prospector Zombie|2}} {{S|Poncho Zombie|2}}- |
||
| + | |zombie11 = {{S|Cowboy Zombie|2}} {{S|Conehead Cowboy|2}} {{S|Prospector Zombie|2}} {{S|Poncho Zombie|2}}- {{S|Poncho Zombie|2}}- {{S|Poncho Zombie|2}}+ |
||
| + | |note11 = 500%/7 Plant Food |
||
| + | |zombie12 = {{S|Cowboy Zombie|2}} {{S|Cowboy Zombie|2}} {{S|Cowboy Zombie|2}} {{S|Conehead Cowboy|2}} {{S|Conehead Cowboy|2}} {{S|Conehead Cowboy|2}} |
||
| + | |zombie13 = {{S|Cowboy Zombie|2}} {{S|Cowboy Zombie|2}} {{S|Conehead Cowboy|2}} {{S|Conehead Cowboy|2}} {{S|Conehead Cowboy|2}} {{S|Prospector Zombie|2}} |
||
| + | |zombie14 = {{S|Cowboy Zombie|2}} {{S|Cowboy Zombie|2}} {{S|Prospector Zombie|2}} {{S|Poncho Zombie|2}}-<sup>4</sup> {{S|Poncho Zombie|2}}+<sup>2</sup> |
||
| + | |zombie15 = {{S|Cowboy Zombie|2}} {{S|Conehead Cowboy|2}} {{S|Conehead Cowboy|2}} {{S|Prospector Zombie|2}} {{S|Prospector Zombie|2}} |
||
| + | |note15 = 600%/7 Plant Food |
||
| + | |zombie16 = {{S|Cowboy Zombie|2}} {{S|Cowboy Zombie|2}} {{S|Cowboy Zombie|2}} {{S|Cowboy Zombie|2}} {{S|Cowboy Zombie|2}} {{S|Conehead Cowboy|2}}<sup>2</sup> {{S|Conehead Cowboy|2}}<sup>4</sup> {{S|Conehead Cowboy|2}} {{S|Flag Cowboy Zombie|2}} {{S|Prospector Zombie|2}} {{S|Prospector Zombie|2}} {{S|Prospector Zombie|2}} {{S|Poncho Zombie|2}}-<sup>1</sup> {{S|Poncho Zombie|2}}-<sup>5</sup> {{S|Poncho Zombie|2}}+<sup>3</sup> |
||
| + | |note16 = Final flag}} |
||
| + | {{S|Poncho Zombie|2}}- never carries metal grate<br> |
||
| + | {{S|Poncho Zombie|2}}+ always carries metal grate |
||
==Strategies== |
==Strategies== |
||
| + | ===Strategy 1=== |
||
'''''<u>Note</u>: This strategy is for all versions.''''' |
'''''<u>Note</u>: This strategy is for all versions.''''' |
||
| − | *''' |
+ | *'''Required plants:''' |
**[[Twin Sunflower]] |
**[[Twin Sunflower]] |
||
**[[Potato Mine]] |
**[[Potato Mine]] |
||
| Line 38: | Line 79: | ||
*Repair Wall-nuts when it reaches its third degrade. |
*Repair Wall-nuts when it reaches its third degrade. |
||
| − | == |
+ | ===Strategy 2=== |
| + | :Created by {{U|Flying-casual}} |
||
| ⚫ | |||
| + | *'''Required plants:''' |
||
| + | **[[Sun-shroom]] |
||
| + | **[[Twin Sunflower]] |
||
| + | **[[Potato Mine]] |
||
| + | **[[Snapdragon]] |
||
| + | **[[Split Pea]] |
||
| + | **[[Wall-nut]] |
||
| + | **[[Cherry Bomb]] |
||
| + | **[[Chili Bean]] (or any other instant kill or stalling plant) |
||
| + | *Start out by planting as many sun plants as possible, using a Potato Mine to take out the first zombie. |
||
| + | *When the next two zombies arrive, plant a Snapdragon, and get a whole column of those in (preferably in column 5). |
||
| + | *Keep building up sun plants and Snapdragons, then add in two columns of Split Peas and add Wall-nuts as necessary in column 6. |
||
| + | *Repair the endangered Wall-nut with Plant Food. |
||
==Gallery== |
==Gallery== |
||
<gallery bordercolor="transparent"> |
<gallery bordercolor="transparent"> |
||
| − | FRWWd16U.png|First time reward |
+ | FRWWd16U.png|First time reward |
| + | WWSOSBF10.PNG|By {{U|BF10}} |
||
| + | SplitPeaSucks.jpg|By {{U|Bearjedi}} |
||
| + | IMG 0140.PNG|By {{U|EpicGamer23468}} |
||
| + | WW - Day 16 (PG234) - 1.png|By {{U|Pinkgirl234}} |
||
| + | WW16.PNG|By {{U|MyNameIsMyName}} |
||
| + | WW16 Melon-pult strategy.PNG|Another strategy by MyNameIsMyName |
||
| + | PvZ2 Stragety WW16.png|By {{U|Satirelol200}}. Also work without Plant Food. |
||
| + | SOWW16.PNG|By {{U|Someone456}} |
||
</gallery> |
</gallery> |
||
| + | |||
| + | ==Trivia== |
||
| ⚫ | |||
| + | |||
==Walkthrough== |
==Walkthrough== |
||
| + | <gallery widths="250"> |
||
| ⚫ | |||
| + | Plants vs. Zombies 2 Split Pea play - Power Up - Wild West Day 16 (Ep.152)|By {{U|Alex5432000}} |
||
| ⚫ | |||
| + | </gallery> |
||
{{Clear}} |
{{Clear}} |
||
{{PvZ2levels}} |
{{PvZ2levels}} |
||
| + | <poll> |
||
| + | How would you rate Wild West - Day 16's difficulty? |
||
| + | Very hard |
||
| + | Hard |
||
| + | Somewhat hard |
||
| + | Medium |
||
| + | Somewhat easy |
||
| + | Easy |
||
| + | Very easy |
||
| + | </poll> |
||
[[Category:Save Our Seeds]] |
[[Category:Save Our Seeds]] |
||
[[Category:Brain Busters]] |
[[Category:Brain Busters]] |
||
[[Category:Levels with two flags]] |
[[Category:Levels with two flags]] |
||
| + | [[Category:Levels with pre-placed plants]] |
||
Revision as of 14:38, 10 July 2019
- For the Chinese version of the level, see Wild West - Day 16 (Chinese version).
| “ | ” | |
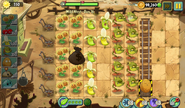
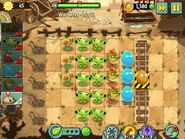
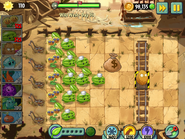
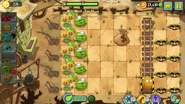
Wild West - Day 16 is the 16th level of Wild West in Plants vs. Zombies 2. It is a Save Our Seeds level. To complete this level, the player must protect a Wall-nut in a minecart, located at the third column from the right side of the lawn. After completing this level, the player receives a money bag.
Dialogue
(Penny appears)
Penny: These levels can be tough nuts to crack.
(Crazy Dave appears)
Crazy Dave: And I want to see the delicious creamy center.
Penny: The point is not to crack them.
(Crazy Dave and Penny leave)
Difficulty
The player must protect a Wall-nut on a minecart that is very close to the zombies. In addition the zombies come quickly into the lawn and includes the Poncho Zombie. This zombie is detrimental and should be dealt with fast. In addition a close set up should be used to protect the Wall-nut. This will be useful combatting the Prospector Zombie, if the player doesn't want to use a backwards attacking plant. Using multi-lane attacks will help trying to set up a proper defense during the course of the level.
Remember, keep watch of the position of the endangered Wall-nut. It is common for the player to ignore this and lose the level because of it.
Waves
- The small number next to the zombie icon means that zombie will always appear in that lane, with 1 being the topmost lane and 5 being the bottommost one.
| Waves | Non-dynamic zombies | Ambush zombies | Note(s) |
|---|---|---|---|
| 1 | None | ||
| 2 | None | ||
| 3 | None | ||
| 4 | None | 100% Plant Food | |
| 5 | None | ||
| 6 | None | ||
| 7 | None | 400%/7 Plant Food | |
| 8 | None | First flag | |
| 9 | None | ||
| 10 | None | ||
| 11 | None | 500%/7 Plant Food | |
| 12 | None | ||
| 13 | None | ||
| 14 | None | ||
| 15 | None | 600%/7 Plant Food | |
| 16 | None | Final flag |
![]() - never carries metal grate
- never carries metal grate
![]() + always carries metal grate
+ always carries metal grate
Strategies
Strategy 1
Note: This strategy is for all versions.
- Required plants:
- Do what you need to do first.
- Plant one column Pea Pods with three or more heads. Then plant one column of Split Peas.
- You may need one column of Lightning Reeds because it is a bit helpful in this level.
- Keep moving the Wall-nut to where there are no zombies. If all five lines have zombies, then you need to plant another Wall-nut in front of it.
- Repair Wall-nuts when it reaches its third degrade.
Strategy 2
- Created by Flying-casual
- Required plants:
- Sun-shroom
- Twin Sunflower
- Potato Mine
- Snapdragon
- Split Pea
- Wall-nut
- Cherry Bomb
- Chili Bean (or any other instant kill or stalling plant)
- Start out by planting as many sun plants as possible, using a Potato Mine to take out the first zombie.
- When the next two zombies arrive, plant a Snapdragon, and get a whole column of those in (preferably in column 5).
- Keep building up sun plants and Snapdragons, then add in two columns of Split Peas and add Wall-nuts as necessary in column 6.
- Repair the endangered Wall-nut with Plant Food.
Gallery
Trivia
- Before the 1.9 update, the player could not lose any lawn mowers.
Walkthrough
- *: Removed ~: Epic Quest


