mNo edit summary |
No edit summary |
||
| (2 intermediate revisions by 2 users not shown) | |||
| Line 31: | Line 31: | ||
==Difficulty== |
==Difficulty== |
||
With only 2000 sun to spend, the player does not have many options. Many [[Seagull Zombie]]s appear, as well as some [[Barrel Roller Zombie]]s. This makes the player choose different types of offensive plants, which could take a big toll on their remaining sun cost they can use. The biggest threat are the [[Swashbuckler Zombie]]s, which act like shields for the tougher zombies. [[Kernel-pult]] is highly suggested, as it can stun all zombies with its [[Plant Food]] and easily deal with the Seagull Zombies. |
With only 2000 sun to spend, the player does not have many options. Many [[Seagull Zombie]]s appear, as well as some [[Barrel Roller Zombie]]s. This makes the player choose different types of offensive plants, which could take a big toll on their remaining sun cost they can use. The biggest threat are the [[Swashbuckler Zombie]]s, which act like shields for the tougher zombies. [[Kernel-pult]] is highly suggested, as it can stun all zombies with its [[Plant Food]] and easily deal with the Seagull Zombies. |
||
| + | |||
| + | ==Waves== |
||
| + | {{Waves |
||
| + | |zombie1 = {{S|Pirate Zombie|2}} {{S|Conehead Pirate|2}} {{S|Conehead Pirate|2}} {{S|Seagull Zombie|2}}<sup>1</sup> {{S|Seagull Zombie|2}}<sup>5</sup> |
||
| + | |zombie2 = {{S|Barrel Roller Zombie|2}}<sup>2</sup> {{S|Barrel Roller Zombie|2}}<sup>3</sup> {{S|Barrel Roller Zombie|2}}<sup>4</sup> |
||
| + | |zombie3 = {{S|Conehead Pirate|2}}<sup>2</sup> {{S|Conehead Pirate|2}}<sup>4</sup> {{S|Conehead Pirate|2}} {{S|Seagull Zombie|2}}<sup>1</sup> {{S|Seagull Zombie|2}}<sup>5</sup> |
||
| + | |note3 = Raiding Party! |
||
| + | |ambush3 = {{S|Swashbuckler Zombie|2}} {{S|Swashbuckler Zombie|2}} {{S|Swashbuckler Zombie|2}} {{S|Swashbuckler Zombie|2}} |
||
| + | |zombie4 = {{S|Swashbuckler Zombie|2}}<sup>1</sup> {{S|Swashbuckler Zombie|2}}<sup>5</sup> {{S|Pirate Captain Zombie|2}}<sup>3</sup> {{S|Pirate Captain Zombie|2}} |
||
| + | |zombie5 = {{S|Conehead Pirate|2}}<sup>2</sup> {{S|Conehead Pirate|2}}<sup>4</sup> {{S|Conehead Pirate|2}} {{S|Seagull Zombie|2}}<sup>1</sup> {{S|Seagull Zombie|2}}<sup>5</sup> |
||
| + | |zombie6 = {{S|Barrel Roller Zombie|2}}<sup>2</sup> {{S|Barrel Roller Zombie|2}}<sup>3</sup> {{S|Barrel Roller Zombie|2}}<sup>4</sup> |
||
| + | |note6 = Raiding Party! |
||
| + | |ambush6 = {{S|Swashbuckler Zombie|2}} {{S|Swashbuckler Zombie|2}} {{S|Swashbuckler Zombie|2}} {{S|Swashbuckler Zombie|2}} {{S|Swashbuckler Zombie|2}} |
||
| + | |zombie7 = {{S|Conehead Pirate|2}} {{S|Seagull Zombie|2}}<sup>1</sup> {{S|Seagull Zombie|2}}<sup>1</sup> {{S|Seagull Zombie|2}}<sup>5</sup> {{S|Seagull Zombie|2}}<sup>5</sup> |
||
| + | |zombie8 = {{S|Swashbuckler Zombie|2}}<sup>1</sup> {{S|Swashbuckler Zombie|2}}<sup>5</sup> {{S|Pirate Captain Zombie|2}} {{S|Pirate Captain Zombie|2}} |
||
| + | |zombie9 = {{S|Conehead Pirate|2}} {{S|Conehead Pirate|2}} {{S|Seagull Zombie|2}}<sup>1</sup> {{S|Seagull Zombie|2}}<sup>1</sup> {{S|Seagull Zombie|2}}<sup>5</sup> {{S|Seagull Zombie|2}}<sup>5</sup> {{S|Barrel Roller Zombie|2}}<sup>3</sup> |
||
| + | |zombie10 = {{S|Flag Pirate Zombie|2}} {{S|Seagull Zombie|2}}<sup>1</sup> {{S|Seagull Zombie|2}}<sup>1</sup> {{S|Seagull Zombie|2}}<sup>5</sup> {{S|Seagull Zombie|2}}<sup>5</sup> {{S|Barrel Roller Zombie|2}}<sup>2</sup> {{S|Barrel Roller Zombie|2}} {{S|Pirate Captain Zombie|2}}<sup>4</sup> |
||
| + | |note10 = Final wave.<br>Raiding Party! |
||
| + | |ambush10 = {{S|Swashbuckler Zombie|2}} {{S|Swashbuckler Zombie|2}} {{S|Swashbuckler Zombie|2}} {{S|Swashbuckler Zombie|2}} {{S|Swashbuckler Zombie|2}} {{S|Swashbuckler Zombie|2}} {{S|Swashbuckler Zombie|2}} {{S|Swashbuckler Zombie|2}}}} |
||
==Strategies== |
==Strategies== |
||
| Line 55: | Line 74: | ||
NewPS16R.png|First time reward |
NewPS16R.png|First time reward |
||
</gallery> |
</gallery> |
||
| + | |||
| + | ==Walkthroughs== |
||
| + | <gallery widths="250"> |
||
| + | Plants vs. Zombies 2 (Chinese version) Unlocked 3 new Plants Pirate Seas Day 16 (Ep.41)|By {{U|Alex5432000}} |
||
| + | </gallery> |
||
| + | |||
|-| |
|-| |
||
Hard mode= |
Hard mode= |
||
| Line 76: | Line 101: | ||
==Difficulty== |
==Difficulty== |
||
With only 2000 sun to spend, the player is forced to use strong plants to beat the Level 2 zombies. |
With only 2000 sun to spend, the player is forced to use strong plants to beat the Level 2 zombies. |
||
| + | |||
| + | ==Waves== |
||
| + | {{Waves |
||
| + | |zombie1 = {{S|Pirate Zombie|2}} {{S|Conehead Pirate|2}} {{S|Conehead Pirate|2}} {{S|Seagull Zombie|2}}<sup>1</sup> {{S|Seagull Zombie|2}}<sup>5</sup> |
||
| + | |zombie2 = {{S|Barrel Roller Zombie|2}}<sup>2</sup> {{S|Barrel Roller Zombie|2}}<sup>3</sup> {{S|Barrel Roller Zombie|2}}<sup>4</sup> |
||
| + | |zombie3 = {{S|Conehead Pirate|2}}<sup>2</sup> {{S|Conehead Pirate|2}}<sup>4</sup> {{S|Conehead Pirate|2}} {{S|Seagull Zombie|2}}<sup>1</sup> {{S|Seagull Zombie|2}}<sup>5</sup> |
||
| + | |note3 = Raiding Party! |
||
| + | |ambush3 = {{S|Swashbuckler Zombie|2}} {{S|Swashbuckler Zombie|2}} {{S|Swashbuckler Zombie|2}} {{S|Swashbuckler Zombie|2}} |
||
| + | |zombie4 = {{S|Swashbuckler Zombie|2}}<sup>1</sup> {{S|Swashbuckler Zombie|2}}<sup>5</sup> {{S|Pirate Captain Zombie|2}}<sup>3</sup> {{S|Pirate Captain Zombie|2}} |
||
| + | |zombie5 = {{S|Conehead Pirate|2}}<sup>2</sup> {{S|Conehead Pirate|2}}<sup>4</sup> {{S|Conehead Pirate|2}} {{S|Seagull Zombie|2}}<sup>1</sup> {{S|Seagull Zombie|2}}<sup>5</sup> |
||
| + | |zombie6 = {{S|Barrel Roller Zombie|2}}<sup>2</sup> {{S|Barrel Roller Zombie|2}}<sup>3</sup> {{S|Barrel Roller Zombie|2}}<sup>4</sup> |
||
| + | |note6 = Raiding Party! |
||
| + | |ambush6 = {{S|Swashbuckler Zombie|2}} {{S|Swashbuckler Zombie|2}} {{S|Swashbuckler Zombie|2}} {{S|Swashbuckler Zombie|2}} {{S|Swashbuckler Zombie|2}} |
||
| + | |zombie7 = {{S|Conehead Pirate|2}} {{S|Seagull Zombie|2}}<sup>1</sup> {{S|Seagull Zombie|2}}<sup>1</sup> {{S|Seagull Zombie|2}}<sup>5</sup> {{S|Seagull Zombie|2}}<sup>5</sup> |
||
| + | |zombie8 = {{S|Swashbuckler Zombie|2}}<sup>1</sup> {{S|Swashbuckler Zombie|2}}<sup>5</sup> {{S|Pirate Captain Zombie|2}} {{S|Pirate Captain Zombie|2}} |
||
| + | |zombie9 = {{S|Conehead Pirate|2}} {{S|Conehead Pirate|2}} {{S|Seagull Zombie|2}}<sup>1</sup> {{S|Seagull Zombie|2}}<sup>1</sup> {{S|Seagull Zombie|2}}<sup>5</sup> {{S|Seagull Zombie|2}}<sup>5</sup> {{S|Barrel Roller Zombie|2}}<sup>3</sup> |
||
| + | |zombie10 = {{S|Flag Pirate Zombie|2}} {{S|Seagull Zombie|2}}<sup>1</sup> {{S|Seagull Zombie|2}}<sup>1</sup> {{S|Seagull Zombie|2}}<sup>5</sup> {{S|Seagull Zombie|2}}<sup>5</sup> {{S|Barrel Roller Zombie|2}}<sup>2</sup> {{S|Barrel Roller Zombie|2}} {{S|Pirate Captain Zombie|2}}<sup>4</sup> |
||
| + | |note10 = Final wave.<br>Raiding Party! |
||
| + | |ambush10 = {{S|Swashbuckler Zombie|2}} {{S|Swashbuckler Zombie|2}} {{S|Swashbuckler Zombie|2}} {{S|Swashbuckler Zombie|2}} {{S|Swashbuckler Zombie|2}} {{S|Swashbuckler Zombie|2}} {{S|Swashbuckler Zombie|2}} {{S|Swashbuckler Zombie|2}}}} |
||
==Strategies== |
==Strategies== |
||
| Line 93: | Line 137: | ||
NewPS16HR.png|First time reward |
NewPS16HR.png|First time reward |
||
</gallery> |
</gallery> |
||
| + | |||
| + | ==Walkthroughs== |
||
| + | <gallery widths="250"> |
||
| + | Plants vs. Zombies 2 (Chinese version) Unlocked 3 new Plants Pirate Seas Day 16 (Ep.41)|By {{U|Alex5432000}} |
||
| + | </gallery> |
||
| + | |||
</tabber> |
</tabber> |
||
{{PvZ2Chineselevels}} |
{{PvZ2Chineselevels}} |
||
Latest revision as of 20:45, 4 August 2019
- For the international version of this level, see Pirate Seas - Day 16.
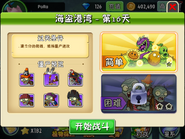
Pirate Seas - Day 16 is the 16th level of Pirate Seas in the Chinese version of Plants vs. Zombies 2. It is a Last Stand level. To complete this level, the player has 2000 sun to spend on a strategy to defeat the zombies. When this level is finished for the first time, the player gets coins.
In the Normal Mode of this level, the player has to beat 9 kinds of zombies in Level 1.
Dialogue
(Penny appears)
Penny: It's low tide and the waves are coming in.
(Crazy Dave appears)
Crazy Dave: Grab your water wings! We're going to get wet.
(Crazy Dave and Penny leave)
Difficulty
With only 2000 sun to spend, the player does not have many options. Many Seagull Zombies appear, as well as some Barrel Roller Zombies. This makes the player choose different types of offensive plants, which could take a big toll on their remaining sun cost they can use. The biggest threat are the Swashbuckler Zombies, which act like shields for the tougher zombies. Kernel-pult is highly suggested, as it can stun all zombies with its Plant Food and easily deal with the Seagull Zombies.
Waves
- The small number next to the zombie icon means that zombie will always appear in that lane, with 1 being the topmost lane and 5 being the bottommost one.
Strategies
Strategy 1
- Created by RaidingParty
This simple strategy can beat the level without Plant Food, premium content or losing any mowers. It does not require any plants that needs the player to progress past this level.
The rest are not needed.
Plant three Bloomerangs in the middle lanes of the first column. Plant five Snapdragons in the second column. Plant three Snapdragons in the middle lanes of the third column. Protect the Snapdragons that do not have Bloomerangs behind them with a Wall-nut. Leave the rest unguarded and reserve the extra sun.
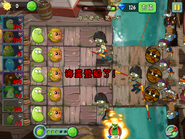
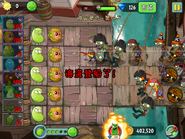
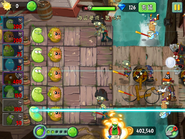
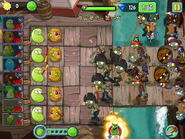
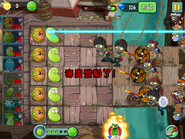
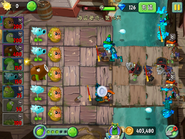
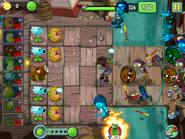
This strategy shows off the raw power of Snapdragons. They will kill most everything themselves, with the center group not even needing any Wall-nuts. This includes the Zombie Parrots, which will almost always try to take them and be burned down quickly. It is possible for them get lucky and steal a Wall-nut while the Snapdragons are in between attack and idle modes, but those can easily be replaced with the leftover sun. Seagull Zombies and stray Imp Pirate Zombies may get a few bites on the Wall-nuts, but not nearly enough and your original Wall-nuts, if they are not stolen, will end the battle barely degraded. The Bloomerangs will damage the Barrel Roller Zombies enough for the Snapdragons to kill them before they can roll barrels into them and the Snapdragons will kill the center lane Imp Pirate Zombies almost always before they can do any damage at all. If you use the Plant Food on the Snapdragons, the zombie force will have zero chance of survival.
- For more strategies, see Last Stand (PvZ2)/Strategies.
Gallery
Walkthroughs
In the Hard Mode of this level, the player has to beat the zombies above in Level 2.
Difficulty
With only 2000 sun to spend, the player is forced to use strong plants to beat the Level 2 zombies.
Waves
- The small number next to the zombie icon means that zombie will always appear in that lane, with 1 being the topmost lane and 5 being the bottommost one.
Strategies
- Required plants:
- Snow Pea (to slow zombies, give enough time for Monkeyfruit to kill them, even in Level 1)
- Monkeyfruit
- Coconut Cannon
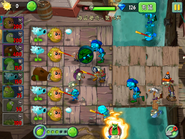
- Plant a row of Monkeyfruits in the second column. In the first column, plant 4 Snow Peas and 1 Coconut Cannon in the center to kill many zombies at once. Tap "Let's Rock!"
- Use Plant Food when needed. Remember to tap the Coconut Cannon, especially when the zombies are close or if there are many zombies focused in a 3x3 area.
Gallery
Walkthroughs
| ||||||||||||||||||||||||||||||||||||||||||||||||||


