- For the Chinese version of this level, see Neon Mixtape Tour - Day 13 (Chinese version).
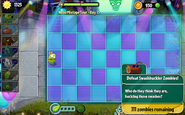
Neon Mixtape Tour - Day 13 is the thirteenth level of Neon Mixtape Tour in Plants vs. Zombies 2. It is a Last Stand level. The player is given 2,000 sun. The jams that play in this level are pop, punk, and rap. After completing this level, the player receives a money bag.
Difficulty
This level is quite hard because of high zombie density and the limited sun that can be used. The limited sun plays a big role to the difficulty in this level. Only 2000 sun is given, and that is not quite enough for the huge waves of zombies in this level. Additionally, the zombies in the level come in large groups, especially Glitter Zombies, Punk Zombies, MC Zom-B's, and numbers of Buckethead Zombies. This means that the player should have a powerful but rather cheap (in terms of sun) setup to win this level.
Waves
- The small number next to the zombie icon means that zombie will always appear in that lane, with 1 being the topmost lane and 5 being the bottommost one.
Strategies
Strategy 1
- Created by RaidingParty
This strategy can beat the level without Plant Food, premium content, gem premium plants, or losing lawn mowers.
- Suggested plants:
- Winter Melon
- Fume-shroom
- Magnet-shroom
- Cherry Bomb
- Wall-nut
- Stunion
- The seventh plant is not needed.
In the first column, place two Winter Melons in the second and fourth lane, and three Fume-shrooms on the other tiles. Fill the second column with Magnet-shrooms. You will want to place two Wall-nuts in the top and bottom lanes of the third column; it may be a better idea to kill off the big horde of Punk Zombies first before setting them down.
The Magnet-shrooms will neutralize the Bucketheads and Punks in the first hordes; if you are unlucky the Punks may kick a Wall-nut away if you have already placed them down, but otherwise do no real damage. The Winter Melons will devastate the core group with the Fume-shrooms mopping up the rest.
After the first huge wave of zombies, you will eventually see three mobs of MC Zom-Bs and Glitter Zombies in the top, middle, and bottom lanes, out of fire from the Winter Melons. However, the music will switch to pop jam before they can reach the plants, so let the Fume-shrooms kill them. Keep an eye on any survivors and when the final wave begins, be prepared to use Stunion on any group (almost always the center lane) that managed to get close as the rap jam will start up again. Dig up any Magnet-shrooms in danger as the final wave will not require many if at all.
For the final wave, make sure there are no zombies alive near the plants, then dig up one of the Winter Melons and use the sun to drop a Cherry Bomb on half of the final horde ahead of that Winter Melon. Finish off the rest of the zombies left.
If you use Plant Food with this strategy, the Winter Melon's Plant Food attack will wipe out the heavy waves, such as the Punk/Glitter horde near the beginning.
Strategy 2
- Created by Dinner111
This setup is both a quick and easy way of defeating this level without Power Ups.
- Suggested plants:
- Any plants to fill up the remaining slots.
Place Winter Melons on the first, third, and fifth squares of the first column. Place two Tile Turnips on whichever Winter Melons you wish. This should leave you with 250 sun, enough to use three Thyme Warps. Use a Thyme Warp when the zombies get close to the Winter Melons. For the final wave, use a plant food on one of the two Winter Melons that is sitting on a Power Tile and watch the zombies drop like flies.
Strategy 3
- Created by Battlehard101
This strategy only needs one (or possibly two) Plant Food, no boosts (although Infi-nut boost saves you a Plant Food), no lawn mowers lost and no Power Ups.
- Suggested plants:
- Laser Bean
- Infi-nut
- Magnet-shroom
- Snapdragon
- Any plant you want.
Plant Laser Beans on the first column and Magnet-shroom on the second. Plant two Snapdragons on the third column, second and fourth row and an Infi-nut on the third row. Then click Let's Rock, feed the Infi-nut with Plant Food. Feed it again the second time if the force field is lost.
Strategy 4
- Created by Ballistic Planet
- Suggested plants:


 (on Explode-O-Nut)
- Plant Cold Snapdragon in the very back column, and plant Explode-O-Nuts in the column just in front of the Cold Snapdragons.
- As the zombies come, your Explode-O-Nuts will get constantly destroyed. Keep replacing them whenever you can.
- Once the wave of MC Zom-Bs comes in, plant two Explode-O-Nuts adjacent to the middle lane right next to the MC Zom-Bs, so as to destroy every zombie in that wave.
At the beginning of the final wave, use a Thyme Warp to warp every zombie on the lawn to the back. Then, place two Explode-O-Nuts right where the zombies are in the lanes adjacent to the middle lane, so as to destroy every zombie and win the level.
- Required plants: Apple Mortar, Cold Snapdragon.
- In the first lane, plant a full row of Apple Mortar's.
- In the second lane, plant a full lane of Cold Snapdragons.
- Use plant food on Apple Mortars near the end. By this time, you will lose 2 snapdragons and 2 apple mortars. The lawnmowers will kill them if they get past the Apple Mortars and the Cold Snapdragons at the bottem.
Gallery
Walkthroughs
- *: Removed ~: Epic Quest


