(Maybe Dynamic) Tag: sourceedit |
(→Trivia) |
||
| (38 intermediate revisions by 21 users not shown) | |||
| Line 1: | Line 1: | ||
| + | |||
| + | :''For the Chinese version of this level, see [[Modern Day - Day 16 (Chinese version)]].'' |
||
| + | |||
{{Quote|''Fools! You have fallen into my excruciatingly obvious trap! My vast and varied array of Gargantuars will pummel you into total oblivion!''|[[Dr. Zomboss]]}} |
{{Quote|''Fools! You have fallen into my excruciatingly obvious trap! My vast and varied array of Gargantuars will pummel you into total oblivion!''|[[Dr. Zomboss]]}} |
||
{{Infobox level |
{{Infobox level |
||
| Line 6: | Line 9: | ||
|Flag = Three |
|Flag = Three |
||
|Plant = {{S|Peashooter|2}} {{S|Iceberg Lettuce|2}} {{S|Repeater|2}} {{S|Coconut Cannon|2}} {{S|Threepeater|2}} {{S|Spikerock|2}} {{S|Cherry Bomb|2}} {{S|Winter Melon|2}} {{S|Citron|2}} {{S|A.K.E.E.|2}} {{S|Phat Beet|2}} {{S|Intensive Carrot|2}} {{S|Primal Wall-nut|2}} {{S|Primal Potato Mine|2}} {{S|Grapeshot|2}} {{S|Cold Snapdragon|2}} |
|Plant = {{S|Peashooter|2}} {{S|Iceberg Lettuce|2}} {{S|Repeater|2}} {{S|Coconut Cannon|2}} {{S|Threepeater|2}} {{S|Spikerock|2}} {{S|Cherry Bomb|2}} {{S|Winter Melon|2}} {{S|Citron|2}} {{S|A.K.E.E.|2}} {{S|Phat Beet|2}} {{S|Intensive Carrot|2}} {{S|Primal Wall-nut|2}} {{S|Primal Potato Mine|2}} {{S|Grapeshot|2}} {{S|Cold Snapdragon|2}} |
||
| − | |Zombie = {{S|Flag Zombie|2}} {{S|Gargantuar|2}} {{S|Mummified Gargantuar|2}} {{S|Gargantuar Pirate|2}} {{S|Wild West Gargantuar|2}} {{S|Gargantuar Prime|2}} {{S|Deep Sea Gargantuar|2}} {{S|Sloth Gargantuar|2}} {{S|Porter Gargantuar|2}} {{S|Hair Metal Gargantuar|2}} {{S|Jurassic Gargantuar|2}}<br><center>Summoned:</center> {{S|Imp|2}} {{S|Imp Mummy|2}} {{S|Imp Pirate Zombie|2}} {{S|Zombie Bull Rider|2}} {{S|Bug Bot Imp|2}} {{S|Imp Mermaid Zombie|2}} {{S|Yeti Imp|2}} {{S|Lost City Imp Zombie|2}} {{S|Impunk|2}} {{S|Jurassic Imp |
+ | |Zombie = {{S|Flag Zombie|2}} {{S|Gargantuar|2}} {{S|Mummified Gargantuar|2}} {{S|Gargantuar Pirate|2}} {{S|Wild West Gargantuar|2}} {{S|Gargantuar Prime|2}} {{S|Deep Sea Gargantuar|2}} {{S|Sloth Gargantuar|2}} {{S|Porter Gargantuar|2}} {{S|Hair Metal Gargantuar|2}} {{S|Jurassic Gargantuar|2}}<br><center>Summoned:</center> {{S|Imp|2}} {{S|Imp Mummy|2}} {{S|Imp Pirate Zombie|2}} {{S|Zombie Bull Rider|2}} {{S|Bug Bot Imp|2}} {{S|Imp Mermaid Zombie|2}} {{S|Yeti Imp|2}} {{S|Lost City Imp Zombie|2}} {{S|Impunk|2}} {{S|Jurassic Imp|2}} |
| − | |FR = [[ |
+ | |FR = *Current: A [[Piñata|Modern Day Piñata]] |
| + | *Old: A [[World Key]]/[[Mystery Gift Box]] |
||
|NR = A [[money bag]] |
|NR = A [[money bag]] |
||
|before = Modern Day - Day 15 |
|before = Modern Day - Day 15 |
||
|after = Modern Day - Day 17 |
|after = Modern Day - Day 17 |
||
|Objective 1 = Survive a massive attack in the Modern Day |
|Objective 1 = Survive a massive attack in the Modern Day |
||
| − | |Objective 2 = Survive without any lawn mowers |
+ | |Objective 2 = Survive without any lawn mowers}} |
| ⚫ | |||
| − | |Diff = Hard}} |
||
| ⚫ | |||
==Difficulty== |
==Difficulty== |
||
| − | With the level consisting of mostly Gargantuars, the entire level poses a big threat for the player. The first part will contain powerful plants for the player. However, as waves start to progress, powerful plants will be swapped out for weaker plants. As a result, this level heavily relies on the player's positioning and use of given plants, including luck from the plants provided. |
+ | With the level consisting of mostly Gargantuars, the entire level poses a big threat for the player. The first part will contain powerful plants for the player. However, as waves start to progress, powerful plants will be swapped out for weaker plants. As a result, this level heavily relies on the player's positioning and use of given plants, including luck from the plants provided. The player shouldn't worry about any problems with obtaining [[Plant Food]], as they will have the chance to grab as much as four in this level. |
| − | |||
| − | Dynamic Difficulty also does not affect the level too much, as it only adds [[Zombie|Basic Zombies]], [[Conehead Zombie]]s, and [[Buckethead Zombie]]s, alongside [[Imp]]s that appear on their own, which can be taken down with the strong plants given to the player due to their lower health and high damage from plants. |
||
==Waves== |
==Waves== |
||
| Line 26: | Line 27: | ||
|note1 = {{S|Winter Melon|2}} and {{S|Primal Potato Mine|2}} are available at the start |
|note1 = {{S|Winter Melon|2}} and {{S|Primal Potato Mine|2}} are available at the start |
||
|zombie2 = {{S|Wild West Gargantuar|2}}<sup>2</sup> {{S|Wild West Gargantuar|2}}<sup>4</sup> |
|zombie2 = {{S|Wild West Gargantuar|2}}<sup>2</sup> {{S|Wild West Gargantuar|2}}<sup>4</sup> |
||
| − | |note2 = {{S|Coconut Cannon|2}} and {{S|Cherry Bomb|2}} are available |
+ | |note2 = {{S|Coconut Cannon|2}} and {{S|Cherry Bomb|2}} are available; 1x Plant Food is available |
|zombie3 = {{S|Jurassic Gargantuar|2}}<sup>3</sup> {{S|Jurassic Gargantuar|2}}<sup>5</sup> |
|zombie3 = {{S|Jurassic Gargantuar|2}}<sup>3</sup> {{S|Jurassic Gargantuar|2}}<sup>5</sup> |
||
|note3 = {{S|Citron|2}} is available |
|note3 = {{S|Citron|2}} is available |
||
| Line 34: | Line 35: | ||
|note5 = {{S|Spikerock|2}}, {{S|Grapeshot|2}}, and {{S|Primal Wall-nut|2}} are available; {{S|Cherry Bomb|2}} and {{S|Primal Potato Mine|2}} are no longer available |
|note5 = {{S|Spikerock|2}}, {{S|Grapeshot|2}}, and {{S|Primal Wall-nut|2}} are available; {{S|Cherry Bomb|2}} and {{S|Primal Potato Mine|2}} are no longer available |
||
|zombie6 = {{S|Gargantuar Pirate|2}}<sup>2</sup> |
|zombie6 = {{S|Gargantuar Pirate|2}}<sup>2</sup> |
||
| − | |note6 = {{S|Winter Melon|2}} is no longer available |
+ | |note6 = {{S|Winter Melon|2}} is no longer available; 1x Plant Food is available |
|zombie7 = {{S|Porter Gargantuar|2}}<sup>4</sup> {{S|Porter Gargantuar|2}}<sup>4</sup> |
|zombie7 = {{S|Porter Gargantuar|2}}<sup>4</sup> {{S|Porter Gargantuar|2}}<sup>4</sup> |
||
| + | |note7 = 1x Plant Food is available |
||
|zombie8 = {{S|Flag Zombie|2}} {{S|Deep Sea Gargantuar|2}}<sup>1</sup> {{S|Deep Sea Gargantuar|2}}<sup>5</sup> {{S|Jurassic Gargantuar|2}}<sup>2</sup> {{S|Jurassic Gargantuar|2}}<sup>3</sup> |
|zombie8 = {{S|Flag Zombie|2}} {{S|Deep Sea Gargantuar|2}}<sup>1</sup> {{S|Deep Sea Gargantuar|2}}<sup>5</sup> {{S|Jurassic Gargantuar|2}}<sup>2</sup> {{S|Jurassic Gargantuar|2}}<sup>3</sup> |
||
|note8 = Second flag; {{S|Threepeater|2}} is available; {{S|Coconut Cannon|2}} and {{S|Citron|2}} are no longer available |
|note8 = Second flag; {{S|Threepeater|2}} is available; {{S|Coconut Cannon|2}} and {{S|Citron|2}} are no longer available |
||
|zombie9 = {{S|Gargantuar|2}}<sup>4</sup> |
|zombie9 = {{S|Gargantuar|2}}<sup>4</sup> |
||
| − | |note9 = {{S|A.K.E.E.|2}} and {{S|Cold Snapdragon|2}} are available |
+ | |note9 = {{S|A.K.E.E.|2}} and {{S|Cold Snapdragon|2}} are available |
|zombie10 = {{S|Gargantuar Prime|2}}<sup>1</sup> {{S|Gargantuar Prime|2}}<sup>3</sup> |
|zombie10 = {{S|Gargantuar Prime|2}}<sup>1</sup> {{S|Gargantuar Prime|2}}<sup>3</sup> |
||
|note10 = {{S|Iceberg Lettuce|2}} is available;{{S|Cold Snapdragon|2}} is no longer available |
|note10 = {{S|Iceberg Lettuce|2}} is available;{{S|Cold Snapdragon|2}} is no longer available |
||
|zombie11 = {{S|Hair Metal Gargantuar|2}}<sup>4</sup> {{S|Hair Metal Gargantuar|2}}<sup>5</sup> |
|zombie11 = {{S|Hair Metal Gargantuar|2}}<sup>4</sup> {{S|Hair Metal Gargantuar|2}}<sup>5</sup> |
||
| − | |note11 = {{S|Repeater|2}}, {{S|Phat Beet|2}}, and {{S|Intensive Carrot|2}} are available; {{S|Threepeater|2}} is no longer available |
+ | |note11 = {{S|Repeater|2}}, {{S|Phat Beet|2}}, and {{S|Intensive Carrot|2}} are available; {{S|Threepeater|2}} is no longer available; 1x Plant Food is available |
|zombie12 = {{S|Flag Zombie|2}} {{S|Mummified Gargantuar|2}}<sup>4</sup> {{S|Gargantuar Prime|2}}<sup>3</sup> {{S|Deep Sea Gargantuar|2}}<sup>5</sup> {{S|Sloth Gargantuar|2}}<sup>2</sup> {{S|Porter Gargantuar|2}}<sup>1</sup> |
|zombie12 = {{S|Flag Zombie|2}} {{S|Mummified Gargantuar|2}}<sup>4</sup> {{S|Gargantuar Prime|2}}<sup>3</sup> {{S|Deep Sea Gargantuar|2}}<sup>5</sup> {{S|Sloth Gargantuar|2}}<sup>2</sup> {{S|Porter Gargantuar|2}}<sup>1</sup> |
||
|note12 = {{S|Peashooter|2}} is available; {{S|Repeater|2}} and {{S|A.K.E.E.|2}} are no longer available; final flag}} |
|note12 = {{S|Peashooter|2}} is available; {{S|Repeater|2}} and {{S|A.K.E.E.|2}} are no longer available; final flag}} |
||
| Line 66: | Line 68: | ||
*Only use Cherry Bombs and Grapeshots to kill the Gargantuars which have reached the fourth column or to greatly damage Gargantuar Primes. |
*Only use Cherry Bombs and Grapeshots to kill the Gargantuars which have reached the fourth column or to greatly damage Gargantuar Primes. |
||
*'''Do not''' plant any of the Support or Sacrifice on the first two columns unless the Imps are about to reach your house, or Intensive Carrots will not be able to revive powerful plants. |
*'''Do not''' plant any of the Support or Sacrifice on the first two columns unless the Imps are about to reach your house, or Intensive Carrots will not be able to revive powerful plants. |
||
| + | |||
| + | ==Related achievement== |
||
| + | {{RelatedAchievement |
||
| + | |image=Great Gargling Gargs.png |
||
| + | |name=Great Gargling Gargantuars |
||
| + | |description=Unleash the [[Modern Day]] [[Gargantuar]]}} |
||
==Gallery== |
==Gallery== |
||
| Line 76: | Line 84: | ||
IMG 0269.PNG|By {{U|EpicGamer23468}} |
IMG 0269.PNG|By {{U|EpicGamer23468}} |
||
MD16.PNG|By {{U|MyNameIsMyName}} |
MD16.PNG|By {{U|MyNameIsMyName}} |
||
| − | md16.png|After the first wave by {{U| |
+ | md16.png|After the first wave by {{U|Mognoxprox}} |
| − | md15no.png|Final wave by |
+ | md15no.png|Final wave by Mognoxprox |
| − | BananasDone.png|Completed by |
+ | BananasDone.png|Completed by Mognoxprox |
| − | Screenshot_2016-10-14-10-54-25.png|By {{U| |
+ | Screenshot_2016-10-14-10-54-25.png|By {{U|LegendofNickson}} (prior to 5.2.1 update) |
| − | DynamicModern16.PNG|Example of Dynamic Difficulty on this level by {{U|BF10}} |
+ | DynamicModern16.PNG|Example of Dynamic Difficulty on this level by {{U|BF10}} (prior to 6.0.1 update) |
| + | SOMD16.PNG|By {{U|Someone456}} |
||
</gallery> |
</gallery> |
||
==Trivia== |
==Trivia== |
||
| − | *Primal Wall-nut reappears as the defensive plant in a Gargantuar battle for the second time, the first time being in [[Jurassic Marsh - Day 16]]. |
||
*It is the first Gargantuar Level without a plant in the conveyor belt being from the respective world the level is in. |
*It is the first Gargantuar Level without a plant in the conveyor belt being from the respective world the level is in. |
||
| − | *Beside boss levels, this level contains the most zombie types |
+ | *Beside boss levels, this level contains the most zombie types. |
| − | *It is the second level where the first zombie which appears is a [[Gargantuar]] (the first being [[Neon Mixtape Tour - Day 31]]) |
+ | *It is the second level where the first zombie which appears is a [[Gargantuar]] (the first being [[Neon Mixtape Tour - Day 31]]). |
*This is the only level to have more than one premium plant given to the player. |
*This is the only level to have more than one premium plant given to the player. |
||
**Coincidentally, both premium plants are the ones tied into [[Jurassic Marsh]] ([[Grapeshot]] and [[Cold Snapdragon]]). |
**Coincidentally, both premium plants are the ones tied into [[Jurassic Marsh]] ([[Grapeshot]] and [[Cold Snapdragon]]). |
||
| − | **However, this does not count [[Beghouled Blitz|Beghouled Blitz - Step 2]]. |
+ | **However, this does not count [[Beghouled Blitz|Beghouled Blitz - Step 2]] or [[Modern Day - Day 8]]. |
*This is the second level to include a period in the goal description. The first is [[Lost City - Day 16]]. |
*This is the second level to include a period in the goal description. The first is [[Lost City - Day 16]]. |
||
| + | *Dark Ages Gargantuar and Vase Gargantuar are the only Gargantuars not present in this level. |
||
| + | *The Modern Day Gargantuar only appears once throughout the level, as the majority of the zombies are Gargantuars from other worlds. |
||
| + | *Oddly, in the code, the [[Winter Melon]] is removed twice from the conveyor belt, first at Wave 6 and then at Wave 9. |
||
| + | **The same happens with [[Coconut Cannon]]. |
||
| + | |||
| + | *This is the only level in Modern Day to not feature any of the three basic zombies. |
||
==Walkthrough== |
==Walkthrough== |
||
[[File:Modern Day Day 16|left|300px]] |
[[File:Modern Day Day 16|left|300px]] |
||
| + | |||
{{PvZ2levels}} |
{{PvZ2levels}} |
||
| + | <poll> |
||
| + | How would you rate Modern Day - Day 16's difficulty? |
||
| + | Very hard |
||
| + | Hard |
||
| + | Somewhat hard |
||
| + | Medium |
||
| + | Somewhat easy |
||
| + | Easy |
||
| + | Very easy |
||
| + | </poll> |
||
[[Category:Levels with three flags]] |
[[Category:Levels with three flags]] |
||
[[Category:Conveyor-belt levels]] |
[[Category:Conveyor-belt levels]] |
||
[[Category:Levels with extra objective(s)]] |
[[Category:Levels with extra objective(s)]] |
||
| + | [[Category:Levels without any lawn mowers]] |
||
Revision as of 10:34, 25 March 2020
- For the Chinese version of this level, see Modern Day - Day 16 (Chinese version).
| “ | ” | |
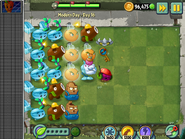
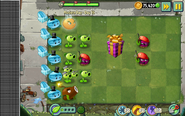
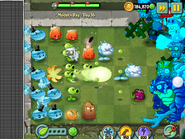
Modern Day - Day 16 is the sixteenth level of Modern Day in Plants vs. Zombies 2. The player is required to battle all of the Gargantuar variants in the game except for the Vase Gargantuar and the Dark Ages Gargantuar without lawn mowers. When this level is finished for the first time, the player receives a Modern Day Piñata.
Difficulty
With the level consisting of mostly Gargantuars, the entire level poses a big threat for the player. The first part will contain powerful plants for the player. However, as waves start to progress, powerful plants will be swapped out for weaker plants. As a result, this level heavily relies on the player's positioning and use of given plants, including luck from the plants provided. The player shouldn't worry about any problems with obtaining Plant Food, as they will have the chance to grab as much as four in this level.
Waves
- The small number next to the zombie icon means that zombie will always appear in that lane, with 1 being the topmost lane and 5 being the bottommost one.
Strategies
- Created by Dung Dinh Anh
Note: CxRy means column x, row y
This strategy divides the given plants into four categories:
- Explode:


 - these plants deal a lot of damage over an area but can only be used once, so they MUST be placed strategically.
 - Vital:


 - these plants are required to defeat the Gargantuars, and MUST also be placed strategically.
 - Support:


 - these plants do not deal much damage, but they are very helpful against Imps, so they should be placed on the third column.
 - Sacrifice:


 - these are the weak ones, and should be used to stall the Gargantuars.
Planting tips:
- Place the first two Primal Potato Mines on C4R5 and C5R5.
- Fill the first column with Winter Melons, place the first one on the fifth column to buy some time.
- When the second wave starts, start filling the second column with Coconut Cannons and Winter Melons; Citrons should be put on column 4, especially C4R2
- Place the third Primal Potato Mine on C9R2, and the fourth on C9R1 to defeat Hair Metal Gargantuar quickly. If there are not enough Primal Potato Mines, the C4R2 Citron will take the hit.
- Save the third column for the Support plants.
- Only use Cherry Bombs and Grapeshots to kill the Gargantuars which have reached the fourth column or to greatly damage Gargantuar Primes.
- Do not plant any of the Support or Sacrifice on the first two columns unless the Imps are about to reach your house, or Intensive Carrots will not be able to revive powerful plants.
Related achievement

|
|---|
Gallery
Trivia
- It is the first Gargantuar Level without a plant in the conveyor belt being from the respective world the level is in.
- Beside boss levels, this level contains the most zombie types.
- It is the second level where the first zombie which appears is a Gargantuar (the first being Neon Mixtape Tour - Day 31).
- This is the only level to have more than one premium plant given to the player.
- Coincidentally, both premium plants are the ones tied into Jurassic Marsh (Grapeshot and Cold Snapdragon).
- However, this does not count Beghouled Blitz - Step 2 or Modern Day - Day 8.
- This is the second level to include a period in the goal description. The first is Lost City - Day 16.
- Dark Ages Gargantuar and Vase Gargantuar are the only Gargantuars not present in this level.
- The Modern Day Gargantuar only appears once throughout the level, as the majority of the zombies are Gargantuars from other worlds.
- Oddly, in the code, the Winter Melon is removed twice from the conveyor belt, first at Wave 6 and then at Wave 9.
- The same happens with Coconut Cannon.
- This is the only level in Modern Day to not feature any of the three basic zombies.
Walkthrough
- *: Removed ~: Epic Quest


