No edit summary Tag: rte-source |
No edit summary |
||
| (20 intermediate revisions by 14 users not shown) | |||
| Line 1: | Line 1: | ||
| + | {{StrategyNeeded}} |
||
| + | :''For the Chinese version of the level, see [[Lost City - Day 13 (Chinese version)]].'' |
||
| + | :''For the Chinese version of this level before the v1.8 update, see [[Lost City - Day 13 (Chinese version: pre-1.8)]].'' |
||
| + | |||
{{Infobox level |
{{Infobox level |
||
|Game = Plants vs. Zombies 2 |
|Game = Plants vs. Zombies 2 |
||
| Line 5: | Line 9: | ||
|Type = [[Special Delivery]] |
|Type = [[Special Delivery]] |
||
|Flag = Three |
|Flag = Three |
||
| ⚫ | |||
| − | |Diff = Hard |
||
| ⚫ | |Zombie = {{S|Adventurer Zombie|2}} {{S|Conehead Adventurer Zombie|2}} {{S|Buckethead Adventurer Zombie|2}} {{S|Flag Adventurer Zombie|2}} {{S|Excavator Zombie|2}} {{S|Parasol Zombie|2}} {{S|Bug Zombie|2}} {{S|Bug Conehead Zombie|2}} {{S|Lost City Imp Zombie|2}} |
||
|FR = A [[money bag]] |
|FR = A [[money bag]] |
||
|NR = same |
|NR = same |
||
|before = Lost City - Day 12 |
|before = Lost City - Day 12 |
||
|after = Lost City - Day 14}} |
|after = Lost City - Day 14}} |
||
| + | {{Levelintro2|no=13th|area=Lost City|type=[[Special Delivery]]}} |
||
| − | |||
| − | '''Lost City - Day 13''' is the thirteenth [[:Category:Plants vs. Zombies 2 levels|level]] of [[Lost City]]. It is a [[Special Delivery]] level. There are no [[Gold Tile]]s. |
||
==Difficulty== |
==Difficulty== |
||
*The player will have to carefully plan out which plants to plant where. Some plant pairs should always be in one lane. These tips should come to mind. |
*The player will have to carefully plan out which plants to plant where. Some plant pairs should always be in one lane. These tips should come to mind. |
||
| − | **[[Melon-pult]] and [[A.K.E.E.]] cannot kill Parasol Zombie. A [[Repeater]] or a [[Red Stinger]], preferably in |
+ | **[[Melon-pult]] and [[A.K.E.E.]] cannot kill Parasol Zombie. A [[Repeater]] or a [[Red Stinger]], preferably in his offensive or semi-defensive form, should be planted in every lane. |
**Similarly, Repeater and Red Stinger cannot handle Excavator Zombie. The player should plant a Melon-pult or an A.K.E.E. in every lane. |
**Similarly, Repeater and Red Stinger cannot handle Excavator Zombie. The player should plant a Melon-pult or an A.K.E.E. in every lane. |
||
| − | **[[Spikerock]] can be dug up by Excavator Zombie, but |
+ | **[[Spikerock]] can be dug up by Excavator Zombie, but he is very important in the later part of the level. |
*[[Bug Zombie]]s can fly over plants, and they are completely invulnerable to Spikerocks. Regular ones can be killed easily but the player should watch out for the stronger variants. It is important to note that Bug Zombies carrying Conehead and Buckethead variants pose a much bigger threat than even [[Excavator Zombie|Excavator]] and [[Parasol Zombie]]s in lanes without their counters. |
*[[Bug Zombie]]s can fly over plants, and they are completely invulnerable to Spikerocks. Regular ones can be killed easily but the player should watch out for the stronger variants. It is important to note that Bug Zombies carrying Conehead and Buckethead variants pose a much bigger threat than even [[Excavator Zombie|Excavator]] and [[Parasol Zombie]]s in lanes without their counters. |
||
| Line 28: | Line 30: | ||
|note3 = 100% [[Plant Food]] |
|note3 = 100% [[Plant Food]] |
||
|zombie4 = {{S|Conehead Adventurer Zombie|2}}<sup>1</sup> {{S|Flag Adventurer Zombie|2}} {{S|Excavator Zombie|2}}<sup>3</sup> {{S|Parasol Zombie|2}}<sup>2</sup> {{S|Bug Conehead Zombie|2}}<sup>5</sup> |
|zombie4 = {{S|Conehead Adventurer Zombie|2}}<sup>1</sup> {{S|Flag Adventurer Zombie|2}} {{S|Excavator Zombie|2}}<sup>3</sup> {{S|Parasol Zombie|2}}<sup>2</sup> {{S|Bug Conehead Zombie|2}}<sup>5</sup> |
||
| − | |note4 = First |
+ | |note4 = First flag |
|zombie5 = {{S|Adventurer Zombie|2}}<sup>2</sup> {{S|Adventurer Zombie|2}}<sup>3</sup> {{S|Adventurer Zombie|2}}<sup>3</sup> {{S|Conehead Adventurer Zombie|2}}<sup>4</sup> |
|zombie5 = {{S|Adventurer Zombie|2}}<sup>2</sup> {{S|Adventurer Zombie|2}}<sup>3</sup> {{S|Adventurer Zombie|2}}<sup>3</sup> {{S|Conehead Adventurer Zombie|2}}<sup>4</sup> |
||
|zombie6 = {{S|Adventurer Zombie|2}}<sup>5</sup> {{S|Bug Zombie|2}}<sup>1</sup> {{S|Bug Conehead Zombie|2}}<sup>2</sup> |
|zombie6 = {{S|Adventurer Zombie|2}}<sup>5</sup> {{S|Bug Zombie|2}}<sup>1</sup> {{S|Bug Conehead Zombie|2}}<sup>2</sup> |
||
|zombie7 = {{S|Lost City Imp Zombie|2}}<sup>1</sup> {{S|Lost City Imp Zombie|2}}<sup>2</sup> {{S|Lost City Imp Zombie|2}}<sup>3</sup> {{S|Lost City Imp Zombie|2}}<sup>4</sup> {{S|Lost City Imp Zombie|2}}<sup>5</sup> |
|zombie7 = {{S|Lost City Imp Zombie|2}}<sup>1</sup> {{S|Lost City Imp Zombie|2}}<sup>2</sup> {{S|Lost City Imp Zombie|2}}<sup>3</sup> {{S|Lost City Imp Zombie|2}}<sup>4</sup> {{S|Lost City Imp Zombie|2}}<sup>5</sup> |
||
| − | |note7 = 100% Plant Food; |
+ | |note7 = 100% Plant Food; skips to wave 8 immediately |
|zombie8 = {{S|Adventurer Zombie|2}}<sup>4</sup> {{S|Flag Adventurer Zombie|2}} {{S|Excavator Zombie|2}}<sup>2</sup> {{S|Parasol Zombie|2}}<sup>1</sup> {{S|Bug Conehead Zombie|2}}<sup>3</sup> {{S|Bug Buckethead Zombie|2}}<sup>4</sup> |
|zombie8 = {{S|Adventurer Zombie|2}}<sup>4</sup> {{S|Flag Adventurer Zombie|2}} {{S|Excavator Zombie|2}}<sup>2</sup> {{S|Parasol Zombie|2}}<sup>1</sup> {{S|Bug Conehead Zombie|2}}<sup>3</sup> {{S|Bug Buckethead Zombie|2}}<sup>4</sup> |
||
|ambush8 = {{S|Lost Pilot Zombie|2}} {{S|Lost Pilot Zombie|2}} {{S|Lost Pilot Zombie|2}} {{S|Lost Pilot Zombie|2}} |
|ambush8 = {{S|Lost Pilot Zombie|2}} {{S|Lost Pilot Zombie|2}} {{S|Lost Pilot Zombie|2}} {{S|Lost Pilot Zombie|2}} |
||
| − | |note8 = Second |
+ | |note8 = Second flag; Parachute Rain! |
|zombie9 = {{S|Adventurer Zombie|2}}<sup>3</sup> {{S|Conehead Adventurer Zombie|2}}<sup>1</sup> {{S|Conehead Adventurer Zombie|2}}<sup>2</sup> {{S|Conehead Adventurer Zombie|2}}<sup>4</sup> {{S|Conehead Adventurer Zombie|2}}<sup>5</sup> |
|zombie9 = {{S|Adventurer Zombie|2}}<sup>3</sup> {{S|Conehead Adventurer Zombie|2}}<sup>1</sup> {{S|Conehead Adventurer Zombie|2}}<sup>2</sup> {{S|Conehead Adventurer Zombie|2}}<sup>4</sup> {{S|Conehead Adventurer Zombie|2}}<sup>5</sup> |
||
|zombie10 = {{S|Buckethead Adventurer Zombie|2}}<sup>3</sup> {{S|Bug Zombie|2}}<sup>4</sup> {{S|Bug Zombie|2}}<sup>5</sup> |
|zombie10 = {{S|Buckethead Adventurer Zombie|2}}<sup>3</sup> {{S|Bug Zombie|2}}<sup>4</sup> {{S|Bug Zombie|2}}<sup>5</sup> |
||
| Line 41: | Line 43: | ||
|zombie12 = {{S|Adventurer Zombie|2}}<sup>3</sup> {{S|Adventurer Zombie|2}}<sup>3</sup> {{S|Adventurer Zombie|2}}<sup>3</sup> {{S|Adventurer Zombie|2}}<sup>3</sup> {{S|Conehead Adventurer Zombie|2}}<sup>3</sup> {{S|Buckethead Adventurer Zombie|2}}<sup>1</sup> {{S|Buckethead Adventurer Zombie|2}}<sup>5</sup> {{S|Flag Adventurer Zombie|2}} {{S|Excavator Zombie|2}}<sup>3</sup> {{S|Parasol Zombie|2}}<sup>3</sup> {{S|Bug Conehead Zombie|2}}<sup>2</sup> {{S|Bug Conehead Zombie|2}}<sup>4</sup> |
|zombie12 = {{S|Adventurer Zombie|2}}<sup>3</sup> {{S|Adventurer Zombie|2}}<sup>3</sup> {{S|Adventurer Zombie|2}}<sup>3</sup> {{S|Adventurer Zombie|2}}<sup>3</sup> {{S|Conehead Adventurer Zombie|2}}<sup>3</sup> {{S|Buckethead Adventurer Zombie|2}}<sup>1</sup> {{S|Buckethead Adventurer Zombie|2}}<sup>5</sup> {{S|Flag Adventurer Zombie|2}} {{S|Excavator Zombie|2}}<sup>3</sup> {{S|Parasol Zombie|2}}<sup>3</sup> {{S|Bug Conehead Zombie|2}}<sup>2</sup> {{S|Bug Conehead Zombie|2}}<sup>4</sup> |
||
|ambush12 = {{S|Lost Pilot Zombie|2}} {{S|Lost Pilot Zombie|2}} {{S|Lost Pilot Zombie|2}} {{S|Lost Pilot Zombie|2}} |
|ambush12 = {{S|Lost Pilot Zombie|2}} {{S|Lost Pilot Zombie|2}} {{S|Lost Pilot Zombie|2}} {{S|Lost Pilot Zombie|2}} |
||
| − | |note12 = Final |
+ | |note12 = Final wave, Parachute Rain! |
}} |
}} |
||
| Line 47: | Line 49: | ||
<gallery bordercolor="transparent"> |
<gallery bordercolor="transparent"> |
||
LostCityDay13.png|By {{U|ThisUserLikesOreo}} |
LostCityDay13.png|By {{U|ThisUserLikesOreo}} |
||
| + | IMG_051.PNG|By {{U|EpicGamer23468}} |
||
| + | 3257.PNG|By {{U|MyNameIsMyName}} |
||
| + | LC - Day 13 (PG234) - 1.png|By {{U|Pinkgirl234}} |
||
| + | LC - Day 13 (PG234) - 2.png|By Pinkgirl234 |
||
| + | LC - Day 13 (PG234) - 3.png|Level completed by Pinkgirl234 |
||
| + | Screenshot_2016-09-15-20-57-52.png|By {{U|LegendofNickson}} |
||
| + | SOLC13.PNG|By {{U|Someone456}} |
||
| + | Screenshot_20171208_061148.jpg|By {{U|AwkwardShota-kun237}} |
||
</gallery> |
</gallery> |
||
==Walkthroughs== |
==Walkthroughs== |
||
| − | <gallery |
+ | <gallery widths="250"> |
Lost City Day 13 |
Lost City Day 13 |
||
Plants vs Zombies 2 - Lost City Day 13 |
Plants vs Zombies 2 - Lost City Day 13 |
||
| + | Plants vs. Zombies 2 Melon-pult, Red Stinger, A.K.E.E. - Lost City Day 13 (Ep.211)|By {{U|Alex5432000}} |
||
</gallery> |
</gallery> |
||
| + | |||
{{PvZ2levels}} |
{{PvZ2levels}} |
||
| + | <poll> |
||
| + | How would you rate Lost City - Day 13's difficulty? |
||
| + | Very hard |
||
| + | Hard |
||
| + | Somewhat hard |
||
| + | Medium |
||
| + | Somewhat easy |
||
| + | Easy |
||
| + | Very easy |
||
| + | </poll> |
||
[[Category:Special Delivery]] |
[[Category:Special Delivery]] |
||
[[Category:Brain Busters]] |
[[Category:Brain Busters]] |
||
Revision as of 08:40, 19 December 2018
This subject currently has no proper strategy associated with it. If you have figured out a good strategy, please add it or the zombies will eat your brains!
- For the Chinese version of the level, see Lost City - Day 13 (Chinese version).
- For the Chinese version of this level before the v1.8 update, see Lost City - Day 13 (Chinese version: pre-1.8).
Lost City - Day 13 is the 13th level of Lost City in Plants vs. Zombies 2. It is a Special Delivery level. After completing this level, the player receives a money bag.
Difficulty
- The player will have to carefully plan out which plants to plant where. Some plant pairs should always be in one lane. These tips should come to mind.
- Melon-pult and A.K.E.E. cannot kill Parasol Zombie. A Repeater or a Red Stinger, preferably in his offensive or semi-defensive form, should be planted in every lane.
- Similarly, Repeater and Red Stinger cannot handle Excavator Zombie. The player should plant a Melon-pult or an A.K.E.E. in every lane.
- Spikerock can be dug up by Excavator Zombie, but he is very important in the later part of the level.
- Bug Zombies can fly over plants, and they are completely invulnerable to Spikerocks. Regular ones can be killed easily but the player should watch out for the stronger variants. It is important to note that Bug Zombies carrying Conehead and Buckethead variants pose a much bigger threat than even Excavator and Parasol Zombies in lanes without their counters.
Waves
- The small number next to the zombie icon means that zombie will always appear in that lane, with 1 being the topmost lane and 5 being the bottommost one.
| Waves | Non-dynamic zombies | Ambush zombies | Note(s) |
|---|---|---|---|
| 1 | None | ||
| 2 | None | ||
| 3 | None | 100% Plant Food | |
| 4 | None | First flag | |
| 5 | None | ||
| 6 | None | ||
| 7 | None | 100% Plant Food; skips to wave 8 immediately | |
| 8 | Second flag; Parachute Rain! | ||
| 9 | None | ||
| 10 | None | ||
| 11 | None | ||
| 12 | Final wave, Parachute Rain! |
Gallery
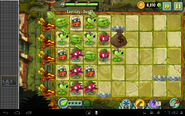
By Pinkgirl234
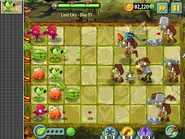
By Someone456
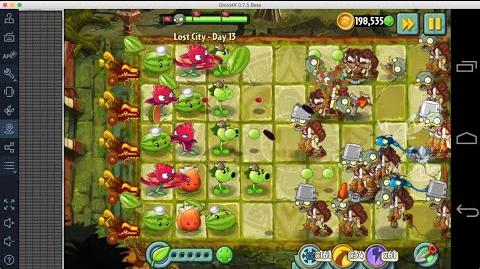
Walkthroughs
- *: Removed ~: Epic Quest


