No edit summary Tag: rte-source |
mNo edit summary |
||
| (18 intermediate revisions by 8 users not shown) | |||
| Line 1: | Line 1: | ||
{{ChinaArticle}} |
{{ChinaArticle}} |
||
:''For the level before the v1.8 update, see [[Kongfu World - Day 21 (Pre-1.8)]].'' |
:''For the level before the v1.8 update, see [[Kongfu World - Day 21 (Pre-1.8)]].'' |
||
| − | {{Levelintro2C |
+ | {{Levelintro2C|As this is a [[Bronze Matrix]] level, the player is forced to defeat all six [[Gargantuar Bronze]]s to win.|level = Kongfu World - Day 21|no = 21st|area = Kongfu World}} |
<tabber> |
<tabber> |
||
| Line 11: | Line 11: | ||
|Flag = Two |
|Flag = Two |
||
|image = NewKFW21.png |
|image = NewKFW21.png |
||
| ⚫ | |||
| − | |Diff = Hard |
||
| − | | |
+ | |Zombie = {{S|Monk Zombie|2}} {{S|Conehead Monk Zombie|2}} {{S|Buckethead Monk Zombie|2}} {{S|Flag Kongfu Zombie|2}} {{S|Imp Monk|2}} {{S|Nunchaku Zombie|2}} {{S|Drinking Monk Zombie|2}} {{S|Knight Bronze|2}} {{S|Qigong Bronze|2}}<br><small>Summoned: {{S|Kongfu Zombie|2}} {{S|Hammer Zombie|2}} {{S|Suicide Bomber Zombie|2}}</small> |
| ⚫ | |||
|EM2 = '''Pre-existed:''' Three<br>'''Max no.:''' Five |
|EM2 = '''Pre-existed:''' Three<br>'''Max no.:''' Five |
||
|EM3 = Two double-carts |
|EM3 = Two double-carts |
||
| Line 25: | Line 24: | ||
*The player is given with effective attack plants, and especially, the [[Winter Melon]], and because of that the player can now handle the freed Gargantuar Bronzes more easily. However, there are six bronze statues the player has to destroy this time. |
*The player is given with effective attack plants, and especially, the [[Winter Melon]], and because of that the player can now handle the freed Gargantuar Bronzes more easily. However, there are six bronze statues the player has to destroy this time. |
||
*The double-carts can be helpful for the player if they know how to use it correctly. |
*The double-carts can be helpful for the player if they know how to use it correctly. |
||
| + | |||
| + | ==Waves== |
||
| + | {{Waves |
||
| + | |zombie1 = {{S|Conehead Monk Zombie|2}} {{S|Buckethead Monk Zombie|2}} {{S|Monk Zombie|2}} {{S|Monk Zombie|2}} |
||
| + | |zombie2 = {{S|Conehead Monk Zombie|2}} {{S|Buckethead Monk Zombie|2}} {{S|Monk Zombie|2}} {{S|Monk Zombie|2}} {{S|Drinking Monk Zombie|2}} |
||
| + | |zombie3 = {{S|Conehead Monk Zombie|2}} {{S|Buckethead Monk Zombie|2}} {{S|Monk Zombie|2}} {{S|Monk Zombie|2}} {{S|Drinking Monk Zombie|2}} {{S|Nunchaku Zombie|2}} |
||
| + | |zombie4 = {{S|Flag Kongfu Zombie|2}} {{S|Conehead Monk Zombie|2}} {{S|Buckethead Monk Zombie|2}} {{S|Monk Zombie|2}} {{S|Drinking Monk Zombie|2}} {{S|Imp Monk|2}}<sup>1</sup> {{S|Imp Monk|2}}<sup>2</sup> {{S|Imp Monk|2}}<sup>3</sup> {{S|Imp Monk|2}}<sup>4</sup> {{S|Imp Monk|2}}<sup>5</sup> {{S|Imp Monk|2}} {{S|Nunchaku Zombie|2}} |
||
| + | |note4 = First flag. |
||
| + | |zombie5 = {{S|Conehead Monk Zombie|2}} {{S|Buckethead Monk Zombie|2}} {{S|Monk Zombie|2}} {{S|Monk Zombie|2}} {{S|Drinking Monk Zombie|2}} {{S|Imp Monk|2}} {{S|Nunchaku Zombie|2}} |
||
| + | |zombie6 = {{S|Conehead Monk Zombie|2}} {{S|Buckethead Monk Zombie|2}} {{S|Monk Zombie|2}} {{S|Monk Zombie|2}} {{S|Drinking Monk Zombie|2}} {{S|Imp Monk|2}} {{S|Nunchaku Zombie|2}} |
||
| + | |note6 = 2x Taiji tiles spawn at C1R2 and C1R4. |
||
| + | |zombie7 = {{S|Conehead Monk Zombie|2}} {{S|Buckethead Monk Zombie|2}} {{S|Monk Zombie|2}} {{S|Monk Zombie|2}} {{S|Drinking Monk Zombie|2}} {{S|Imp Monk|2}} {{S|Nunchaku Zombie|2}} |
||
| ⚫ | |zombie8 = {{S|Flag Kongfu Zombie|2}} {{S|Conehead Monk Zombie|2}} {{S|Conehead Monk Zombie|2}} {{S|Buckethead Monk Zombie|2}} {{S|Buckethead Monk Zombie|2}} {{S|Monk Zombie|2}} {{S|Drinking Monk Zombie|2}} {{S|Drinking Monk Zombie|2}} {{S|Drinking Monk Zombie|2}} {{S|Imp Monk|2}} {{S|Imp Monk|2}} {{S|Imp Monk|2}} {{S|Imp Monk|2}} {{S|Nunchaku Zombie|2}} {{S|Nunchaku Zombie|2}} {{S|Nunchaku Zombie|2}} |
||
| + | |note8 = Final wave. |
||
| + | }} |
||
==Strategy== |
==Strategy== |
||
| − | *The Cabbage-pults should be planted like how it normally would. It is recommended to plant it right on the |
+ | *The Cabbage-pults should be planted like how it normally would. It is recommended to plant it right on the Taiji Tiles to get more Plant Food. |
*The double-carts each should contain a Winter Melon and a Repeater to max its potential damaging the statues. Quickly destroy as many statues as you can. If you are running out of time, focus on an another statue, as you can handle up to three Bronze Gargantuars this time. |
*The double-carts each should contain a Winter Melon and a Repeater to max its potential damaging the statues. Quickly destroy as many statues as you can. If you are running out of time, focus on an another statue, as you can handle up to three Bronze Gargantuars this time. |
||
*Plant as many attack plants in the middle lane as you can. The statue in that lane should be destroyed easily. |
*Plant as many attack plants in the middle lane as you can. The statue in that lane should be destroyed easily. |
||
| − | *Continue your defenses with |
+ | *Continue your defenses with Radishes to protect the attack plants. Delay the zombies and freed Gargantuars with anything you have. It would be best to use Winter Melon's Plant Food to deal medium damage to all zombies at the same time and use Repeater's Plant Food to focus attack on the statues. |
==Gallery== |
==Gallery== |
||
| Line 39: | Line 53: | ||
NewKFW21R.png|First time reward |
NewKFW21R.png|First time reward |
||
</gallery> |
</gallery> |
||
| + | |||
| + | ==Walkthroughs== |
||
| + | <gallery widths="250"> |
||
| + | Plants vs. Zombies 2 China - Kongfu World Day 21 Bronze Matrix《植物大战僵尸2》- 功夫世界 21天 |
||
| + | Plants vs. Zombies 2 (China) - 5 Stone Gargantuar - Kung-Fu World Day 21 (Ep.107)|By {{U|Alex5432000}} |
||
| + | </gallery> |
||
| + | |||
|-| |
|-| |
||
Hard mode= |
Hard mode= |
||
| Line 47: | Line 68: | ||
|Flag = Two |
|Flag = Two |
||
|image = NewKFW21H.png |
|image = NewKFW21H.png |
||
| + | |Plant = {{S|Cabbage-pult|2}} {{S|Repeater|2}} {{S|Iceberg Lettuce|2}} {{S|Power Lily|2C}} {{S|Chili Bean|2}} {{S|Winter Melon|2}} {{S|Radish|2}} |
||
| ⚫ | |||
| ⚫ | |Zombie = {{LevelIconNew|2}}~{{LevelIconNew|3}}: {{S|Monk Zombie|2}} {{S|Conehead Monk Zombie|2}} {{S|Buckethead Monk Zombie|2}} {{S|Flag Kongfu Zombie|2}} {{S|Imp Monk|2}} {{S|Nunchaku Zombie|2}} {{S|Drinking Monk Zombie|2}} {{S|Knight Bronze|2}} {{S|Qigong Bronze|2}}<br><small>Summoned:<br>{{LevelIconNew|2}}~{{LevelIconNew|3}}: {{S|Kongfu Zombie|2}} {{S|Hammer Zombie|2}} {{S|Suicide Bomber Zombie|2}}</small>{{HardModeNote}} |
||
| ⚫ | |||
| ⚫ | | |
||
|EM2 = '''Pre-existed:''' Three<br>'''Max no.:''' Five |
|EM2 = '''Pre-existed:''' Three<br>'''Max no.:''' Five |
||
|EM3 = Two double-carts |
|EM3 = Two double-carts |
||
| Line 56: | Line 76: | ||
|before = Kongfu World - Day 20 |
|before = Kongfu World - Day 20 |
||
|after = Kongfu World - Day 22}} |
|after = Kongfu World - Day 22}} |
||
| − | In the Hard Mode of this level, the player has to beat the zombies at |
+ | In the Hard Mode of this level, the player has to beat the zombies at Levels 2-3. |
==Difficulty== |
==Difficulty== |
||
| − | *All zombies, including the Gargantuar Bronzes, are |
+ | *All zombies, including the Gargantuar Bronzes, are at Levels 2-3. The level cannot be completed unless the player upgrades at least two of these plants: Repeater, Winter Melon, Cabbage-pult. Chili Bean is also recommended for an upgrade too. The player can still finish it with a single [[Power Ups#Cuke|Cuke]], though. |
==Strategies== |
==Strategies== |
||
| − | *The strategy would be the same as what you would do in Easy mode. It is recommended to upgrade at least two of these plants: Repeater, Winter Melon, Cabbage-pult. Chili Bean is also recommended for an upgrade too, or you can finish the level with a single |
+ | *The strategy would be the same as what you would do in Easy mode. It is recommended to upgrade at least two of these plants: Repeater, Winter Melon, Cabbage-pult. Chili Bean is also recommended for an upgrade too, or you can finish the level with a single Cuke. |
==Gallery== |
==Gallery== |
||
| Line 69: | Line 89: | ||
NewKFW21HR.png|First time reward |
NewKFW21HR.png|First time reward |
||
</gallery> |
</gallery> |
||
| + | |||
| + | ==Walkthroughs== |
||
| + | <gallery widths="250"> |
||
| + | Plants vs. Zombies 2 China - Kongfu World Day 21 Bronze Matrix《植物大战僵尸2》- 功夫世界 21天 |
||
| + | Plants vs. Zombies 2 (China) - 5 Stone Gargantuar - Kung-Fu World Day 21 (Ep.107)|By {{U|Alex5432000}} |
||
| + | </gallery> |
||
| + | |||
</tabber> |
</tabber> |
||
{{PvZ2Chineselevels}} |
{{PvZ2Chineselevels}} |
||
| + | <poll> |
||
| + | How would you rate Kongfu World - Day 21's difficulty? |
||
| ⚫ | |||
| + | Hard |
||
| + | Somewhat hard |
||
| + | Medium |
||
| + | Somewhat easy |
||
| + | Easy |
||
| + | Very easy |
||
| + | </poll> |
||
[[Category:Bronze Matrix]] |
[[Category:Bronze Matrix]] |
||
[[Category:Brain Busters (Chinese version)]] |
[[Category:Brain Busters (Chinese version)]] |
||
Revision as of 07:31, 9 February 2020
This article is about content available solely in the People's Republic of China.
- For the level before the v1.8 update, see Kongfu World - Day 21 (Pre-1.8).
Kongfu World - Day 21 is the 21st level of Kongfu World in the Chinese version of Plants vs. Zombies 2. As this is a Bronze Matrix level, the player is forced to defeat all six Gargantuar Bronzes to win. After completing this level, the player receives a money bag.
In the Normal Mode of this level, the player has to beat Kongfu Zombies at Level 1.
Difficulty
- The player is given with effective attack plants, and especially, the Winter Melon, and because of that the player can now handle the freed Gargantuar Bronzes more easily. However, there are six bronze statues the player has to destroy this time.
- The double-carts can be helpful for the player if they know how to use it correctly.
Waves
- The small number next to the zombie icon means that zombie will always appear in that lane, with 1 being the topmost lane and 5 being the bottommost one.
| Waves | Non-dynamic zombies | Ambush zombies | Note(s) |
|---|---|---|---|
| 1 | None | ||
| 2 | None | ||
| 3 | None | ||
| 4 | None | First flag. | |
| 5 | None | ||
| 6 | None | 2x Taiji tiles spawn at C1R2 and C1R4. | |
| 7 | None | ||
| 8 | None | Final wave. |
Strategy
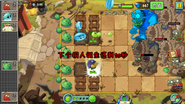
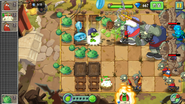
- The Cabbage-pults should be planted like how it normally would. It is recommended to plant it right on the Taiji Tiles to get more Plant Food.
- The double-carts each should contain a Winter Melon and a Repeater to max its potential damaging the statues. Quickly destroy as many statues as you can. If you are running out of time, focus on an another statue, as you can handle up to three Bronze Gargantuars this time.
- Plant as many attack plants in the middle lane as you can. The statue in that lane should be destroyed easily.
- Continue your defenses with Radishes to protect the attack plants. Delay the zombies and freed Gargantuars with anything you have. It would be best to use Winter Melon's Plant Food to deal medium damage to all zombies at the same time and use Repeater's Plant Food to focus attack on the statues.
Gallery
Walkthroughs
In the Hard Mode of this level, the player has to beat the zombies at Levels 2-3.
Difficulty
- All zombies, including the Gargantuar Bronzes, are at Levels 2-3. The level cannot be completed unless the player upgrades at least two of these plants: Repeater, Winter Melon, Cabbage-pult. Chili Bean is also recommended for an upgrade too. The player can still finish it with a single Cuke, though.
Strategies
- The strategy would be the same as what you would do in Easy mode. It is recommended to upgrade at least two of these plants: Repeater, Winter Melon, Cabbage-pult. Chili Bean is also recommended for an upgrade too, or you can finish the level with a single Cuke.
Gallery
Walkthroughs
| ||||||||||||||||||||||||||||||||||||||||||||||||||


