m (Protected "Kongfu World - Day 20" ([move=sysop] (indefinite))) |
No edit summary |
||
| (8 intermediate revisions by 2 users not shown) | |||
| Line 11: | Line 11: | ||
|Type = [[Powder Keg]] |
|Type = [[Powder Keg]] |
||
|Flag = Two |
|Flag = Two |
||
| − | |Zombie = {{S|Kongfu Zombie|2}} {{S|Conehead Monk Zombie|2}} {{S|Buckethead Monk Zombie|2}} {{S|Flag Kongfu Zombie|2}} {{S|Torch Monk Zombie|2}} {{S|Swordsman Zombie|2}} {{S|Nunchaku Zombie|2}} |
+ | |Zombie = {{S|Kongfu Zombie|2}} {{S|Conehead Kongfu Zombie|2}} {{S|Conehead Monk Zombie|2}} {{S|Buckethead Monk Zombie|2}} {{S|Flag Kongfu Zombie|2}} {{S|Torch Monk Zombie|2}} {{S|Swordsman Zombie|2}} {{S|Nunchaku Zombie|2}} {{S|Drinking Monk Zombie|2}} |
|EM = {{S|Flag Stand|2}} {{S|Torch Stand|2}}<br>'''Pre-existed:''' Two {{S|Torch Stand|2}} |
|EM = {{S|Flag Stand|2}} {{S|Torch Stand|2}}<br>'''Pre-existed:''' Two {{S|Torch Stand|2}} |
||
|EM2 = '''Pre-existed:''' One<br>'''Max no.:''' Four |
|EM2 = '''Pre-existed:''' One<br>'''Max no.:''' Four |
||
| Line 25: | Line 25: | ||
==Waves== |
==Waves== |
||
| + | {{Waves |
||
| − | {{Waves|zombie1 = {{S|Torch Monk Zombie|2}} |zombie2 = {{S|Conehead Kongfu Zombie|2}} |note2 = 100% Plant Food|zombie3 = {{S|Kongfu Zombie|2}} {{S|Buckethead Kongfu Zombie|2}} |zombie4 = None|ambush4 = {{S|Kongfu Zombie|2}} {{S|Kongfu Zombie|2}} |zombie5 = {{S|Torch Monk Zombie|2}}<sup>2</sup> {{S|Torch Monk Zombie|2}}<sup>3</sup> {{S|Drinking Monk Zombie|2}} {{S|Drinking Monk Zombie|2}}|zombie6 = {{S|Torch Monk Zombie|2}}<sup>2</sup> {{S|Torch Monk Zombie|2}}<sup>5</sup> {{S|Drinking Monk Zombie|2}} {{S|Swordsman Zombie|2}}<sup>3</sup> {{S|Kongfu Zombie|2}} {{S|Conehead Kongfu Zombie|2}} |note6 = 100% Plant Food|zombie7 = {{S|Torch Monk Zombie|2}}<sup>2</sup> {{S|Torch Monk Zombie|2}}<sup>4</sup> {{S|Monk Zombie|2}} {{S|Conehead Monk Zombie|2}} {{S|Buckethead Monk Zombie|2}} |note7 = 100% Plant Food |zombie8 = {{S|Flag Kongfu Zombie|2}} {{S|Torch Monk Zombie|2}} {{S|Buckethead Monk Zombie|2}} {{S|Buckethead Monk Zombie|2}} {{S|Buckethead Monk Zombie|2}} |note8 = First flag|zombie9 = {{S|Kongfu Zombie|2}} {{S|Kongfu Zombie|2}} {{S|Swordsman Zombie|2}} {{S|Swordsman Zombie|2}} {{S|Nunchaku Zombie|2}} |note9 = 100% Plant Food|zombie10 = {{S|Kongfu Zombie|2}} {{S|Kongfu Zombie|2}} {{S|Buckethead Kongfu Zombie|2}} {{S|Torch Monk Zombie|2}} {{S|Drinking Monk Zombie|2}} |zombie11 = {{S|Kongfu Zombie|2}} {{S|Torch Monk Zombie|2}} {{S|Buckethead Kongfu Zombie|2}} |zombie12 = {{S|Kongfu Zombie|2}} {{S|Buckethead Kongfu Zombie|2}} {{S|Swordsman Zombie|2}} {{S|Torch Monk Zombie|2}} {{S|Torch Monk Zombie|2}} |zombie13 = {{S|Buckethead Kongfu Zombie|2}} {{S|Drinking Monk Zombie|2}} {{S|Swordsman Zombie|2}} {{S|Torch Monk Zombie|2}} |zombie14 = {{S|Kongfu Zombie|2}} {{S|Buckethead Kongfu Zombie|2}} {{S|Torch Monk Zombie|2}}<sup>3</sup> {{S|Torch Monk Zombie|2}}<sup>4</sup> |zombie15 = {{S|Flag Kongfu Zombie|2}} {{S|Drinking Monk Zombie|2}} {{S|Swordsman Zombie|2}} {{S|Torch Monk Zombie|2}} {{S|Torch Monk Zombie|2}} |zombie16 = {{S|Torch Monk Zombie|2}}<sup>1</sup> {{S|Torch Monk Zombie|2}}<sup>2</sup> {{S|Torch Monk Zombie|2}}<sup>3</sup> {{S|Torch Monk Zombie|2}}<sup>4</sup> {{S|Torch Monk Zombie|2}}<sup>5</sup> {{S|Torch Monk Zombie|2}} {{S|Conehead Kongfu Zombie|2}} {{S|Conehead Kongfu Zombie|2}} {{S|Nunchaku Zombie|2}} {{S|Nunchaku Zombie|2}} |note16 = Final wave}} |
||
| + | |zombie1 = {{S|Torch Monk Zombie|2}}<sup>4</sup> |
||
| + | |zombie2 = {{S|Conehead Kongfu Zombie|2}} |
||
| + | |note2 = Carries 1x [[Plant Food]]. |
||
| + | |zombie3 = {{S|Kongfu Zombie|2}}<sup>4</sup> {{S|Buckethead Monk Zombie|2}}<sup>1</sup> |
||
| + | |note3 = 2x {{S|Torch Stand|2}} spawn at C7R2 and C7R4.<br>2x {{S|Flag Stand|2}} spawn at C8R1 and C8R5. |
||
| + | |zombie4 = {{S|Kongfu Zombie|2}} {{S|Conehead Monk Zombie|2}} {{S|Buckethead Monk Zombie|2}} {{S|Drinking Monk Zombie|2}} {{S|Swordsman Zombie|2}} {{S|Torch Monk Zombie|2}} {{S|Torch Monk Zombie|2}} |
||
| + | |zombie5 = {{S|Kongfu Zombie|2}} {{S|Conehead Monk Zombie|2}} {{S|Buckethead Monk Zombie|2}} {{S|Conehead Monk Zombie|2}} {{S|Drinking Monk Zombie|2}} {{S|Swordsman Zombie|2}} {{S|Torch Monk Zombie|2}} {{S|Torch Monk Zombie|2}} |
||
| + | |note5 = Carries 1x Plant Food. |
||
| + | |zombie6 = {{S|Kongfu Zombie|2}} {{S|Conehead Monk Zombie|2}} {{S|Buckethead Monk Zombie|2}} {{S|Drinking Monk Zombie|2}} {{S|Swordsman Zombie|2}} {{S|Torch Monk Zombie|2}} {{S|Torch Monk Zombie|2}} {{S|Torch Monk Zombie|2}} {{S|Nunchaku Zombie|2}} |
||
| + | |note6 = 1x Taiji tile spawns at C2R1.<br>Carries 1x Plant Food. |
||
| + | |zombie7 = {{S|Kongfu Zombie|2}} {{S|Flag Kongfu Zombie|2}} {{S|Conehead Monk Zombie|2}} {{S|Buckethead Monk Zombie|2}} {{S|Buckethead Monk Zombie|2}} {{S|Drinking Monk Zombie|2}} {{S|Swordsman Zombie|2}} {{S|Torch Monk Zombie|2}} {{S|Torch Monk Zombie|2}} {{S|Nunchaku Zombie|2}} |
||
| + | |note7 = First flag.<br>2x {{S|Torch Stand|2}} spawn at C7R1 and C7R5.<br>1x {{S|Sword Stand|2}} spawns at C6R1.<br>1x {{S|Nunchaku Stand|2}} spawns at C6R5. |
||
| + | |zombie8 = {{S|Kongfu Zombie|2}} {{S|Conehead Monk Zombie|2}} {{S|Buckethead Monk Zombie|2}} {{S|Drinking Monk Zombie|2}} {{S|Swordsman Zombie|2}} {{S|Torch Monk Zombie|2}} {{S|Torch Monk Zombie|2}} {{S|Swordsman Zombie|2}} {{S|Nunchaku Zombie|2}} |
||
| + | |zombie9 = {{S|Kongfu Zombie|2}} {{S|Conehead Monk Zombie|2}} {{S|Buckethead Monk Zombie|2}} {{S|Drinking Monk Zombie|2}} {{S|Swordsman Zombie|2}} {{S|Torch Monk Zombie|2}} {{S|Torch Monk Zombie|2}} {{S|Nunchaku Zombie|2}} |
||
| + | |zombie10 = {{S|Kongfu Zombie|2}} {{S|Conehead Monk Zombie|2}} {{S|Buckethead Monk Zombie|2}} {{S|Torch Monk Zombie|2}} {{S|Torch Monk Zombie|2}} {{S|Swordsman Zombie|2}} {{S|Nunchaku Zombie|2}} {{S|Nunchaku Zombie|2}} {{S|Drinking Monk Zombie|2}} |
||
| + | |note10 = Carries 1x Plant Food. |
||
| + | |zombie11 = {{S|Kongfu Zombie|2}} {{S|Conehead Monk Zombie|2}} {{S|Buckethead Monk Zombie|2}} {{S|Drinking Monk Zombie|2}} {{S|Swordsman Zombie|2}} {{S|Torch Monk Zombie|2}} {{S|Torch Monk Zombie|2}} {{S|Nunchaku Zombie|2}} |
||
| + | |note11 = 2x Taiji tiles spawn at C7R2 and C7R4. |
||
| + | |zombie12 = {{S|Kongfu Zombie|2}} {{S|Conehead Monk Zombie|2}} {{S|Buckethead Monk Zombie|2}} {{S|Drinking Monk Zombie|2}} {{S|Swordsman Zombie|2}} {{S|Torch Monk Zombie|2}} {{S|Torch Monk Zombie|2}} {{S|Nunchaku Zombie|2}} |
||
| + | |note12 = Carries 1x Plant Food. |
||
| + | |zombie13 = {{S|Kongfu Zombie|2}} {{S|Conehead Monk Zombie|2}} {{S|Buckethead Monk Zombie|2}} {{S|Drinking Monk Zombie|2}} {{S|Swordsman Zombie|2}} {{S|Torch Monk Zombie|2}} {{S|Torch Monk Zombie|2}} {{S|Nunchaku Zombie|2}} |
||
| + | |note13 = 2x {{S|Torch Stand|2}} spawn at C5R2 and C7R3.<br>1x {{S|Flag Stand|2}} spawns at C6R2.<br>1x {{S|Sword Stand|2}} spawns at C6R5.<br>1x {{S|Bomb Stand|2}} spawns at C8R5. |
||
| + | |zombie14 = {{S|Kongfu Zombie|2}} {{S|Flag Kongfu Zombie|2}} {{S|Conehead Monk Zombie|2}} {{S|Buckethead Monk Zombie|2}} {{S|Drinking Monk Zombie|2}} {{S|Swordsman Zombie|2}} {{S|Torch Monk Zombie|2}} {{S|Torch Monk Zombie|2}} {{S|Nunchaku Zombie|2}} |
||
| + | |note14 = Second flag (in-game).<br>Carries 1x Plant Food. |
||
| + | |zombie15 = {{S|Kongfu Zombie|2}} {{S|Flag Kongfu Zombie|2}} {{S|Conehead Monk Zombie|2}} {{S|Buckethead Monk Zombie|2}} {{S|Drinking Monk Zombie|2}} {{S|Swordsman Zombie|2}} {{S|Torch Monk Zombie|2}} {{S|Torch Monk Zombie|2}} {{S|Torch Monk Zombie|2}} {{S|Torch Monk Zombie|2}} {{S|Torch Monk Zombie|2}} {{S|Torch Monk Zombie|2}} {{S|Nunchaku Zombie|2}} |
||
| + | |note15 = Final wave. |
||
| + | }} |
||
==Strategy== |
==Strategy== |
||
*Bringing plants with freezing effect is required. If you don't have anything else but Iceberg Lettuce, plant them in a row right next to the gunpowder barrels. That way, the level will become a normal level without lawn mowers. |
*Bringing plants with freezing effect is required. If you don't have anything else but Iceberg Lettuce, plant them in a row right next to the gunpowder barrels. That way, the level will become a normal level without lawn mowers. |
||
*Now set up your attack. Be careful of the threats as they are all instant-killers. Once again, don't bring any straight-shot projectile plants with you to prevent [[Nunchaku Zombie]]s from deflecting your attacks. |
*Now set up your attack. Be careful of the threats as they are all instant-killers. Once again, don't bring any straight-shot projectile plants with you to prevent [[Nunchaku Zombie]]s from deflecting your attacks. |
||
| − | *Plant on |
+ | *Plant on Taiji Tiles to get more Plant Food. Use them when needed. |
==Gallery== |
==Gallery== |
||
| Line 39: | Line 66: | ||
NewKFW20R.png|First time reward |
NewKFW20R.png|First time reward |
||
</gallery> |
</gallery> |
||
| + | |||
| + | ==Walkthroughs== |
||
| + | <gallery widths="250"> |
||
| + | Plants vs. Zombies 2 (China) - Unlocked 2 new Plants - Kung-Fu World Day 20 (Ep.106)|By {{U|Alex5432000}} |
||
| + | </gallery> |
||
| + | |||
|-| |
|-| |
||
Hard mode= |
Hard mode= |
||
| Line 47: | Line 80: | ||
|Type = [[Powder Keg]] |
|Type = [[Powder Keg]] |
||
|Flag = Two |
|Flag = Two |
||
| − | |Zombie = {{LevelIconNew|2}}: {{S|Kongfu Zombie|2}} {{S|Conehead Monk Zombie|2}} {{S|Buckethead Monk Zombie|2}} {{S|Flag Kongfu Zombie|2}} {{S|Torch Monk Zombie|2}} {{S|Swordsman Zombie|2}} {{S|Nunchaku Zombie|2}}{{HardModeNote}} |
+ | |Zombie = {{LevelIconNew|2}}~{{LevelIconNew|3}}: {{S|Kongfu Zombie|2}} {{S|Conehead Kongfu Zombie|2}} {{S|Conehead Monk Zombie|2}} {{S|Buckethead Monk Zombie|2}} {{S|Flag Kongfu Zombie|2}} {{S|Torch Monk Zombie|2}} {{S|Swordsman Zombie|2}} {{S|Nunchaku Zombie|2}}{{HardModeNote}} |
|EM = {{S|Flag Stand|2}} {{S|Torch Stand|2}}<br>'''Pre-existed:''' Two {{S|Torch Stand|2}} |
|EM = {{S|Flag Stand|2}} {{S|Torch Stand|2}}<br>'''Pre-existed:''' Two {{S|Torch Stand|2}} |
||
|EM2 = '''Pre-existed:''' One<br>'''Max no.:''' Four |
|EM2 = '''Pre-existed:''' One<br>'''Max no.:''' Four |
||
| Line 55: | Line 88: | ||
|before = Kongfu World - Day 19 |
|before = Kongfu World - Day 19 |
||
|after = Kongfu World - Day 21}} |
|after = Kongfu World - Day 21}} |
||
| − | In the Hard Mode of this level, the player has to beat the zombies at |
+ | In the Hard Mode of this level, the player has to beat the zombies at Levels 2-3. |
==Difficulty== |
==Difficulty== |
||
| Line 67: | Line 100: | ||
NewKFW20HG1.png |
NewKFW20HG1.png |
||
NewKFW20HG2.png|Final wave |
NewKFW20HG2.png|Final wave |
||
| + | </gallery> |
||
| + | |||
| + | ==Walkthroughs== |
||
| + | <gallery widths="250"> |
||
| + | Plants vs. Zombies 2 (China) - Unlocked 2 new Plants - Kung-Fu World Day 20 (Ep.106)|By {{U|Alex5432000}} |
||
</gallery> |
</gallery> |
||
Revision as of 21:12, 23 August 2019
This article is about content available solely in the People's Republic of China.
- For the level before the v1.8 update, see Kongfu World - Day 20 (Pre-1.8).
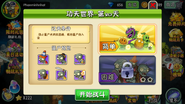
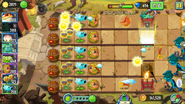
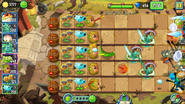
Kongfu World - Day 20 is the 20th level of Kongfu World in the Chinese version of Plants vs. Zombies 2. It is a Powder Keg level. When this level is finished for the first time, the player get coins.
In the Normal Mode of this level, the player has to beat Kongfu Zombies at Level 1.
Difficulty
- As the player now has to win the level with their own plants chosen like a normal level they should remember that this level is practically without lawn mowers and that the gunpowder barrels are entirely detrimental.
Waves
- The small number next to the zombie icon means that zombie will always appear in that lane, with 1 being the topmost lane and 5 being the bottommost one.
| Waves | Non-dynamic zombies | Ambush zombies | Note(s) |
|---|---|---|---|
| 1 | None | ||
| 2 | None | Carries 1x Plant Food. | |
| 3 | None | 2x 2x | |
| 4 | None | ||
| 5 | None | Carries 1x Plant Food. | |
| 6 | None | 1x Taiji tile spawns at C2R1. Carries 1x Plant Food. | |
| 7 | None | First flag. 2x 1x 1x | |
| 8 | None | ||
| 9 | None | ||
| 10 | None | Carries 1x Plant Food. | |
| 11 | None | 2x Taiji tiles spawn at C7R2 and C7R4. | |
| 12 | None | Carries 1x Plant Food. | |
| 13 | None | 2x 1x 1x 1x | |
| 14 | None | Second flag (in-game). Carries 1x Plant Food. | |
| 15 | None | Final wave. |
Strategy
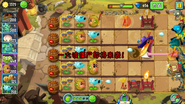
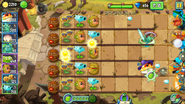
- Bringing plants with freezing effect is required. If you don't have anything else but Iceberg Lettuce, plant them in a row right next to the gunpowder barrels. That way, the level will become a normal level without lawn mowers.
- Now set up your attack. Be careful of the threats as they are all instant-killers. Once again, don't bring any straight-shot projectile plants with you to prevent Nunchaku Zombies from deflecting your attacks.
- Plant on Taiji Tiles to get more Plant Food. Use them when needed.
Gallery
Walkthroughs
In the Hard Mode of this level, the player has to beat the zombies at Levels 2-3.
Difficulty
- As the plants are now the player's choice, plants with freezing effects along with powerful attack plants should be just enough to defeat all the zombies in the level.
Strategies
- The strategy should be just as same as in Normal mode. However, it is recommended to bring upgraded powerful plants to deal with leveled-up zombies.
Gallery
Walkthroughs
| ||||||||||||||||||||||||||||||||||||||||||||||||||


