mNo edit summary Tag: sourceedit |
No edit summary |
||
| (22 intermediate revisions by 13 users not shown) | |||
| Line 4: | Line 4: | ||
|Flag = Two |
|Flag = Two |
||
|EM = Three {{S|Raptor|2}}<br>Two {{S|Pterodactyl|2}} |
|EM = Three {{S|Raptor|2}}<br>Two {{S|Pterodactyl|2}} |
||
| − | |Diff = Medium-hard |
||
|Zombie = {{S|Jurassic Zombie|2}} {{S|Jurassic Conehead|2}} {{S|Jurassic Buckethead|2}} {{S|Jurassic Fossilhead|2}} {{S|Jurassic Flag Zombie|2}} {{S|Jurassic Gargantuar|2}} {{S|Jurassic Imp|2}} |
|Zombie = {{S|Jurassic Zombie|2}} {{S|Jurassic Conehead|2}} {{S|Jurassic Buckethead|2}} {{S|Jurassic Fossilhead|2}} {{S|Jurassic Flag Zombie|2}} {{S|Jurassic Gargantuar|2}} {{S|Jurassic Imp|2}} |
||
| − | |FR = A [[ |
+ | |FR = A [[note]] |
|before = Jurassic Marsh - Day 14 |
|before = Jurassic Marsh - Day 14 |
||
|after = Jurassic Marsh - Day 16 |
|after = Jurassic Marsh - Day 16 |
||
| ⚫ | |||
| − | |Loc = Jurassic Marsh}} |
||
| ⚫ | |||
==Difficulty== |
==Difficulty== |
||
| − | Like most [[Save Our Seeds]] levels, the player must protect specific plants. In this case, two [[Primal Wall-nut]]s. Unlike [[Neon Mixtape Tour]] - [[Neon Mixtape Tour - Day 5|Day 5]], the zombies do not start attacking the endangered plants until a wave or two pass, giving more time for [[sun]] production |
+ | Like most [[Save Our Seeds]] levels, the player must protect specific plants. In this case, two [[Primal Wall-nut]]s. Unlike [[Neon Mixtape Tour]] - [[Neon Mixtape Tour - Day 5|Day 5]], the non-dynamic zombies do not start attacking the endangered plants until a wave or two pass, giving more time for [[sun]] production and for setting up their defenses. |
| + | |||
| + | The main threats for the endangered plants are [[Dinosaur|raptors]], which are constantly deployed onto those rows, as well two pterodactyls during the final wave in the fourth column. [[Perfume-shroom]]s can easily take care of the dinos in this level, but not all of them. |
||
| + | |||
| + | Other lanes should not be forgotten though, as a [[Jurassic Gargantuar]] appears in a lane without an endangered plant. However, no dinosaurs appear in that row, forcing the player to legitimately kill it, unlike before. Despite its large amount of health, using two [[Primal Peashooter]]s or more can keep it at bay, as its knockback will most likely keep pushing it back, as well as the Jurassic Gargantuar's slower speed. |
||
| + | |||
| + | [[Dynamic Difficulty]] should also be taken into account; this may allow for zombies to appear on lanes with the endangered plants far earlier than normal, which can pose a huge threat. |
||
==Waves== |
==Waves== |
||
| Line 43: | Line 47: | ||
This strategy can beat the level without [[Plant Food]], premium content, gemium plants, or losing any lawn mowers. |
This strategy can beat the level without [[Plant Food]], premium content, gemium plants, or losing any lawn mowers. |
||
| − | *''' |
+ | *'''Required plants:''' |
**[[Snapdragon]] |
**[[Snapdragon]] |
||
**[[Perfume-shroom]] |
**[[Perfume-shroom]] |
||
| Line 52: | Line 56: | ||
**[[Celery Stalker]] |
**[[Celery Stalker]] |
||
This group will work in many of the Jurassic Marsh levels, and will work here. |
This group will work in many of the Jurassic Marsh levels, and will work here. |
||
| − | Drag out the beginning fights by killing the first few zombies with Chili Beans and Celery Stalkers while filling up two columns with Sun-shrooms. Celery Stalkers ideally go in the seventh column. When the raptors appear, charm them when they stand in front of the nuts, so that they do not kill the zombies too quickly. Fill up the two columns ahead of the Sun-shrooms with Snapdragons and add Tall-nuts between the endangered plants. Get rid of Jurassic Buckethead and Fossilhead with Chili Beans. If you need to keep a pterodactyl from helping the zombies until it is charmed, plant a Tall-nut in the ninth column to delay the zombies and keep it out of action. The Gargantuar is easily dealt with by letting it approach the Snapdragons, then planting a Primal Wall-nut in front of it and a Celery Stalker behind it. |
+ | Drag out the beginning fights by killing the first few zombies with Chili Beans and Celery Stalkers while filling up two columns with Sun-shrooms. Celery Stalkers ideally go in the seventh column. When the raptors appear, charm them when they stand in front of the nuts, so that they do not kill the zombies too quickly. Fill up the two columns ahead of the Sun-shrooms with Snapdragons and add Tall-nuts between the endangered plants. Get rid of Jurassic Buckethead and Fossilhead with Chili Beans. If you need to keep a pterodactyl from helping the zombies until it is charmed, plant a Tall-nut in the ninth column to delay the zombies and keep it out of action. The Gargantuar is easily dealt with by letting it approach the Snapdragons, then planting a Primal Wall-nut in front of it and a Celery Stalker behind it. You can heal the Primal Wall-nut faster than it can kill it, keeping it locked in place until it is destroyed by the plants. If you use Plant Food with this strategy, the Snapdragons will wipe out everything. |
| − | ===Strategy 2=== |
+ | ===Strategy 2{{PremiumMaybe}}=== |
{{Strategies|BF10|{{S|Sun-shroom|2}}{{S|Primal Peashooter|2}}{{S|Garlic|2}} {{S|Cherry Bomb|2}} or {{S|Grapeshot|2}} {{S|Chard Guard|2}} or {{S|Hurrikale|2}}{{S|Perfume-shroom|2}}<br>Any other plants| |
{{Strategies|BF10|{{S|Sun-shroom|2}}{{S|Primal Peashooter|2}}{{S|Garlic|2}} {{S|Cherry Bomb|2}} or {{S|Grapeshot|2}} {{S|Chard Guard|2}} or {{S|Hurrikale|2}}{{S|Perfume-shroom|2}}<br>Any other plants| |
||
'''Do not edit without my permission!''' |
'''Do not edit without my permission!''' |
||
| − | *This does not really need the seventh or eighth seed packet nor any premiums (unless you decide to use the premium plant choices) |
+ | *This does not really need the seventh or eighth seed packet nor any premiums (unless you decide to use the premium plant choices). |
**Alongside, this does not need Plant Food unless you did something wrong or if you plan to make this easier or safer. |
**Alongside, this does not need Plant Food unless you did something wrong or if you plan to make this easier or safer. |
||
*Only place your Sun-shrooms on the leftmost column. |
*Only place your Sun-shrooms on the leftmost column. |
||
| Line 68: | Line 72: | ||
*On the final wave, use Perfume-shroom on a pterodactyl so you only have to deal with one. Cherry Bomb the zombie in the lane of the uncharmed pterodactyl. You should then be able to finish off the rest and win the level.}} |
*On the final wave, use Perfume-shroom on a pterodactyl so you only have to deal with one. Cherry Bomb the zombie in the lane of the uncharmed pterodactyl. You should then be able to finish off the rest and win the level.}} |
||
| − | ===Strategy 3=== |
+ | ===Strategy 3 {{GemiumMaybe}} {{PremiumMaybe}}=== |
*'''Required plants:''' |
*'''Required plants:''' |
||
**[[Sun-shroom]] |
**[[Sun-shroom]] |
||
| Line 85: | Line 89: | ||
*Place Snapdragon right next to Primal Wall-nut. |
*Place Snapdragon right next to Primal Wall-nut. |
||
*Use the Lawn Mower Boost when needed. |
*Use the Lawn Mower Boost when needed. |
||
| + | |||
| + | ===Strategy 4{{GemiumIncluded}}=== |
||
| + | ''Created by {{U|Comicboss4000}}'' |
||
| + | |||
| + | *'''Required plants:''' |
||
| + | **[[Sunflower]] |
||
| + | **[[Celery Stalker]] |
||
| + | **[[Homing Thistle]] |
||
| + | **[[Primal Wall-nut]] |
||
| + | **[[Iceberg Lettuce]] |
||
| + | **Other plants to fill in |
||
| + | At the beginning of the level, defeat the first few zombies with Celery Stalkers. Then, when you get enough [[sun]], place some Homing Thistles to take out tougher zombies. The more Homing Thistles you put down, the better. When pterodactyls appear and drop the zombies on the left side of the lawn, use Celery Stalker to kill those backwards-facing zombies. Also, if zombies do start eating the Primal Wall-nuts, freeze them with Iceberg Lettuce and kill those while they are frozen. It is advised to use Plant Food on Iceberg Lettuce in tight situations. |
||
==Gallery== |
==Gallery== |
||
| Line 93: | Line 109: | ||
jm15.jpg|By {{U|ShroomstagramUser}} |
jm15.jpg|By {{U|ShroomstagramUser}} |
||
JurassicMarsh15.png|By {{U|Yappat}} |
JurassicMarsh15.png|By {{U|Yappat}} |
||
| − | + | IMG 0050.PNG|By {{U|EpicGamer23468}} |
|
| + | Screenshot_2016-10-12-20-36-48.png|Strategy without picking Primal Wall-nut in seed selection by {{U|LegendofNickson}} |
||
| + | Screenshot_2016-12-20-17-41-51.png|By {{U|Satirelol200}} |
||
| + | SOJM15.PNG|By {{U|Someone456}} |
||
</gallery> |
</gallery> |
||
==Walkthroughs== |
==Walkthroughs== |
||
| − | <gallery |
+ | <gallery widths="250"> |
Jurassic Marsh Day 15 |
Jurassic Marsh Day 15 |
||
Plants Vs Zombies 2 Jurassic Marsh Day 15 |
Plants Vs Zombies 2 Jurassic Marsh Day 15 |
||
| + | Plants vs. Zombies 2 Survive and protect plants - Jurassic Marsh Day 15 (Ep.347)|By {{U|Alex5432000}} |
||
</gallery> |
</gallery> |
||
| + | |||
{{PvZ2levels}} |
{{PvZ2levels}} |
||
| + | <poll> |
||
| + | How would you rate Jurassic Marsh - Day 15's difficulty? |
||
| + | Very hard |
||
| + | Hard |
||
| + | Somewhat hard |
||
| + | Medium |
||
| + | Somewhat easy |
||
| + | Easy |
||
| + | Very easy |
||
| + | </poll> |
||
[[Category:Levels with two flags]] |
[[Category:Levels with two flags]] |
||
[[Category:Brain Busters]] |
[[Category:Brain Busters]] |
||
Revision as of 11:33, 19 December 2018
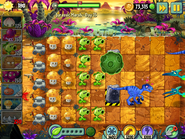
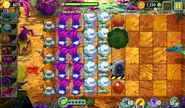
Jurassic Marsh - Day 15 is the fifteenth level of Jurassic Marsh in Plants vs. Zombies 2. It is a Save Our Seeds level. The player needs to protect two Primal Wall-nuts on the fifth column. When this level is finished for the first time, the player receives a meteorite.
Difficulty
Like most Save Our Seeds levels, the player must protect specific plants. In this case, two Primal Wall-nuts. Unlike Neon Mixtape Tour - Day 5, the non-dynamic zombies do not start attacking the endangered plants until a wave or two pass, giving more time for sun production and for setting up their defenses.
The main threats for the endangered plants are raptors, which are constantly deployed onto those rows, as well two pterodactyls during the final wave in the fourth column. Perfume-shrooms can easily take care of the dinos in this level, but not all of them.
Other lanes should not be forgotten though, as a Jurassic Gargantuar appears in a lane without an endangered plant. However, no dinosaurs appear in that row, forcing the player to legitimately kill it, unlike before. Despite its large amount of health, using two Primal Peashooters or more can keep it at bay, as its knockback will most likely keep pushing it back, as well as the Jurassic Gargantuar's slower speed.
Dynamic Difficulty should also be taken into account; this may allow for zombies to appear on lanes with the endangered plants far earlier than normal, which can pose a huge threat.
Waves
- The small number next to the zombie icon means that zombie will always appear in that lane, with 1 being the topmost lane and 5 being the bottommost one.
| Waves | Non-dynamic zombies | Ambush zombies | Dinosaurs | Note(s) |
|---|---|---|---|---|
| 1 | None | None | ||
| 2 | None | None | ||
| 3 | None | 100% Plant Food | ||
| 4 | None | None | ||
| 5 | None | First flag | ||
| 6 | None | None | ||
| 7 | None | None | 100% Plant Food | |
| 8 | None | |||
| 9 | None | None | ||
| 10 | None | Final flag |
Strategies
Strategy 1
- Created by RaidingParty
This strategy can beat the level without Plant Food, premium content, gemium plants, or losing any lawn mowers.
- Required plants:
This group will work in many of the Jurassic Marsh levels, and will work here. Drag out the beginning fights by killing the first few zombies with Chili Beans and Celery Stalkers while filling up two columns with Sun-shrooms. Celery Stalkers ideally go in the seventh column. When the raptors appear, charm them when they stand in front of the nuts, so that they do not kill the zombies too quickly. Fill up the two columns ahead of the Sun-shrooms with Snapdragons and add Tall-nuts between the endangered plants. Get rid of Jurassic Buckethead and Fossilhead with Chili Beans. If you need to keep a pterodactyl from helping the zombies until it is charmed, plant a Tall-nut in the ninth column to delay the zombies and keep it out of action. The Gargantuar is easily dealt with by letting it approach the Snapdragons, then planting a Primal Wall-nut in front of it and a Celery Stalker behind it. You can heal the Primal Wall-nut faster than it can kill it, keeping it locked in place until it is destroyed by the plants. If you use Plant Food with this strategy, the Snapdragons will wipe out everything.
- Created by BF10
Do not edit without my permission!
- This does not really need the seventh or eighth seed packet nor any premiums (unless you decide to use the premium plant choices).
- Alongside, this does not need Plant Food unless you did something wrong or if you plan to make this easier or safer.
- Only place your Sun-shrooms on the leftmost column.
- When the first zombie comes, use Chard Guard or Hurrikale to push it back. Plant a Primal Peashooter on the row after the Sun-shrooms where the zombie is.
- Continue to place Primal Peashooters and Chard Guards or Hurrikales on the zombies.
- When the first zombie goes on a row with a Primal Wall-nut, place a Garlic in front of the Primal Wall-nut that the zombie is walking to.
- Make sure you have two row of Primal Peashooters.
- Use Perfume-shroom on the dinosaurs that come, and place another Garlic in front of the other Primal Wall-nut. Use Cherry Bombs if things get out of hand or if a Jurassic Gargantuar appears.
- Remember to replace the Garlics when they are on their second degrades.
- On the final wave, use Perfume-shroom on a pterodactyl so you only have to deal with one. Cherry Bomb the zombie in the lane of the uncharmed pterodactyl. You should then be able to finish off the rest and win the level.
===Strategy 3 (May contain gem premium content)
(May contain premium content)===
- Required plants:
- Sun-shroom
- Perfume-shroom
- Primal Wall-nut
- Citron (to defeat Gargantuar)
- Snapdragon
- Cherry Bomb or Lava Guava
- Primal Peashooter
- Electric Blueberry (optional)
- Plant Sun-shroom first to gain sufficient sun for Citron.
- When the first group of zombies appears, use Primal Peashooter to keep them at bay.
- When any dinosaurs appear, use Perfume-shroom to charm them.
- When a Gargantuar appears, use Plant Food on Citron to attack it.
- Place Snapdragon right next to Primal Wall-nut.
- Use the Lawn Mower Boost when needed.
Strategy 4 (Contains gemium content)
Created by Comicboss4000
- Required plants:
- Sunflower
- Celery Stalker
- Homing Thistle
- Primal Wall-nut
- Iceberg Lettuce
- Other plants to fill in
At the beginning of the level, defeat the first few zombies with Celery Stalkers. Then, when you get enough sun, place some Homing Thistles to take out tougher zombies. The more Homing Thistles you put down, the better. When pterodactyls appear and drop the zombies on the left side of the lawn, use Celery Stalker to kill those backwards-facing zombies. Also, if zombies do start eating the Primal Wall-nuts, freeze them with Iceberg Lettuce and kill those while they are frozen. It is advised to use Plant Food on Iceberg Lettuce in tight situations.
Gallery
Walkthroughs
- *: Removed ~: Epic Quest


