No edit summary Tag: rte-source |
|||
| (27 intermediate revisions by 18 users not shown) | |||
| Line 1: | Line 1: | ||
| + | |||
:''For the Chinese version of the level, see [[Far Future - Day 13 (Chinese version)]].'' |
:''For the Chinese version of the level, see [[Far Future - Day 13 (Chinese version)]].'' |
||
| + | :''For the Chinese version of this level before the v1.8 update, see [[Far Future - Day 13 (Chinese version: pre-1.8)]].'' |
||
| + | |||
{{Infobox level |
{{Infobox level |
||
|Game = Plants vs. Zombies 2 |
|Game = Plants vs. Zombies 2 |
||
| Line 7: | Line 10: | ||
|Type = Regular |
|Type = Regular |
||
|Flag = Two |
|Flag = Two |
||
| ⚫ | |||
|Zombie = {{S|Future Zombie|2}} {{S|Future Conehead Zombie|2}} {{S|Future Buckethead Zombie|2}} {{S|Future Flag Zombie|2}} {{S|Jetpack Zombie|2}} {{S|Robo-Cone Zombie|2}} {{S|Mecha-Football Zombie|2}} |
|Zombie = {{S|Future Zombie|2}} {{S|Future Conehead Zombie|2}} {{S|Future Buckethead Zombie|2}} {{S|Future Flag Zombie|2}} {{S|Jetpack Zombie|2}} {{S|Robo-Cone Zombie|2}} {{S|Mecha-Football Zombie|2}} |
||
|FR = {{S|Infi-nut|2}} |
|FR = {{S|Infi-nut|2}} |
||
|before = Far Future - Day 12 |
|before = Far Future - Day 12 |
||
|after = Far Future - Day 14}} |
|after = Far Future - Day 14}} |
||
| − | + | {{Levelintro2|no=thirteenth|area=Far Future|[[Mecha-Football Zombie]] is introduced in this level for the first time.|unique=unlocks [[Infi-nut]]}} |
|
==Difficulty== |
==Difficulty== |
||
| − | This level introduces the Mecha-Football Zombie. This is a really dangerous zombie due to its ability to push plants one tile behind or potentially off the lawn. In addition, it has the same toughness as the [[Disco-tron 3000]], making it even harder to deal with. Using [[E.M.Peach]] is the most efficient way to combat this zombie, as well as the use of powerful plants like [[Citron]]. |
+ | This level introduces the Mecha-Football Zombie. This is a really dangerous zombie due to its ability to push plants one tile behind or potentially off the lawn. In addition, it has the same toughness as the [[Disco-tron 3000]], making it even harder to deal with. Using [[E.M.Peach]] is the most efficient way to combat this zombie, as well as the use of powerful plants like [[Citron]]. |
| − | There is also a [[Robo-Cone Zombie]] and some [[Jetpack Zombie]]s to encounter in this level, so the player should take precaution |
+ | There is also a [[Robo-Cone Zombie]] and some [[Jetpack Zombie]]s to encounter in this level, so the player should take precaution for both zombies. |
==Waves== |
==Waves== |
||
| Line 25: | Line 27: | ||
|zombie3 = {{S|Future Zombie|2}} {{S|Future Zombie|2}} {{S|Future Conehead Zombie|2}} |
|zombie3 = {{S|Future Zombie|2}} {{S|Future Zombie|2}} {{S|Future Conehead Zombie|2}} |
||
|zombie4 = {{S|Future Conehead Zombie|2}} {{S|Future Conehead Zombie|2}} |
|zombie4 = {{S|Future Conehead Zombie|2}} {{S|Future Conehead Zombie|2}} |
||
| − | |note4 = |
+ | |note4 = Carries 1x [[Plant Food]]. |
|zombie5 = {{S|Robo-Cone Zombie|2}} |
|zombie5 = {{S|Robo-Cone Zombie|2}} |
||
|zombie6 = {{S|Future Zombie|2}} {{S|Future Buckethead Zombie|2}} |
|zombie6 = {{S|Future Zombie|2}} {{S|Future Buckethead Zombie|2}} |
||
| − | |note6 = |
+ | |note6 = Carries 1x Plant Food. |
|zombie7 = {{S|Future Zombie|2}}<sup>3</sup> {{S|Mecha-Football Zombie|2}}<sup>3</sup> |
|zombie7 = {{S|Future Zombie|2}}<sup>3</sup> {{S|Mecha-Football Zombie|2}}<sup>3</sup> |
||
|zombie8 = {{S|Future Conehead Zombie|2}}<sup>2</sup> {{S|Future Conehead Zombie|2}}<sup>4</sup> {{S|Future Buckethead Zombie|2}}<sup>1</sup> {{S|Future Buckethead Zombie|2}}<sup>5</sup> {{S|Future Flag Zombie|2}} |
|zombie8 = {{S|Future Conehead Zombie|2}}<sup>2</sup> {{S|Future Conehead Zombie|2}}<sup>4</sup> {{S|Future Buckethead Zombie|2}}<sup>1</sup> {{S|Future Buckethead Zombie|2}}<sup>5</sup> {{S|Future Flag Zombie|2}} |
||
| − | |note8 = |
+ | |note8 = First flag.<br>Carries 1x Plant Food. |
|zombie9 = {{S|Jetpack Zombie|2}}<sup>1</sup> {{S|Jetpack Zombie|2}}<sup>3</sup> {{S|Jetpack Zombie|2}}<sup>5</sup> {{S|Jetpack Zombie|2}} |
|zombie9 = {{S|Jetpack Zombie|2}}<sup>1</sup> {{S|Jetpack Zombie|2}}<sup>3</sup> {{S|Jetpack Zombie|2}}<sup>5</sup> {{S|Jetpack Zombie|2}} |
||
|zombie10 = {{S|Future Conehead Zombie|2}} {{S|Future Conehead Zombie|2}} {{S|Future Conehead Zombie|2}} {{S|Future Conehead Zombie|2}} |
|zombie10 = {{S|Future Conehead Zombie|2}} {{S|Future Conehead Zombie|2}} {{S|Future Conehead Zombie|2}} {{S|Future Conehead Zombie|2}} |
||
|zombie11 = {{S|Future Conehead Zombie|2}}<sup>1</sup> {{S|Future Conehead Zombie|2}}<sup>5</sup> {{S|Future Buckethead Zombie|2}}<sup>5</sup> |
|zombie11 = {{S|Future Conehead Zombie|2}}<sup>1</sup> {{S|Future Conehead Zombie|2}}<sup>5</sup> {{S|Future Buckethead Zombie|2}}<sup>5</sup> |
||
| − | |note11 = |
+ | |note11 = Carries 1x Plant Food. |
|zombie12 = {{S|Mecha-Football Zombie|2}} |
|zombie12 = {{S|Mecha-Football Zombie|2}} |
||
|zombie13 = {{S|Jetpack Zombie|2}}<sup>1</sup> {{S|Jetpack Zombie|2}}<sup>2</sup> {{S|Jetpack Zombie|2}}<sup>3</sup> {{S|Jetpack Zombie|2}}<sup>4</sup> {{S|Jetpack Zombie|2}}<sup>5</sup> {{S|Jetpack Zombie|2}} {{S|Jetpack Zombie|2}} |
|zombie13 = {{S|Jetpack Zombie|2}}<sup>1</sup> {{S|Jetpack Zombie|2}}<sup>2</sup> {{S|Jetpack Zombie|2}}<sup>3</sup> {{S|Jetpack Zombie|2}}<sup>4</sup> {{S|Jetpack Zombie|2}}<sup>5</sup> {{S|Jetpack Zombie|2}} {{S|Jetpack Zombie|2}} |
||
|zombie14 = {{S|Future Conehead Zombie|2}}<sup>1</sup> {{S|Future Conehead Zombie|2}}<sup>1</sup> {{S|Future Conehead Zombie|2}}<sup>5</sup> {{S|Future Conehead Zombie|2}}<sup>5</sup> |
|zombie14 = {{S|Future Conehead Zombie|2}}<sup>1</sup> {{S|Future Conehead Zombie|2}}<sup>1</sup> {{S|Future Conehead Zombie|2}}<sup>5</sup> {{S|Future Conehead Zombie|2}}<sup>5</sup> |
||
| − | |note14 = |
+ | |note14 = Carries 1x Plant Food. |
|zombie15 = {{S|Future Zombie|2}}<sup>2</sup> {{S|Future Zombie|2}}<sup>4</sup> {{S|Future Conehead Zombie|2}}<sup>1</sup> {{S|Future Conehead Zombie|2}}<sup>5</sup> {{S|Future Buckethead Zombie|2}}<sup>3</sup> |
|zombie15 = {{S|Future Zombie|2}}<sup>2</sup> {{S|Future Zombie|2}}<sup>4</sup> {{S|Future Conehead Zombie|2}}<sup>1</sup> {{S|Future Conehead Zombie|2}}<sup>5</sup> {{S|Future Buckethead Zombie|2}}<sup>3</sup> |
||
| − | |note15 = |
+ | |note15 = Carries 1x Plant Food. |
|zombie16 = {{S|Future Conehead Zombie|2}}<sup>1</sup> {{S|Future Conehead Zombie|2}}<sup>5</sup> {{S|Future Flag Zombie|2}} {{S|Jetpack Zombie|2}}<sup>2</sup> {{S|Jetpack Zombie|2}}<sup>4</sup> {{S|Mecha-Football Zombie|2}}<sup>2</sup> {{S|Mecha-Football Zombie|2}}<sup>4</sup> |
|zombie16 = {{S|Future Conehead Zombie|2}}<sup>1</sup> {{S|Future Conehead Zombie|2}}<sup>5</sup> {{S|Future Flag Zombie|2}} {{S|Jetpack Zombie|2}}<sup>2</sup> {{S|Jetpack Zombie|2}}<sup>4</sup> {{S|Mecha-Football Zombie|2}}<sup>2</sup> {{S|Mecha-Football Zombie|2}}<sup>4</sup> |
||
| − | |note16 = Final |
+ | |note16 = Final wave.}} |
==Strategies== |
==Strategies== |
||
| + | ===Strategy 1=== |
||
| − | *''' |
+ | *'''Required plants:''' |
**[[Twin Sunflower]] (or [[Sun-shroom]]) |
**[[Twin Sunflower]] (or [[Sun-shroom]]) |
||
**[[Bonk Choy]] |
**[[Bonk Choy]] |
||
| Line 53: | Line 56: | ||
**[[E.M.Peach]] |
**[[E.M.Peach]] |
||
**[[Cherry Bomb]] |
**[[Cherry Bomb]] |
||
| − | *Do as you normally do in the first stage. Planting two columns of Twin Sunflowers (not on [[Power Tile |
+ | *Do as you normally do in the first stage. Planting two columns of Twin Sunflowers (not on [[Power Tile]]s) will help you plant many offensive plants to ready for the new zombie. |
*Try to plant at least one Winter Melon on each lane. Then plant one column of Bonk Choys. When the first huge wave comes, a [[Mecha-Football Zombie]] makes its first appearance. Plant an E.M.Peach if you are afraid of its special. Overall, this level should not be too hard. |
*Try to plant at least one Winter Melon on each lane. Then plant one column of Bonk Choys. When the first huge wave comes, a [[Mecha-Football Zombie]] makes its first appearance. Plant an E.M.Peach if you are afraid of its special. Overall, this level should not be too hard. |
||
*Smart tip: Plant a Bonk Choy near Mecha-Football Zombie, as it will keep punching it because Mecha-Football Zombie cannot eat it and will push it instead. |
*Smart tip: Plant a Bonk Choy near Mecha-Football Zombie, as it will keep punching it because Mecha-Football Zombie cannot eat it and will push it instead. |
||
| + | |||
| + | ===Strategy 2=== |
||
| + | *'''Required plants:''' |
||
| + | **[[Sunflower]] |
||
| + | **[[Pea Pod]] |
||
| + | **[[Cherry Bomb]] |
||
| + | *Plant one row of Sunflowers. |
||
| + | *Plant one row of Pea Pods. |
||
| + | *Keep putting down Pea Pods on top of the ones in the second row and you can take it from there (Plant Food and other plants are optional). This strategy also works for multiple levels in [[Far Future]]. |
||
==Gallery== |
==Gallery== |
||
<gallery bordercolor="transparent"> |
<gallery bordercolor="transparent"> |
||
| − | FR FF D13.png|First time reward |
+ | FR FF D13.png|First time reward |
FFDay13Angry3456.PNG|By {{U|Angry3456}} (second time) |
FFDay13Angry3456.PNG|By {{U|Angry3456}} (second time) |
||
IMG_0090.PNG|By {{U|EpicGamer23468}} |
IMG_0090.PNG|By {{U|EpicGamer23468}} |
||
| Line 66: | Line 78: | ||
FF - Day 13 (PG234) - 2.png|By Pinkgirl234 |
FF - Day 13 (PG234) - 2.png|By Pinkgirl234 |
||
FF - Day 13 (PG234) - 3.png|By Pinkgirl234 |
FF - Day 13 (PG234) - 3.png|By Pinkgirl234 |
||
| + | FF13.png|By {{U|MyNameIsMyName}} |
||
| + | PvZ2_Stragety_FF 13.png|By {{U|Satirelol200}} |
||
| + | Screenshot_2016-09-15-12-59-30.png|By {{U|LegendofNickson}} |
||
| + | FF 13.png|Done by {{U|GalacticFNAFRunner}} |
||
| + | SOFF13.PNG|By {{U|Someone456}} |
||
| + | FF-13 by WeebishlyDone.png|By {{U|WeebishlyDone}} |
||
| + | File:Screenshot_20200523-102148.png|By {{U|SerenityStars364}} |
||
</gallery> |
</gallery> |
||
==Walkthrough== |
==Walkthrough== |
||
| + | <gallery widths="250"> |
||
| − | + | Far Future Day 13 - Football Mech - Plants vs Zombies 2 |
|
| + | Plants vs. Zombies 2 New Mecha-Football Zombie, new plant Infi-nut - Far Future Day 13 (Ep.248)|By {{U|Alex5432000}} |
||
| + | </gallery> |
||
| + | |||
{{Clear}} |
{{Clear}} |
||
{{PvZ2levels}} |
{{PvZ2levels}} |
||
| + | <poll> |
||
| + | How would you rate Far Future - Day 13's difficulty? |
||
| + | Very hard |
||
| + | Hard |
||
| + | Somewhat hard |
||
| ⚫ | |||
| + | Somewhat easy |
||
| + | Easy |
||
| + | Very easy |
||
| + | </poll> |
||
[[Category:Levels with two flags]] |
[[Category:Levels with two flags]] |
||
Revision as of 02:42, 23 May 2020
- For the Chinese version of the level, see Far Future - Day 13 (Chinese version).
- For the Chinese version of this level before the v1.8 update, see Far Future - Day 13 (Chinese version: pre-1.8).
Far Future - Day 13 is the thirteenth level of Far Future in Plants vs. Zombies 2. Mecha-Football Zombie is introduced in this level for the first time. When this level is finished for the first time, the player unlocks Infi-nut.
Difficulty
This level introduces the Mecha-Football Zombie. This is a really dangerous zombie due to its ability to push plants one tile behind or potentially off the lawn. In addition, it has the same toughness as the Disco-tron 3000, making it even harder to deal with. Using E.M.Peach is the most efficient way to combat this zombie, as well as the use of powerful plants like Citron.
There is also a Robo-Cone Zombie and some Jetpack Zombies to encounter in this level, so the player should take precaution for both zombies.
Waves
- The small number next to the zombie icon means that zombie will always appear in that lane, with 1 being the topmost lane and 5 being the bottommost one.
| Waves | Non-dynamic zombies | Ambush zombies | Note(s) |
|---|---|---|---|
| 1 | None | ||
| 2 | None | ||
| 3 | None | ||
| 4 | None | Carries 1x Plant Food. | |
| 5 | None | ||
| 6 | None | Carries 1x Plant Food. | |
| 7 | None | ||
| 8 | None | First flag. Carries 1x Plant Food. | |
| 9 | None | ||
| 10 | None | ||
| 11 | None | Carries 1x Plant Food. | |
| 12 | None | ||
| 13 | None | ||
| 14 | None | Carries 1x Plant Food. | |
| 15 | None | Carries 1x Plant Food. | |
| 16 | None | Final wave. |
Strategies
Strategy 1
- Required plants:
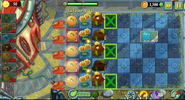
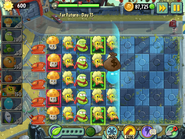
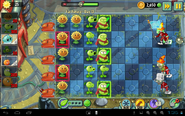
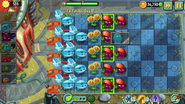
- Do as you normally do in the first stage. Planting two columns of Twin Sunflowers (not on Power Tiles) will help you plant many offensive plants to ready for the new zombie.
- Try to plant at least one Winter Melon on each lane. Then plant one column of Bonk Choys. When the first huge wave comes, a Mecha-Football Zombie makes its first appearance. Plant an E.M.Peach if you are afraid of its special. Overall, this level should not be too hard.
- Smart tip: Plant a Bonk Choy near Mecha-Football Zombie, as it will keep punching it because Mecha-Football Zombie cannot eat it and will push it instead.
Strategy 2
- Required plants:
- Plant one row of Sunflowers.
- Plant one row of Pea Pods.
- Keep putting down Pea Pods on top of the ones in the second row and you can take it from there (Plant Food and other plants are optional). This strategy also works for multiple levels in Far Future.
Gallery
Walkthrough
- *: Removed ~: Epic Quest

