(Pointless.) Tags: Visual edit apiedit |
(→Waves) Tags: Visual edit apiedit |
||
| Line 61: | Line 61: | ||
|note19 = Water reaches 4th column; 100% Plant Food |
|note19 = Water reaches 4th column; 100% Plant Food |
||
|zombie20 = {{S|Pompadour Buckethead|2}}<sup>2</sup> {{S|Pompadour Buckethead|2}}<sup>4</sup> {{S|Bikini Conehead|2}} {{S|Bikini Buckethead|2}}<sup>3</sup> {{S|Beach Flag Zombie|2}} {{S|Snorkel Zombie|2}} {{S|Surfer Zombie|2}}<sup>1</sup> {{S|Surfer Zombie|2}}<sup>5</sup> {{S|Deep Sea Gargantuar|2}}<sup>5</sup> {{S|Fisherman Zombie|2}} |
|zombie20 = {{S|Pompadour Buckethead|2}}<sup>2</sup> {{S|Pompadour Buckethead|2}}<sup>4</sup> {{S|Bikini Conehead|2}} {{S|Bikini Buckethead|2}}<sup>3</sup> {{S|Beach Flag Zombie|2}} {{S|Snorkel Zombie|2}} {{S|Surfer Zombie|2}}<sup>1</sup> {{S|Surfer Zombie|2}}<sup>5</sup> {{S|Deep Sea Gargantuar|2}}<sup>5</sup> {{S|Fisherman Zombie|2}} |
||
| − | |note20 = Final flag}} |
+ | |note20 = Final flag|note1 = Skips to Wave 2 immediately}} |
==Strategies== |
==Strategies== |
||
Revision as of 12:21, 22 March 2016
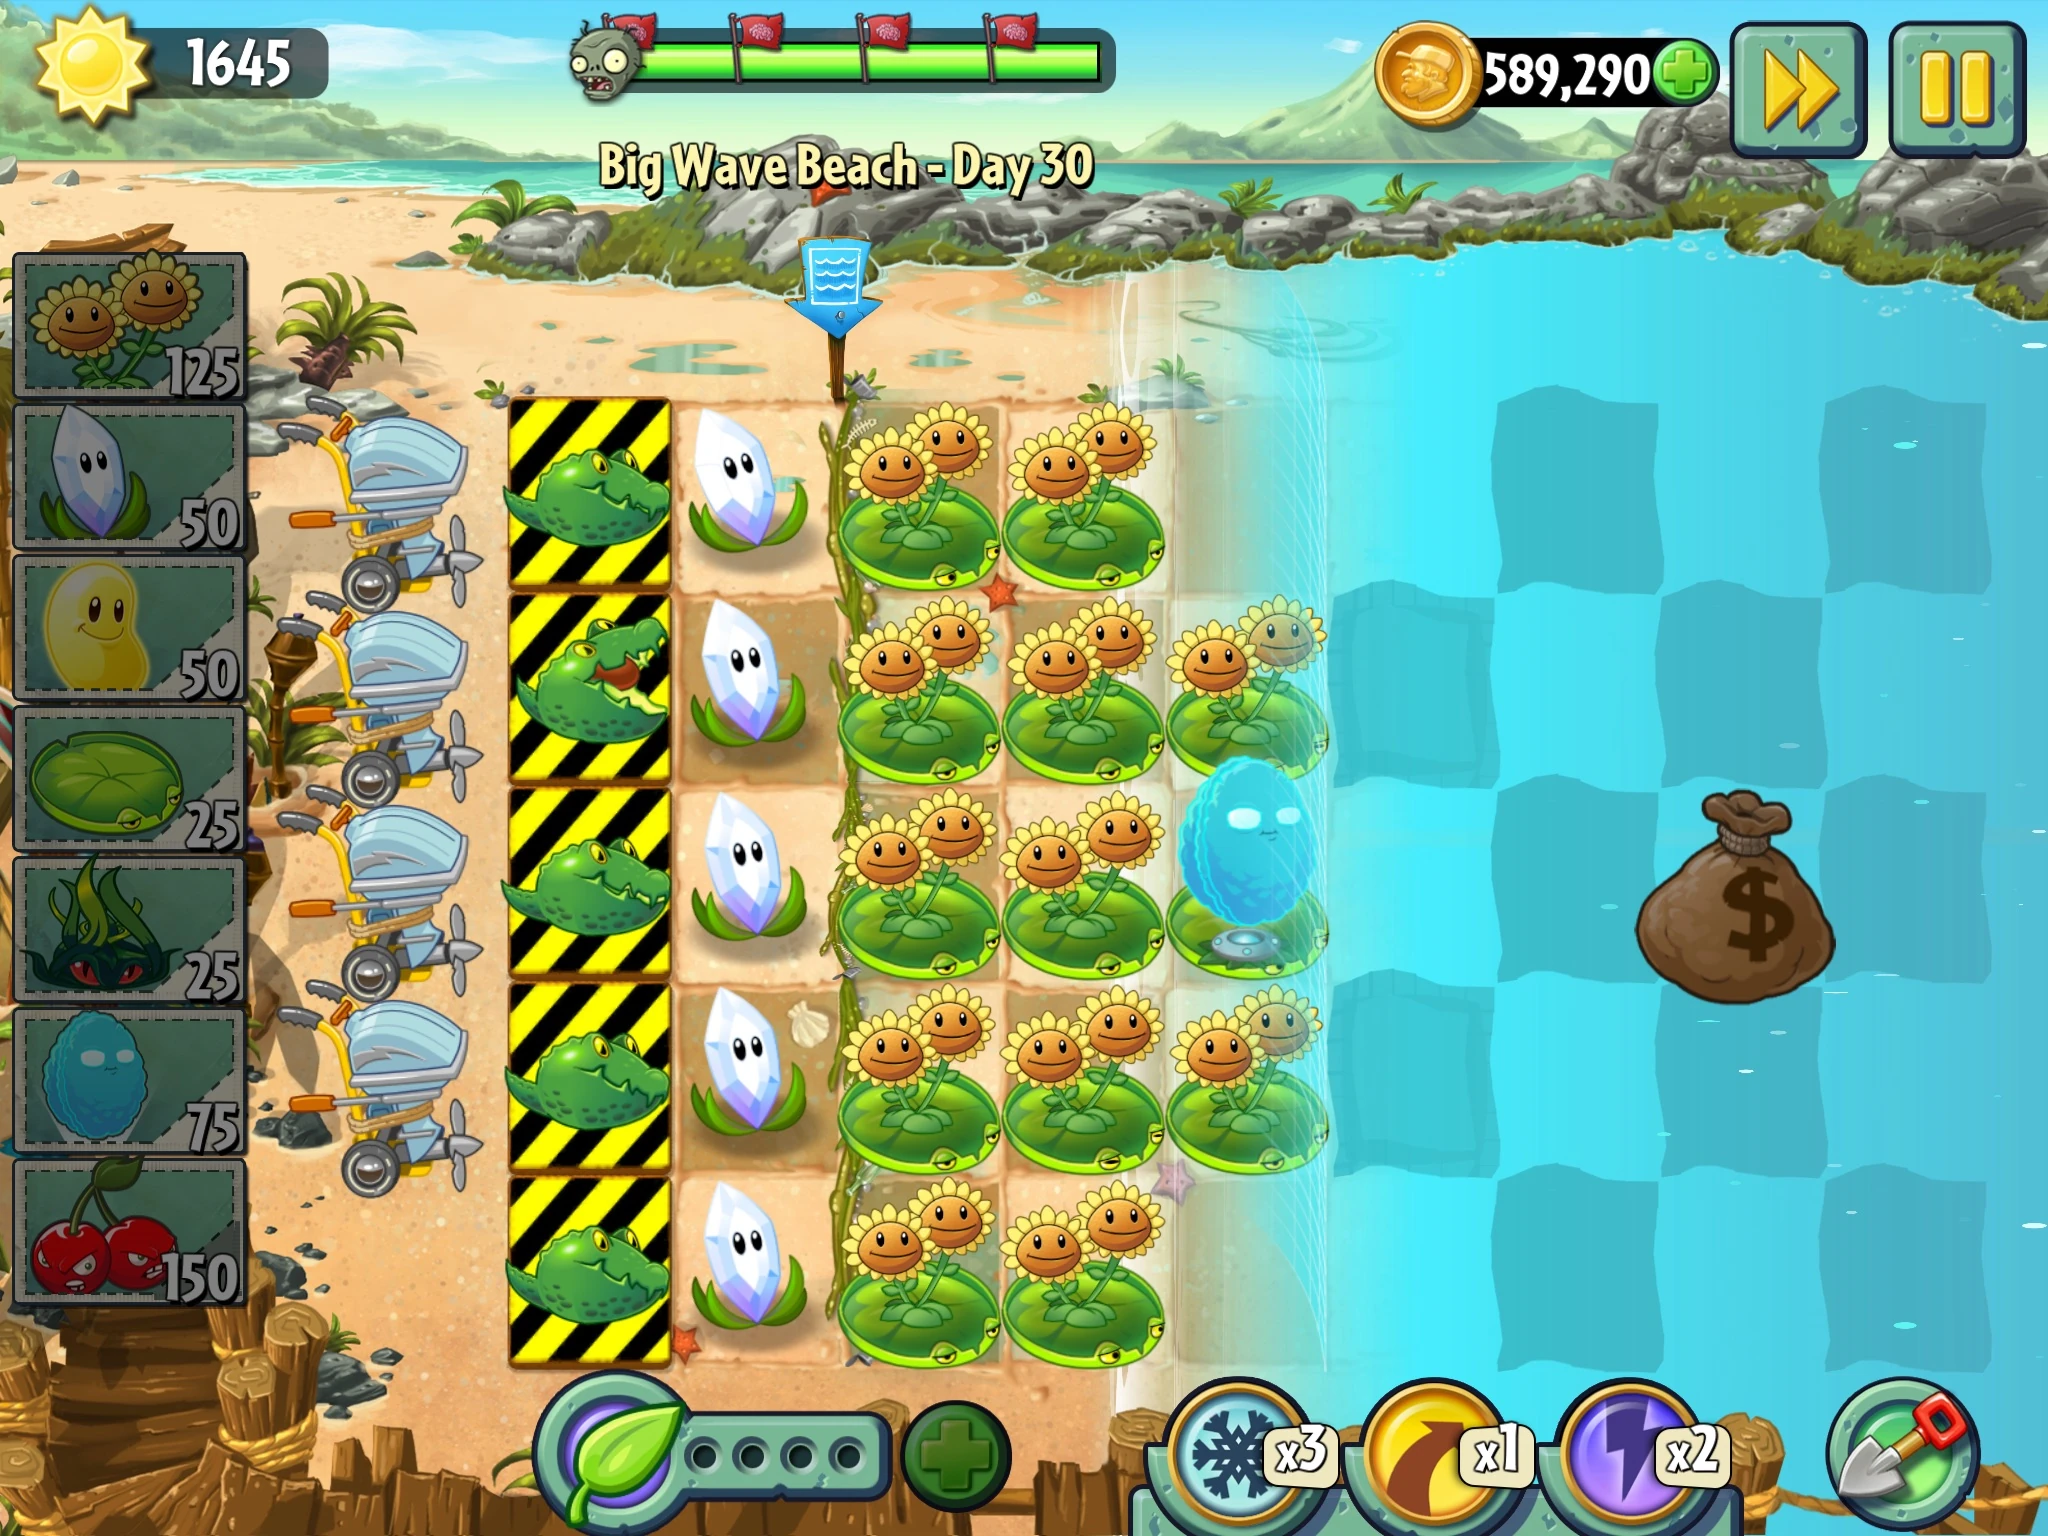
Big Wave Beach - Day 30 is the thirtieth level of Big Wave Beach, which is the final Save Our Seeds level in this world. To complete this level, the player must protect the five Guacodiles which are located in the first column. The tideline is located between the second and third column.
Difficulty
- If a Fisherman Zombie hooks a Guacodile, he will make it perform its rush attack which makes it go off-screen, therefore losing the level. The player needs to plant many plants to win.
- Zombies will enter the lawn early in this level; however, slower in the middle waves.
- Deep Sea Gargantuars can appear during the ambush.
Waves
- The small number next to the zombie icon means that zombie will always appear in that lane, with 1 being the topmost lane and 5 being the bottommost one.
| Waves | Non-dynamic zombies | Ambush zombies | Note(s) |
|---|---|---|---|
| 1 | None | Skips to Wave 2 immediately | |
| 2 | None | 400%/7 Plant Food | |
| 3 | None | ||
| 4 | Water reaches 8th column; Low Tide! | ||
| 5 | None | First flag | |
| 6 | None | ||
| 7 | None | Water reaches 6th column | |
| 8 | None | Water reaches 3rd column; 600%/7 Plant Food | |
| 9 | None | Water reaches 4th column | |
| 10 | Second flag; water reaches 7th column; Low Tide! | ||
| 11 | None | Water reaches 5th column | |
| 12 | None | Water reaches 3rd column | |
| 13 | Water reaches 8th column; Low Tide! | ||
| 14 | None | 500%/7 Plant Food | |
| 15 | None | Third flag | |
| 16 | None | Water reaches 6th column | |
| 17 | None | Water reaches 5th column | |
| 18 | None | Water reaches 2nd column | |
| 19 | None | Water reaches 4th column; 100% Plant Food | |
| 20 | None | Final flag |
Strategies
Strategy 1
- Created by Uselessguy
Ask for his permission before editing.
See Gallery for more details.
- Suggested plants
- Twin Sunflower
- Banana Launcher
- Cherry Bomb
- Snapdragon
- Lily Pad
- Infi-nut (extremely important)
- Tangle Kelp (or Ghost Pepper)
- Keep planting Twin Sunflowers until the ambush comes. Quickly use a Cherry Bomb and plant a Snapdragon to stop the zombies.
- Go on planting Twin Sunflowers. When seeing a Fisherman Zombie, quickly plant an Infi-nut and feed Plant Food on it. Pay attention to zombies, especially Surfer Zombie.
- Plant at least two Snapdragons to protect the Infi-nut's force field. Plant some Banana Launchers to stop the Deep Sea Gargantuars and Surfer Zombies. You need at least four.
- Plant another Infi-nut and feed Plant Food on it.
- When a Deep Sea Gargantuar comes, quickly fire three bananas as fast as you can before it throws its Imp Mermaid Zombie. It is best not to use Turbo Button.
- Quickly destroy the Surfer Zombies if they are about to kill your Infi-nut, or the Fishermen Zombies will destroy your defense!
- Cherry Bombs are very important in this level. Try to use it.
Strategy 2
Created by RaidingParty
This strategy allows you to complete the level without Plant Food, paid content, premium plants, or losing lawn mowers.
- Suggested plants
The goal is to get two columns of Twin Sunflowers up with a column of Magnifying Grass. This will provide enough sun to kill off the enemies. Ideally the Magnifying Grass will go in the fourth column with Twin Sunflowers on either side (the front end providing a buffer).
Quickly set up Twin Sunflowers while the first wave approaches while filling the nearby Lily Pads with Puff-shrooms. Kill the first Conehead with a Tangle Kelp just before it gets too close to the halfway area. This will trigger the first Low Tide. Kill off one side of the invading force with a Cherry Bomb and finish off or at least delay the other two rows with Puff-shroom spam until they can be dealt with using Magnifying Grass. Continue filling out your Twin Sunflower and Magnifying Grass columns, and delay on killing the zombies whenever possible.
As Surfers, Octos, and Fishermen appear, shoot them down with Magnifying Grass shots, but note that you can save on sun by using Kelp to kill them, especially the Fishermen/Octos. Plant extra Lily Pads and Sun-shrooms as well, they will provide even more sun, be used as a buffer, and can double as positions for Puff-shrooms. Use Cherry Bombs to counter Low Tide attacks and save on sun. Gargantuars can be killed quickly with Magnifying Grass shots and if they need to be delayed, use Lily Pads, Sun-shrooms, and Puff-shrooms to do so.
Strategy 3
- By Mathdude314
The strategy wins!
Somewhat similar to Strategy 2 but this one takes advantage of the Infi-nut in stopping Fisherman Zombies. Plants needed:
- Twin Sunflower
- Magnifying Grass
- Sun Bean
- Infi-nut
- Lily Pad
- Tangle Kelp
- Cherry Bomb or other instant to take out Gargantuars
Define the bottom left tile to be (1, 1). Plant Twin Sunflowers on the third column. Dig up the Lily Pads that preexist. Start planting Magnifying Grass on column two. As you progress, build Twin Sunflowers to the fifth column excluding (5, 3). Use Sun Bean to get extra sun. When the Fisherman Zombie comes, plant an Infi-nut at (5, 3) and use Plant Food on it. You will have 14 Twin Sunflowers at best. Use Cherry Bombs for large groups of zombies or for Gargantuars.
Gallery
")
")
")
")
")
")
")
")
")
")
")
Walkthrough

Big Wave Beach Day 30. Zombies 2 - Big Wave Beach Day 30
- *: Removed ~: Epic Quest