(→Klasy) |
(Navbox jest tutaj niepotrzebny) |
||
| (Nie pokazano 30 wersji utworzonych przez 2 użytkowników) | |||
| Linia 1: | Linia 1: | ||
| − | Rośliny to jedna ze stron w grze [[Plants vs. Zombies: Garden Warfare]]. Ich celem jest (zwykle) obrona ogrodu. Są cztery rośliny, którymi można kierować: [[ |
+ | '''Rośliny''' to jedna ze stron w grze [[Plants vs. Zombies: Garden Warfare]]. Ich celem jest (zwykle) obrona ogrodu. Są cztery rośliny, którymi można kierować: [[Groszkostrzelec (Plants vs. Zombies: Garden Warfare)|Groszkostrzelec]], [[Słonecznik (Plants vs. Zombies: Garden Warfare)|Słonecznik]], [[Pożeracz (Plants vs. Zombies: Garden Warfare)|Pożeracz]] i [[Kaktus (Plants vs. Zombies: Garden Warfare)|Kaktus]]. Każda z klas ma 7-8 dodatkowych wariantów, a ponadto istnieje też 15 roślin możliwych do posadzenia w [[Garden Ops]] i [[Gardens & Graveyards]]. |
==Klasy== |
==Klasy== |
||
| − | Każda z czterech istniejących klas ma różne umiejętności. |
+ | Każda z czterech istniejących klas ma różne umiejętności. |
{| border="1" cellpadding="1" cellspacing="1" class="article-table" style="width: 100%; height: 100%;" |
{| border="1" cellpadding="1" cellspacing="1" class="article-table" style="width: 100%; height: 100%;" |
||
|- |
|- |
||
! scope="row" style="text-align:center;"|Roślina |
! scope="row" style="text-align:center;"|Roślina |
||
! scope="col" style="text-align:center;"|Obrazek |
! scope="col" style="text-align:center;"|Obrazek |
||
| − | ! scope="col" style="text-align:center;"| |
+ | ! scope="col" style="text-align:center;"|Ulepszenia |
| + | ! scope="col" style="text-align:center;"|Zdrowie |
||
! scope="col" style="text-align:center;"|Warianty |
! scope="col" style="text-align:center;"|Warianty |
||
! scope="col" style="text-align:center;"|Podstawowa broń |
! scope="col" style="text-align:center;"|Podstawowa broń |
||
! scope="col" style="text-align:center;"|Zdolności |
! scope="col" style="text-align:center;"|Zdolności |
||
|- |
|- |
||
| − | ! scope="row" style="text-align:center;"|[[ |
+ | ! scope="row" style="text-align:center;"|[[Groszkostrzelec (Plants vs. Zombies: Garden Warfare)|Groszkostrzelec]] |
| − | | style="text-align:center;"| |
+ | | style="text-align:center;"|[[Plik:PeashooterGardenWarfare.png|100px]] |
| + | | style="text-align:center;"|[[Plik:PeashooterUlepszenia.png|200px]] |
||
| style="text-align:center;"|125 |
| style="text-align:center;"|125 |
||
| − | | style="text-align:center;"|[[ |
+ | | style="text-align:center;"|[[Ognisty Groszek]]<br />[[Lodowy Groszek]]<br />[[Toksyczny Groszek]]<br />[[Komandos Groszek]]<br />[[Agent Groszek]]<br />[[Groszek Prawa]]<br />[[Jagodostrzelec]]<br />[[Plazmowy Groszek]] |
| + | | style="text-align:center;"|[[Działo groszkowe]] |
||
| − | Pea]]<br>[[Law Pea]] |
||
| + | | style="text-align:center;"|[[Bomba fasolowa chili]]<br />[[Karabin Groszkowy]]<br />[[Hiper]]<br />[[Bomba fasolowa sombrero]]<br />[[Kartaczownica]]<br />[[Superskok]] |
||
| − | | style="text-align:center;"|[[Pea Cannon]] |
||
| − | | style="text-align:center;"|[[Chili Bean Bomb]]<br>[[Pea Gatling]]<br>[[Hyper]]<br>[[Sombrero Bean Bomb]]<br>[[Retro Gatling]]<br>[[Super Pea Jump]] |
||
|- |
|- |
||
| − | ! scope="row" style="text-align:center;"|[[ |
+ | ! scope="row" style="text-align:center;"|[[Słonecznik (Plants vs. Zombies: Garden Warfare)|Słonecznik]] |
| − | | style="text-align:center;"| |
+ | | style="text-align:center;"|[[Plik:SunflowerGardenWarfare.png|100px]] |
| + | | style="text-align:center;"|[[Plik:SunflowerUpgrade.png|200px]] |
||
| style="text-align:center;"|100 |
| style="text-align:center;"|100 |
||
| − | | style="text-align:center;"|[[ |
+ | | style="text-align:center;"|[[Mistyczny Słonecznik]]<br />[[Elektrosłonecznik]]<br />[[Ognisty Słonecznik]]<br />[[Mroczny Słonecznik]]<br />[[Metalowy Słonecznik]]<br />[[Słoneczny Faraon]]<br />[[Kosmiczny Słonecznik]] |
| − | | style="text-align:center;"|[[ |
+ | | style="text-align:center;"|[[Słoneczne Uderzenie]] |
| − | | style="text-align:center;"|[[ |
+ | | style="text-align:center;"|[[Promień uzdrawiający]]<br />[[Promień słońca]]<br />[[Uzdrawiający kwiat]]<br />[[Tęczowy promień uzdrawiający]]<br />[[Skumulowany promień słońca]]<br />[[Mroczny kwiat]] |
|- |
|- |
||
| − | ! scope="row" style="text-align:center;"|[[ |
+ | ! scope="row" style="text-align:center;"|[[Pożeracz (Plants vs. Zombies: Garden Warfare)|Pożeracz]] |
| − | | style="text-align:center;"| |
+ | | style="text-align:center;"|[[Plik:ChomperGW.png|100px]] |
| + | | style="text-align:center;"|[[Plik:ChomperUpgrade.png|200px]] |
||
| style="text-align:center;"|150 (175, jeśli ulepszony) |
| style="text-align:center;"|150 (175, jeśli ulepszony) |
||
| − | | style="text-align:center;"|[[Hot Rod |
+ | | style="text-align:center;"|[[Pożeracz Hot Rod]]<br />[[Toksyczny Pożeracz]]<br />[[Ognisty Pożeracz]]<br />[[Elektropożeracz]]<br />[[Hrabia Gryzula]]<br />[[Opancerzony Pożeracz]]<br />[[Dziki Pożeracz]]<br />[[Chester Pożeracz]] |
| − | | style="text-align:center;"|[[ |
+ | | style="text-align:center;"|[[Chaps!]] |
| − | | style="text-align:center;"|[[ |
+ | | style="text-align:center;"|[[Maź]]<br />[[Tunel]]<br />[[Kolczatka (Plants vs. Zombies: Garden Warfare)|Kolczatka]]<br />[[Kleista supermaź]]<br />[[Tunel biegowy]]<br />[[Najeżona kolczatka]] |
|- |
|- |
||
| − | ! scope="row" style="text-align:center;"|[[ |
+ | ! scope="row" style="text-align:center;"|[[Kaktus (Plants vs. Zombies: Garden Warfare)|Kaktus]] |
| − | | style="text-align:center;"| |
+ | | style="text-align:center;"|[[Plik:CactusPVZGardenWarfare.png|100px]] |
| + | | style="text-align:center;"|[[Plik:CactusUpgrade.png|200px]] |
||
| style="text-align:center;"|125 |
| style="text-align:center;"|125 |
||
| − | | style="text-align:center;"|[[ |
+ | | style="text-align:center;"|[[Zamaskowany Kaktus]]<br />[[Ognisty Kaktus]]<br />[[Lodowy Kaktus]]<br />[[Elektrokaktus]]<br />[[Kaktus z Przyszłości]]<br />[[Kaktus-Bandyta]]<br />[[Cytrusowy Kaktus]]<br />[[Nefrytowy Kaktus]] |
| − | | style="text-align:center;"|[[ |
+ | | style="text-align:center;"|[[Kolce]] |
| − | | style="text-align:center;"|[[ |
+ | | style="text-align:center;"|[[Mina ziemniaczana (Plants vs. Zombies: Garden Warfare)|Mina ziemniaczana]]<br />[[Czosnkowy dron]]<br />[[Orzechowa barykada]]<br />[[Mini-mina ziemniaczana]]<br />[[Karczochowy dron]]<br />[[Żelazna dziewica]] |
|- |
|- |
||
! scope="row" style="text-align:center;"|[[Crazy Dave]] |
! scope="row" style="text-align:center;"|[[Crazy Dave]] |
||
| − | | style="text-align:center;"| |
+ | | style="text-align:center;"|[[Plik:CrazyDaveGW.png|100px]] |
| + | | style="text-align:center;"|n/a |
||
| style="text-align:center;"|2000 |
| style="text-align:center;"|2000 |
||
| style="text-align:center;"|N/A |
| style="text-align:center;"|N/A |
||
| style="text-align:center;"|N/A |
| style="text-align:center;"|N/A |
||
| − | | style="text-align:center;"|[[Coconut Spotting Station]]<br>[[Twin Heal Flower]]<br>[[Cherry Strike]]<br>Resurrect |
+ | | style="text-align:center;"|[[Coconut Spotting Station]]<br />[[Twin Heal Flower]]<br />[[Cherry Strike]]<br />Resurrect |
|} |
|} |
||
==Warianty== |
==Warianty== |
||
| − | Każda z klas ma |
+ | Każda z klas ma 7-8 wariantów. Różne warianty różnią się wyglądem, podstawowym atakiem, czasami niektórymi zdolnościami. |
| − | ===[[ |
+ | ===[[Groszkostrzelec (Plants vs. Zombies: Garden Warfare)|Groszkostrzelec]]=== |
| + | {| class="article-table" border="1" cellpadding="0" cellspacing="0" width="100%" |
||
| − | (wstawić tabelę) |
||
| + | ! scope="row" style="text-align:center;"|Roślina |
||
| + | ! scope="col" style="text-align:center;"|Obraz |
||
| + | ! scope="col" style="text-align:center;"|Ulepszenia |
||
| + | ! scope="col" style="text-align:center;"|Punkty zdrowia |
||
| + | ! scope="col" style="text-align:center;"|Broń |
||
| + | ! scope="col" style="text-align:center;"|Zadawane obrażenia |
||
| + | |- |
||
| + | |colspan="6"| |
||
| + | |- |
||
| + | | bgcolor="green" colspan="6" style="text-align:center;"| <font color="white">'''Warianty Groszkostrzelca'''</font> |
||
| + | |- |
||
| + | |colspan="6"| |
||
| + | |- |
||
| + | ! scope="row" style="text-align:center;"|[[Ognisty Groszek]] |
||
| + | | style="text-align:center;"|[[Plik:Firepea.jpg|100px]] |
||
| + | | style="text-align:center;"|[[Plik:Fire Pea Abilitis.png|200px]] |
||
| + | | style="text-align:center;"|125 |
||
| + | | style="text-align:center;"|Fire Pea Cannon |
||
| + | | style="text-align:center;"|'''15-19''' (standardowe obrażenia)<br />'''21-26''' (obrażenia krytyczne)<br />'''10''' (rozprysk)<br />'''5''' (podpalenie; trwa kilka sekund) |
||
| + | |- |
||
| + | ! scope="row" style="text-align:center;"|[[Lodowy Groszek]] |
||
| + | | style="text-align:center;"|[[Plik:IcePeaGW.png|100px]] |
||
| + | | style="text-align:center;"|[[Plik:IcePeaUpgrade.png|200px]] |
||
| + | | style="text-align:center;"|125 |
||
| + | | style="text-align:center;"|Ice Pea Cannon |
||
| + | | style="text-align:center;"|'''15-19''' (standardowe obrażenia)<br />'''21-25''' (obrażenia krytyczne)<br />'''10''' (rozprysk) |
||
| + | |- |
||
| + | ! scope="row" style="text-align:center;"|[[Toksyczny Groszek]] |
||
| + | | style="text-align:center;"|[[Plik:ToxicPea.jpg|100px]] |
||
| + | | style="text-align:center;"|[[Plik:ToxicPeaUpgrade.png|200px]] |
||
| + | | style="text-align:center;"|125 |
||
| + | | style="text-align:center;"|Toxic Pea Cannon |
||
| + | | style="text-align:center;"|'''17-32''' (obrażenia krytyczne)<br />'''17-26''' (standardowe obrażenia)<br />'''10''' (rozprysk)<br />'''2''' (radioaktywne obrażenia przez kilka sekund) |
||
| + | |- |
||
| + | ! scope="row" style="text-align:center;"|[[Komandos Groszek]] |
||
| + | | style="text-align:center;"|[[Plik:Commandopea.jpg|100px]] |
||
| + | | style="text-align:center;"|[[Plik:CommandoPeaUpgrade.png|200px]] |
||
| + | | style="text-align:center;"|125 |
||
| + | | style="text-align:center;"|Full-Auto Pea |
||
| + | | style="text-align:center;"|'''6-12''' (standardowe obrażenia)<br />'''6-13''' (obrażenia krytyczne) |
||
| + | |- |
||
| + | ! scope="row" style="text-align:center;"|[[Agent Groszek]] |
||
| + | | style="text-align:center;"|[[Plik:AgentPea.jpg|100px]] |
||
| + | | style="text-align:center;"|[[Plik:AgentPeaUpgrade.png|200px]] |
||
| + | | style="text-align:center;"|100 |
||
| + | | style="text-align:center;"|Pea Silencer |
||
| + | | style="text-align:center;"|'''10-16''' (standardowe obrażenia)<br />'''20-33''' (obrażenia krytyczne) |
||
| + | |- |
||
| + | ! scope="row" style="text-align:center;"|[[Groszek Prawa]] |
||
| + | | style="text-align:center;"|[[Plik:Law Pea.jpg|100px]] |
||
| + | | style="text-align:center;"|[[Plik:LawPeaUpgrade.png|200px]] |
||
| + | | style="text-align:center;"|125 |
||
| + | | style="text-align:center;"|Six Shooter |
||
| + | | style="text-align:center;"|'''13-22''' (standardowe obrażenia)<br />'''15-26''' (obrażenia krytyczne) |
||
| + | |- |
||
| + | ! scope="row" style="text-align:center;"|[[Jagodostrzelec]] |
||
| + | | style="text-align:center;"|[[Plik:Berry-Shooter.png|100px]] |
||
| + | | style="text-align:center;"|[[Plik:BerryShooterUpgrade.png|200px]] |
||
| + | | style="text-align:center;"|125 |
||
| + | | style="text-align:center;"|Berry Blast |
||
| + | | style="text-align:center;"|'''20-35''' (obrażenia krytyczne)<br />'''1-15''' (rozprysk) |
||
| + | |- |
||
| + | ! scope="row" style="text-align:center;"|[[Plazmowy Groszek]] |
||
| + | | style="text-align:center;"|[[Plik:Plasma Pea.png|100px]] |
||
| + | | style="text-align:center;"|[[Plik:PlasmaPeaUpgrade.png|200px]] |
||
| + | | style="text-align:center;"|125 |
||
| + | | style="text-align:center;"|Plasmic Disruptor |
||
| + | | style="text-align:center;"|'''20-70''' (obrażenia standardowe/po naładowaniu)<br />'''10-30''' (rozprysk/po naładowaniu) |
||
| + | |} |
||
| − | ===[[ |
+ | ===[[Słonecznik (Plants vs. Zombies: Garden Warfare)|Słonecznik]]=== |
| + | {| class="article-table" border="1" cellpadding="0" cellspacing="0" width="100%" |
||
| − | (wstawić tabelę) |
||
| + | ! scope="row" style="text-align:center;"|Roślina |
||
| + | ! scope="col" style="text-align:center;"|Obraz |
||
| + | ! scope="col" style="text-align:center;"|Ulepszenia |
||
| + | ! scope="col" style="text-align:center;"|Punkty zdrowia |
||
| + | ! scope="col" style="text-align:center;"|Broń |
||
| + | ! scope="col" style="text-align:center;"|Zadawane obrażenia |
||
| + | |- |
||
| + | |colspan="6"| |
||
| + | |- |
||
| + | | bgcolor="orange" colspan="6" style="text-align:center;"| <font color="white">'''Warianty Słonecznika'''</font> |
||
| + | |- |
||
| + | |colspan="6"| |
||
| + | |- |
||
| + | ! scope="row" style="text-align:center;"|[[Mistyczny Słonecznik]] |
||
| + | | style="text-align:center;"|[[Plik:Mystic SunflowerGW.png|100px]] |
||
| + | | style="text-align:center;"|[[Plik:MysticFlowerUpgrade.png|200px]] |
||
| + | | style="text-align:center;"|100 |
||
| + | | style="text-align:center;"|Mysterious Energy |
||
| + | | style="text-align:center;"|'''11-40''' (standardowe obrażenia/po naładowaniu)<br />'''13-80''' (obrażenia krytyczne/po naładowaniu) |
||
| + | |- |
||
| + | ! scope="row" style="text-align:center;"|[[Elektrosłonecznik]] |
||
| + | | style="text-align:center;"|[[Plik:PowerFlowerGW.png|100px]] |
||
| + | | style="text-align:center;"|[[Plik:PowerFlowerUpgrade.png|200px]] |
||
| + | | style="text-align:center;"|100 |
||
| + | | style="text-align:center;"|Power Pulse |
||
| + | | style="text-align:center;"|'''6-8''' (standardowe obrażenia)<br />'''7-9''' (obrażenia krytyczne)<br />'''5-7''' (porażenie prądem) |
||
| + | |- |
||
| + | ! scope="row" style="text-align:center;"|[[Ognisty Słonecznik]] |
||
| + | | style="text-align:center;"|[[Plik:FireFlowerGW.png|100px]] |
||
| + | | style="text-align:center;"|[[Plik:FireFlowerUpgrade.png|200px]] |
||
| + | | style="text-align:center;"|100 |
||
| + | | style="text-align:center;"|Flame Pulse |
||
| + | | style="text-align:center;"|'''4-7''' (standardowe obrażenia)<br />'''5-9''' (obrażenia krytyczne)<br />'''5''' (podpalenie na kilka sekund) |
||
| + | |- |
||
| + | ! scope="row" style="text-align:center;"|[[Mroczny Słonecznik]] |
||
| + | | style="text-align:center;"|[[Plik:ShadowFlowerGW.jpg|100px]] |
||
| + | | style="text-align:center;"|[[Plik:ShadowFlowerUpgrade.png|200px]] |
||
| + | | style="text-align:center;"|100 |
||
| + | | style="text-align:center;"|Dark Energy |
||
| + | | style="text-align:center;"|'''7-8''' (standardowe obrażenia)<br />'''9-10''' (obrażenia krytyczne) |
||
| + | |- |
||
| + | ! scope="row" style="text-align:center;"|[[Metalowy Słonecznik]] |
||
| + | | style="text-align:center;"|[[Plik:MetalPetalGW.png|100px]] |
||
| + | | style="text-align:center;"|[[Plik:MetalPetalUpgrade.png|200px]] |
||
| + | | style="text-align:center;"|150 |
||
| + | | style="text-align:center;"|Metal Blast |
||
| + | | style="text-align:center;"|'''4-7''' (standardowe obrażenia)<br />'''6-9''' (obrażenia krytyczne) |
||
| + | |- |
||
| + | ! scope="row" style="text-align:center;"|[[Słoneczny Faraon]] |
||
| + | | style="text-align:center;"|[[Plik:PharaohFlower.png|100px]] |
||
| + | | style="text-align:center;"|[[Plik:SunPharaohUpgrade.png|200px]] |
||
| + | | style="text-align:center;"|100 |
||
| + | | style="text-align:center;"|Cobra Laser |
||
| + | | style="text-align:center;"|'''10-13''' (standardowe obrażenia)<br />'''12-15''' (obrażenia krytyczne) |
||
| + | |- |
||
| + | ! scope="row" style="text-align:center;"|[[Kosmiczny Słonecznik]] |
||
| + | | style="text-align:center;"|[[Plik:AlienFlower.png|100px]] |
||
| + | | style="text-align:center;"|[[Plik:AlienFlowerUpgrade.png|200px]] |
||
| + | | style="text-align:center;"|100 |
||
| + | | style="text-align:center;"|Spore Mist |
||
| + | | style="text-align:center;"|'''10-14''' (standardowe obrażenia)<br />'''15-18''' (obrażenia krytyczne)<br />'''3''' (obrażenia od chmury) |
||
| + | |} |
||
| − | ===[[ |
+ | ===[[Pożeracz (Plants vs. Zombies: Garden Warfare)|Pożeracz]]=== |
| + | {| class="article-table" border="1" cellpadding="0" cellspacing="0" width="100%" |
||
| − | (wstawić tabelę) |
||
| + | ! scope="row" style="text-align:center;"|Roślina |
||
| + | ! scope="col" style="text-align:center;"|Obraz |
||
| + | ! scope="col" style="text-align:center;"|Ulepszenia |
||
| + | ! scope="col" style="text-align:center;"|Punkty zdrowia |
||
| + | ! scope="col" style="text-align:center;"|Broń |
||
| + | ! scope="col" style="text-align:center;"|Zadawane obrażenia |
||
| + | |- |
||
| + | |colspan="6"| |
||
| + | |- |
||
| + | | bgcolor="purple" colspan="6" style="text-align:center;"| <font color="white">'''Warianty Pożeracza'''</font> |
||
| + | |- |
||
| + | |colspan="6"| |
||
| + | |- |
||
| + | ! scope="row" style="text-align:center;"|[[Pożeracz Hod Rod]] |
||
| + | | style="text-align:center;"|[[Plik:HotRodChomper.jpg|100px]] |
||
| + | | style="text-align:center;"|[[Plik:HotRodChomperUpgrade.png|200px]] |
||
| + | | style="text-align:center;"|100 (125 ulepszony) |
||
| + | | style="text-align:center;"|Hot Rod Chomp |
||
| + | | style="text-align:center;"|'''25''' (ugryzienie)<br />'''2000''' (po użyciu umiejętności "burrow" lub zajście od tyłu) |
||
| + | |- |
||
| + | ! scope="row" style="text-align:center;"|[[Toksyczny Pożeracz]] |
||
| + | | style="text-align:center;"|[[Plik:ToxicChomper.jpg|100px]] |
||
| + | | style="text-align:center;"|[[Plik:ToxicChomperUpgrade.png|200px]] |
||
| + | | style="text-align:center;"|150 (175 ulepszony) |
||
| + | | style="text-align:center;"|Toxic Spray |
||
| + | | style="text-align:center;"|'''6-8''' (toksyczny spraj)<br />'''2000''' (po użyciu umiejętności "burrow" lub zajście od tyłu)<br />'''2-5''' (radioaktywność przez kilka sekund) |
||
| + | |- |
||
| + | ! scope="row" style="text-align:center;"|[[Ognisty Pożeracz]] |
||
| + | | style="text-align:center;"|[[Plik:FireChomper.jpg|100px]] |
||
| + | | style="text-align:center;"|[[Plik:FireChomperUpgrade.png|200px]] |
||
| + | | style="text-align:center;"|150 (175 ulepszony) |
||
| + | | style="text-align:center;"|Flame Spray |
||
| + | | style="text-align:center;"|'''8-10''' (ognisty spraj)<br />'''2000''' (po użyciu umiejętności "burrow" lub zajście od tyłu)<br />'''5''' (podpalenie na kilka sekund) |
||
| + | |- |
||
| + | ! scope="row" style="text-align:center;"|[[Elektropożeracz]] |
||
| + | | style="text-align:center;"|[[Plik:Power chomp.png|100px]] |
||
| + | | style="text-align:center;"|[[Plik:PowerChomperUpgrade.png|200px]] |
||
| + | | style="text-align:center;"|150 (175 ulepszony) |
||
| + | | style="text-align:center;"|Electric Spray |
||
| + | | style="text-align:center;"|'''10''' (elektryczny spraj)<br />'''2000''' (po użyciu umiejętności "burrow" lub zajście od tyłu)<br />'''2''' (porażenie prądem) |
||
| + | |- |
||
| + | ! scope="row" style="text-align:center;"|[[Hrabia Gryzula]] |
||
| + | | style="text-align:center;"|[[Plik:CountChompula.jpg|100px]] |
||
| + | | style="text-align:center;"|[[Plik:CountChompulaUpgrade.png|200px]] |
||
| + | | style="text-align:center;"|125 (150 ulepszony) |
||
| + | | style="text-align:center;"|Vampiric Chomp |
||
| + | | style="text-align:center;"|'''25''' (ugryzienie)<br />'''2000''' (po użyciu umiejętności "burrow" lub zajście od tyłu) |
||
| + | |- |
||
| + | ! scope="row" style="text-align:center;"|[[Opancerzony Pożeracz]] |
||
| + | | style="text-align:center;"|[[Plik:GGG.jpg|100px]] |
||
| + | | style="text-align:center;"|[[Plik:ArmorChomperUpgrade.png|200px]] |
||
| + | | style="text-align:center;"|200 (225 ulepszony) |
||
| + | | style="text-align:center;"|Metal Chomp |
||
| + | | style="text-align:center;"|'''50-60''' (ugryzienie)<br />'''2000''' (po użyciu umiejętności "burrow" lub zajście od tyłu) |
||
| + | |- |
||
| + | ! scope="row" style="text-align:center;"|[[Chester Pożeracz]] |
||
| + | | style="text-align:center;"|[[Plik:ChestaChomperBP.PNG|100px]] |
||
| + | | style="text-align:center;"|[[Plik:ChesterChomperUpgrade.png|200px]] |
||
| + | | style="text-align:center;"|125 (150 ulepszony) |
||
| + | | style="text-align:center;"|Cheesy Chomp |
||
| + | | style="text-align:center;"|'''25''' (ugryzienie)<br />'''2000''' (po użyciu umiejętności "burrow" lub zajście od tyłu) |
||
| + | |- |
||
| + | ! scope="row" style="text-align:center;"|[[Dziki Pożeracz]] |
||
| + | | style="text-align:center;"|[[Plik:ChompThing.png|100px]] |
||
| + | | style="text-align:center;"|[[Plik:ChompThingUpgrade.png|200px]] |
||
| + | | style="text-align:center;"|100 (125 ulepszony) |
||
| + | | style="text-align:center;"|Swamp Spray |
||
| + | | style="text-align:center;"|'''5-12''' (bagnisty spraj)<br />'''2000''' (po użyciu umiejętności "burrow" lub zajście od tyłu) |
||
| + | |} |
||
| − | ===[[ |
+ | ===[[Kaktus (Plants vs. Zombies: Garden Warfare)|Kaktus]]=== |
| + | {| class="article-table" border="1" cellpadding="0" cellspacing="0" width="100%" |
||
| − | (wstawić tabelę) |
||
| + | ! scope="row" style="text-align:center;"|Roślina |
||
| + | ! scope="col" style="text-align:center;"|Obraz |
||
| + | ! scope="col" style="text-align:center;"|Ulepszenia |
||
| + | ! scope="col" style="text-align:center;"|Punkty zdrowia |
||
| + | ! scope="col" style="text-align:center;"|Broń |
||
| + | ! scope="col" style="text-align:center;"|Zadawane obrażenia |
||
| + | |- |
||
| + | |colspan="6"| |
||
| + | |- |
||
| + | | bgcolor="firebrick" colspan="6" style="text-align:center;"| <font color="white">'''Warianty Kaktusa'''</font> |
||
| + | |- |
||
| + | |colspan="6"| |
||
| + | |- |
||
| + | ! scope="row" style="text-align:center;"|[[Zamaskowany Kaktus]] |
||
| + | | style="text-align:center;"|[[Plik:CamoCactus.jpg|100px]] |
||
| + | | style="text-align:center;"|[[Plik:CamoCacutsUpgrade.png|200px]] |
||
| + | | style="text-align:center;"|125 |
||
| + | | style="text-align:center;"|Camo Shot |
||
| + | | style="text-align:center;"|'''30-33''' (standardowe obrażenia)<br />'''60-66''' (obrażenia krytyczne) |
||
| + | |- |
||
| + | ! scope="row" style="text-align:center;"|[[Ognisty Kaktus]] |
||
| + | | style="text-align:center;"|[[Plik:FireCactus.jpg|100px]] |
||
| + | | style="text-align:center;"|[[Plik:FireCactusUpgrade.png|200px]] |
||
| + | | style="text-align:center;"|125 |
||
| + | | style="text-align:center;"|Fire Needle |
||
| + | | style="text-align:center;"|'''16-22''' (standardowe obrażenia)<br />'''23-30''' (obrażenia krytyczne)<br />'''5''' (podpalenie na kilka sekund) |
||
| + | |- |
||
| + | ! scope="row" style="text-align:center;"|[[Lodowy Kaktus]] |
||
| + | | style="text-align:center;"|[[Plik:IceCactus.jpg|100px]] |
||
| + | | style="text-align:center;"|[[Plik:IceCactusUpgrade.png|200px]] |
||
| + | | style="text-align:center;"|125 |
||
| + | | style="text-align:center;"|Ice Needle |
||
| + | | style="text-align:center;"|'''15-22''' (standardowe obrażenia)<br />'''16-26''' (obrażenia krytyczne) |
||
| + | |- |
||
| + | ! scope="row" style="text-align:center;"|[[Elekrokaktus]] |
||
| + | | style="text-align:center;"|[[Plik:PowerCactus.jpg|100px]] |
||
| + | | style="text-align:center;"|[[Plik:PowerCactusUpgrade.png|200px]] |
||
| + | | style="text-align:center;"|125 |
||
| + | | style="text-align:center;"|Electric Needle |
||
| + | | style="text-align:center;"|'''15-22''' (standardowe obrażenia)<br />'''18-27''' (obrażenia krytyczne)<br />'''3-7''' (porażenie prądem) |
||
| + | |- |
||
| + | ! scope="row" style="text-align:center;"|[[Kaktus z Przyszłości]] |
||
| + | | style="text-align:center;"|[[Plik:FutureCactus.jpg|100px]] |
||
| + | | style="text-align:center;"|[[Plik:FutureCactusUpgrade.png|200px]] |
||
| + | | style="text-align:center;"|125 |
||
| + | | style="text-align:center;"|Future Shot |
||
| + | | style="text-align:center;"|'''10-94''' (standardowe obrażenia/po naładowaniu)<br />'''20-107''' (obrażenia krytyczne/po naładowaniu)<br />'''30''' (rozprysk tylko przy w pełni naładowanym) |
||
| + | |- |
||
| + | ! scope="row" style="text-align:center;"|[[Kaktus-Bandyta]] |
||
| + | | style="text-align:center;"|[[Plik:BanditCactus.jpg|100px]] |
||
| + | | style="text-align:center;"|[[Plik:BanditCactusUpgrade.png|200px]] |
||
| + | | style="text-align:center;"|125 |
||
| + | | style="text-align:center;"|Gatling Needle |
||
| + | | style="text-align:center;"|'''9''' (standardowe obrażenia)<br />'''10-11''' (obrażenia krytyczne) |
||
| + | |- |
||
| + | ! scope="row" style="text-align:center;"|[[Cytrusowy Kaktus]] |
||
| + | | style="text-align:center;"|[[Plik:CitrusCactust.png|150px]] |
||
| + | | style="text-align:center;"|[[Plik:CitrusCactusUpgrade.png|200px]] |
||
| + | | style="text-align:center;"|125 |
||
| + | | style="text-align:center;"|Orange Burst |
||
| + | | style="text-align:center;"|'''13-17''' (standardowe obrażenia/obrażenia krytyczne)<br />'''5-15''' (rozprysk) |
||
| + | |- |
||
| + | ! scope="row" style="text-align:center;"|[[Nefrytowy Kaktus]] |
||
| + | | style="text-align:center;"|[[Plik:JadeCactus.png|150px]] |
||
| + | | style="text-align:center;"|[[Plik:JadeCactusUpgrade.png|200px]] |
||
| + | | style="text-align:center;"|150 |
||
| + | | style="text-align:center;"|Shatter Shot |
||
| + | | style="text-align:center;"|'''11-26''' (standardowe obrażenia)<br />'''13-38''' (obrażenia krytyczne)<br />'''15''' (rozprysk) |
||
| + | |} |
||
| + | ==Zdolności z użyciem roślin== |
||
| − | ==Rośliny-zdolności== |
||
| + | {| class="article-table" border="1" cellpadding="0" cellspacing="0" width="100%" |
||
| − | Te rośliny to zdolności każdej z klas. |
||
| + | ! scope="row" style="text-align:center;"|Roślina |
||
| − | (wstawić tabelę) |
||
| + | ! scope="col" style="text-align:center;"|Obraz |
||
| + | |- |
||
| + | |colspan="2"| |
||
| + | |- |
||
| + | | bgcolor="green" colspan="2" style="text-align:center;"| <font color="white">'''Groszkostrzelec'''</font> |
||
| + | |- |
||
| + | |colspan="2"| |
||
| + | |- |
||
| + | ! scope="row" style="text-align:center;"|[[Bomba fasolowa chili]] |
||
| + | | style="text-align:center;"|[[Plik:Chilibeanbomb.PNG|100px]] |
||
| + | |- |
||
| + | ! scope="row" style="text-align:center;"|[[Bomba fasolowa sombrero]] |
||
| + | | style="text-align:center;"|[[Plik:Sombrerobeanbomb.PNG|100px]] |
||
| + | |- |
||
| + | |colspan="2"| |
||
| + | |- |
||
| + | | bgcolor="orange" colspan="2" style="text-align:center;"| <font color="white">'''Słonecznik'''</font> |
||
| + | |- |
||
| + | |colspan="2"| |
||
| + | |- |
||
| + | ! scope="row" style="text-align:center;"|[[Uzdrawiający kwiat]] |
||
| + | | style="text-align:center;"|[[Plik:Healflower.PNG|100px]] |
||
| + | |- |
||
| + | ! scope="row" style="text-align:center;"|[[Mroczny kwiat]] |
||
| + | | style="text-align:center;"|[[Plik:Darkflower.PNG|100px]] |
||
| + | |- |
||
| + | |colspan="2"| |
||
| + | |- |
||
| + | | bgcolor="purple" colspan="2" style="text-align:center;"| <font color="white">'''Pożeracz'''</font> |
||
| + | |- |
||
| + | |colspan="2"| |
||
| + | |- |
||
| + | ! scope="row" style="text-align:center;"|[[Kolczatka (Plants vs. Zombies: Garden Warfare)|Kolczatka]] |
||
| + | | style="text-align:center;"|[[Plik:SpikeweedGW.PNG|100px]] |
||
| + | |- |
||
| + | ! scope="row" style="text-align:center;"|[[Najeżona kolczatka]] |
||
| + | | style="text-align:center;"|[[Plik:Spikyspikeweed.PNG|100px]] |
||
| + | |- |
||
| + | ! scope="row" style="text-align:center;"|[[Chesterweed]] |
||
| + | | style="text-align:center;"|[[Plik:Chesterweed.png|100px]] |
||
| + | |- |
||
| + | |colspan="2"| |
||
| + | |- |
||
| + | | bgcolor="firebrick" colspan="2" style="text-align:center;"| <font color="white">'''Kaktus'''</font> |
||
| + | |- |
||
| + | |colspan="2"| |
||
| + | |- |
||
| + | ! scope="row" style="text-align:center;"|[[Mina ziemniaczana (Plants vs. Zombies: Garden Warfare|Mina ziemniaczana]] |
||
| + | | style="text-align:center;"|[[Plik:PotatomineGW.PNG|100px]] |
||
| + | |- |
||
| + | ! scope="row" style="text-align:center;"|[[Czosnkowy dron]] |
||
| + | | style="text-align:center;"|[[Plik:Garlicdrone.PNG|100px]] |
||
| + | |- |
||
| + | ! scope="row" style="text-align:center;"|[[Orzechowa barykada]] |
||
| + | | style="text-align:center;"|[[Plik:Tallnutbattlement.PNG|100px]] |
||
| + | |- |
||
| + | ! scope="row" style="text-align:center;"|[[Mini-mina ziemniaczana]] |
||
| + | | style="text-align:center;"|[[Plik:Nuggetmine.PNG|100px]] |
||
| + | |- |
||
| + | ! scope="row" style="text-align:center;"|[[Karczochowy dron]] |
||
| + | | style="text-align:center;"|[[Plik:Artichokedrone.PNG|100px]] |
||
| + | |- |
||
| + | ! scope="row" style="text-align:center;"|[[Żelazna dziewica]] |
||
| + | | style="text-align:center;"|[[Plik:Ironmaiden.PNG|100px]] |
||
| + | |} |
||
==Rośliny doniczkowe== |
==Rośliny doniczkowe== |
||
| − | Jest |
+ | Jest 15 roślin "doniczkowych". Mogą być one sadzone w pustych doniczkach, dzięki czemu mogą asystować w walce z hordami zombie. Raz posadzona roślina nie może być odzyskana (aczkolwiek można mieć wiele sztuk jednej rośliny). Można je zdobyć poprzez kupowanie paczek w [[Sklep z naklejkami|sklepie z naklejkami]]. |
| − | Roślin tych można użyć jedynie w [[Garden Ops]] |
+ | Roślin tych można użyć jedynie w [[Garden Ops]], [[Gardens & Graveyards]] i [[Taco Bandits]] |
| − | (wstawić tabelę) |
||
| + | {| class="article-table" border="1" cellpadding="0" cellspacing="0" width="100%" |
||
| − | ==Inne rośliny== |
||
| + | ! scope="row" style="text-align:center;"|Roślina |
||
| − | (wstawić tabelę) |
||
| + | ! scope="col" style="text-align:center;"|Obraz |
||
| + | ! scope="col" style="text-align:center;"|Zdrowie |
||
| + | |- |
||
| + | ! scope="row" style="text-align:center;"|[[Działo groszkowe (Roślina)|Działo groszkowe]] |
||
| + | | style="text-align:center;"|[[Plik:PeaRepeaterCard.png|100px]] |
||
| + | | style="text-align:center;"|36 |
||
| + | |- |
||
| + | ! scope="row" style="text-align:center;"|[[Pea Repeater]] |
||
| + | | style="text-align:center;"|[[Plik:PeaCannonCard.png|100px]] |
||
| + | | style="text-align:center;"|80 |
||
| + | |- |
||
| + | ! scope="row" style="text-align:center;"|[[Karabin groszkowy (Roślina)|Karabin groszkowy]] |
||
| + | | style="text-align:center;"|[[Plik:GatlingPeaCard.png|100px]] |
||
| + | | style="text-align:center;"|100 |
||
| + | |- |
||
| + | ! scope="row" style="text-align:center;"|[[Bonk Choy (Plants vs. Zombies: Garden Warfare)|Bonk Choy]] |
||
| + | | style="text-align:center;"|[[Plik:BonkChoyCard.png|100px]] |
||
| + | | style="text-align:center;"|100 |
||
| + | |- |
||
| + | ! scope="row" style="text-align:center;"|[[Bojaźliwy grzyb (Plants vs. Zombies: Garden Warfare)|Bojaźliwy grzyb]] |
||
| + | | style="text-align:center;"|[[Plik:Scadery-shroomCard.png|100px]] |
||
| + | | style="text-align:center;"|70 |
||
| + | |- |
||
| + | ! scope="row" style="text-align:center;"|[[Uzdrawiający kwiat (Roślina)|Uzdrawiający kwiat]] |
||
| + | | style="text-align:center;"|[[Plik:HealFlowerCard.png|100px]] |
||
| + | | style="text-align:center;"|61 |
||
| + | |- |
||
| + | ! scope="row" style="text-align:center;"|[[Grzyb rozpylacz (Plants vs. Zombies: Garden Warfare)|Grzyb rozpylacz]] |
||
| + | | style="text-align:center;"|[[Plik:Fume-shroomCard.png|100px]] |
||
| + | | style="text-align:center;"|75 |
||
| + | |- |
||
| + | ! scope="row" style="text-align:center;"|[[Maziowy grzyb]] |
||
| + | | style="text-align:center;"|[[Plik:Goop-shroomCard.png|100px]] |
||
| + | | style="text-align:center;"|100 |
||
| + | |- |
||
| + | ! scope="row" style="text-align:center;"|[[Smok]] |
||
| + | | style="text-align:center;"|[[Plik:SnapDragonCard.png|100px]] |
||
| + | | style="text-align:center;"|95 |
||
| + | |- |
||
| + | ! scope="row" style="text-align:center;"|[[Lodowy grzyb]] |
||
| + | | style="text-align:center;"|[[Plik:Ice-shroomCard.png|100px]] |
||
| + | | style="text-align:center;"|50 |
||
| + | |- |
||
| + | ! scope="row" style="text-align:center;"|[[Grzyb zagłady (Plants vs. Zombies: Garden Warfare)|Grzyb zagłady]] |
||
| + | | style="text-align:center;"|[[Plik:Doom-shroomCard.png|100px]] |
||
| + | | style="text-align:center;"|100 |
||
| + | |- |
||
| + | ! scope="row" style="text-align:center;"|[[Ice Peashooter]] |
||
| + | | style="text-align:center;"|[[Plik:IcePeashooterCard.png|100px]] |
||
| + | | style="text-align:center;"|42 |
||
| + | |- |
||
| + | ! scope="row" style="text-align:center;"|[[Fire Peashooter (Plants vs. Zombies: Garden Warfare)|Fire Peashooter]] |
||
| + | | style="text-align:center;"|[[Plik:FirePeashooterCard.jpg|100px]] |
||
| + | | style="text-align:center;"|70 |
||
| + | |- |
||
| + | ! scope="row" style="text-align:center;"|[[Bambus (Plants vs. Zombies: Garden Warfare)|Bambus]] |
||
| + | | style="text-align:center;"|[[Plik:BambooShootCard.png|100px]] |
||
| + | | style="text-align:center;"|50 |
||
| + | |- |
||
| + | ! scope="row" style="text-align:center;"|[[Laser Bean (Plants vs. Zombies: Garden Warfare)|Laser Bean]] |
||
| + | | style="text-align:center;"|[[Plik:LaserBeanCard.png|100px]] |
||
| + | | style="text-align:center;"|100 |
||
| + | |} |
||
| + | |||
| + | ==Pozostałe rośliny== |
||
| + | {| class="article-table" border="1" cellpadding="0" cellspacing="0" width="100%" |
||
| + | ! scope="row" style="text-align:center;"|Roślina |
||
| + | ! scope="col" style="text-align:center;"|Obraz |
||
| + | |- |
||
| + | ! scope="row" style="text-align:center;"|[[Twin Heal Flower]] |
||
| + | | style="text-align:center;"|[[Plik:TwinHealFlower.png|100px]] |
||
| + | |- |
||
| + | ! scope="row" style="text-align:center;"|[[Cherry Strike]] |
||
| + | | style="text-align:center;"|[[Plik:CherryStrike.png|100px]] |
||
| + | |- |
||
| + | ! scope="row" style="text-align:center;"|[[Coconut Spotting Station]] |
||
| + | | style="text-align:center;"|[[Plik:CoconutSpottingStation.png|100px]] |
||
| + | |- |
||
| + | ! scope="row" style="text-align:center;"|[[Revive Rainbow]] |
||
| + | | style="text-align:center;"|[[Plik:ReviveRainbow.png|100px]] |
||
| + | |- |
||
| + | ! scope="row" style="text-align:center;"|[[Tallnut Cannon]] |
||
| + | | style="text-align:center;"|[[Plik:Tallnut Cannon.png|100px]] |
||
| + | |- |
||
| + | ! scope="row" style="text-align:center;"|[[Tallnut]] |
||
| + | | style="text-align:center;"|[[Plik:Tallnut.png|100px]] |
||
| + | |- |
||
| + | ! scope="row" style="text-align:center;"|[[Corn Mortar]] |
||
| + | | style="text-align:center;"|[[Plik:CornMortar.png|100px]] |
||
| + | |- |
||
| + | ! scope="row" style="text-align:center;"|[[Tactical Cuke]] |
||
| + | | style="text-align:center;"|[[Plik:TacticalCuke.png|100px]] |
||
| + | |- |
||
| + | ! scope="row" style="text-align:center;"|[[Flax Cannon]] |
||
| + | | style="text-align:center;"|[[Plik:FlaxCannon.png|100px]] |
||
| + | |- |
||
| + | ! scope="row" style="text-align:center;"|[[Mega Flower]] |
||
| + | | style="text-align:center;"|[[Plik:MegaFlower.png|100px]] |
||
| + | |} |
||
| + | [[en:Plants_(PvZ:_GW)]] |
||
| + | [[Kategoria:Plants vs. Zombies: Garden Warfare]] |
||
| + | [[Kategoria:Rośliny]] |
||
| + | [[Kategoria:Rośliny z Plants vs. Zombies: Garden Warfare]] |
||
Aktualna wersja na dzień 20:56, 2 sie 2018
Rośliny to jedna ze stron w grze Plants vs. Zombies: Garden Warfare. Ich celem jest (zwykle) obrona ogrodu. Są cztery rośliny, którymi można kierować: Groszkostrzelec, Słonecznik, Pożeracz i Kaktus. Każda z klas ma 7-8 dodatkowych wariantów, a ponadto istnieje też 15 roślin możliwych do posadzenia w Garden Ops i Gardens & Graveyards.
Klasy
Każda z czterech istniejących klas ma różne umiejętności.
| Roślina | Obrazek | Ulepszenia | Zdrowie | Warianty | Podstawowa broń | Zdolności |
|---|---|---|---|---|---|---|
| Groszkostrzelec | 
|
|
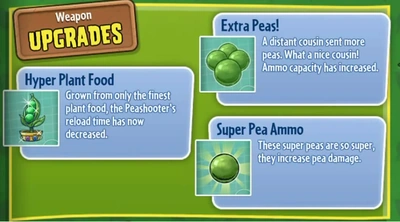
125 | Ognisty Groszek Lodowy Groszek Toksyczny Groszek Komandos Groszek Agent Groszek Groszek Prawa Jagodostrzelec Plazmowy Groszek |
Działo groszkowe | Bomba fasolowa chili Karabin Groszkowy Hiper Bomba fasolowa sombrero Kartaczownica Superskok |
| Słonecznik | 
|

|
100 | Mistyczny Słonecznik Elektrosłonecznik Ognisty Słonecznik Mroczny Słonecznik Metalowy Słonecznik Słoneczny Faraon Kosmiczny Słonecznik |
Słoneczne Uderzenie | Promień uzdrawiający Promień słońca Uzdrawiający kwiat Tęczowy promień uzdrawiający Skumulowany promień słońca Mroczny kwiat |
| Pożeracz | 
|

|
150 (175, jeśli ulepszony) | Pożeracz Hot Rod Toksyczny Pożeracz Ognisty Pożeracz Elektropożeracz Hrabia Gryzula Opancerzony Pożeracz Dziki Pożeracz Chester Pożeracz |
Chaps! | Maź Tunel Kolczatka Kleista supermaź Tunel biegowy Najeżona kolczatka |
| Kaktus | 
|

|
125 | Zamaskowany Kaktus Ognisty Kaktus Lodowy Kaktus Elektrokaktus Kaktus z Przyszłości Kaktus-Bandyta Cytrusowy Kaktus Nefrytowy Kaktus |
Kolce | Mina ziemniaczana Czosnkowy dron Orzechowa barykada Mini-mina ziemniaczana Karczochowy dron Żelazna dziewica |
| Crazy Dave | 
|
n/a | 2000 | N/A | N/A | Coconut Spotting Station Twin Heal Flower Cherry Strike Resurrect |
Warianty
Każda z klas ma 7-8 wariantów. Różne warianty różnią się wyglądem, podstawowym atakiem, czasami niektórymi zdolnościami.
Groszkostrzelec
| Roślina | Obraz | Ulepszenia | Punkty zdrowia | Broń | Zadawane obrażenia |
|---|---|---|---|---|---|
| Warianty Groszkostrzelca | |||||
| Ognisty Groszek | 
|

|
125 | Fire Pea Cannon | 15-19 (standardowe obrażenia) 21-26 (obrażenia krytyczne) 10 (rozprysk) 5 (podpalenie; trwa kilka sekund) |
| Lodowy Groszek | 
|

|
125 | Ice Pea Cannon | 15-19 (standardowe obrażenia) 21-25 (obrażenia krytyczne) 10 (rozprysk) |
| Toksyczny Groszek | 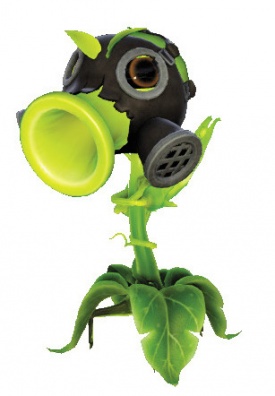
|

|
125 | Toxic Pea Cannon | 17-32 (obrażenia krytyczne) 17-26 (standardowe obrażenia) 10 (rozprysk) 2 (radioaktywne obrażenia przez kilka sekund) |
| Komandos Groszek | 
|

|
125 | Full-Auto Pea | 6-12 (standardowe obrażenia) 6-13 (obrażenia krytyczne) |
| Agent Groszek | 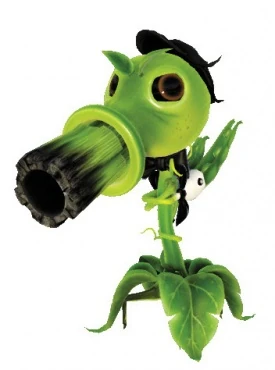
|

|
100 | Pea Silencer | 10-16 (standardowe obrażenia) 20-33 (obrażenia krytyczne) |
| Groszek Prawa | 
|

|
125 | Six Shooter | 13-22 (standardowe obrażenia) 15-26 (obrażenia krytyczne) |
| Jagodostrzelec | 
|
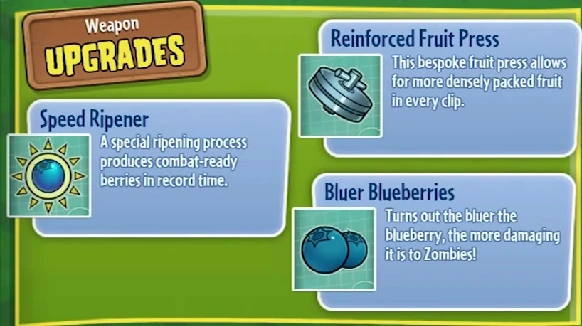
|
125 | Berry Blast | 20-35 (obrażenia krytyczne) 1-15 (rozprysk) |
| Plazmowy Groszek | 
|

|
125 | Plasmic Disruptor | 20-70 (obrażenia standardowe/po naładowaniu) 10-30 (rozprysk/po naładowaniu) |
Słonecznik
| Roślina | Obraz | Ulepszenia | Punkty zdrowia | Broń | Zadawane obrażenia |
|---|---|---|---|---|---|
| Warianty Słonecznika | |||||
| Mistyczny Słonecznik | 
|

|
100 | Mysterious Energy | 11-40 (standardowe obrażenia/po naładowaniu) 13-80 (obrażenia krytyczne/po naładowaniu) |
| Elektrosłonecznik | 
|

|
100 | Power Pulse | 6-8 (standardowe obrażenia) 7-9 (obrażenia krytyczne) 5-7 (porażenie prądem) |
| Ognisty Słonecznik | 
|

|
100 | Flame Pulse | 4-7 (standardowe obrażenia) 5-9 (obrażenia krytyczne) 5 (podpalenie na kilka sekund) |
| Mroczny Słonecznik | 
|

|
100 | Dark Energy | 7-8 (standardowe obrażenia) 9-10 (obrażenia krytyczne) |
| Metalowy Słonecznik | 
|

|
150 | Metal Blast | 4-7 (standardowe obrażenia) 6-9 (obrażenia krytyczne) |
| Słoneczny Faraon | 
|

|
100 | Cobra Laser | 10-13 (standardowe obrażenia) 12-15 (obrażenia krytyczne) |
| Kosmiczny Słonecznik | 
|
|
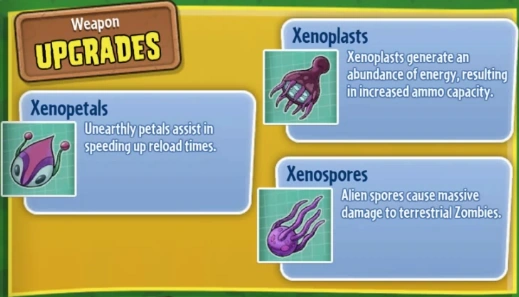
100 | Spore Mist | 10-14 (standardowe obrażenia) 15-18 (obrażenia krytyczne) 3 (obrażenia od chmury) |
Pożeracz
| Roślina | Obraz | Ulepszenia | Punkty zdrowia | Broń | Zadawane obrażenia |
|---|---|---|---|---|---|
| Warianty Pożeracza | |||||
| Pożeracz Hod Rod | 
|

|
100 (125 ulepszony) | Hot Rod Chomp | 25 (ugryzienie) 2000 (po użyciu umiejętności "burrow" lub zajście od tyłu) |
| Toksyczny Pożeracz | 
|

|
150 (175 ulepszony) | Toxic Spray | 6-8 (toksyczny spraj) 2000 (po użyciu umiejętności "burrow" lub zajście od tyłu) 2-5 (radioaktywność przez kilka sekund) |
| Ognisty Pożeracz | 
|

|
150 (175 ulepszony) | Flame Spray | 8-10 (ognisty spraj) 2000 (po użyciu umiejętności "burrow" lub zajście od tyłu) 5 (podpalenie na kilka sekund) |
| Elektropożeracz | 
|

|
150 (175 ulepszony) | Electric Spray | 10 (elektryczny spraj) 2000 (po użyciu umiejętności "burrow" lub zajście od tyłu) 2 (porażenie prądem) |
| Hrabia Gryzula | 
|

|
125 (150 ulepszony) | Vampiric Chomp | 25 (ugryzienie) 2000 (po użyciu umiejętności "burrow" lub zajście od tyłu) |
| Opancerzony Pożeracz | 
|

|
200 (225 ulepszony) | Metal Chomp | 50-60 (ugryzienie) 2000 (po użyciu umiejętności "burrow" lub zajście od tyłu) |
| Chester Pożeracz | 
|

|
125 (150 ulepszony) | Cheesy Chomp | 25 (ugryzienie) 2000 (po użyciu umiejętności "burrow" lub zajście od tyłu) |
| Dziki Pożeracz | 
|

|
100 (125 ulepszony) | Swamp Spray | 5-12 (bagnisty spraj) 2000 (po użyciu umiejętności "burrow" lub zajście od tyłu) |
Kaktus
| Roślina | Obraz | Ulepszenia | Punkty zdrowia | Broń | Zadawane obrażenia |
|---|---|---|---|---|---|
| Warianty Kaktusa | |||||
| Zamaskowany Kaktus | 
|

|
125 | Camo Shot | 30-33 (standardowe obrażenia) 60-66 (obrażenia krytyczne) |
| Ognisty Kaktus | 
|

|
125 | Fire Needle | 16-22 (standardowe obrażenia) 23-30 (obrażenia krytyczne) 5 (podpalenie na kilka sekund) |
| Lodowy Kaktus | 
|

|
125 | Ice Needle | 15-22 (standardowe obrażenia) 16-26 (obrażenia krytyczne) |
| Elekrokaktus | 
|

|
125 | Electric Needle | 15-22 (standardowe obrażenia) 18-27 (obrażenia krytyczne) 3-7 (porażenie prądem) |
| Kaktus z Przyszłości | 
|

|
125 | Future Shot | 10-94 (standardowe obrażenia/po naładowaniu) 20-107 (obrażenia krytyczne/po naładowaniu) 30 (rozprysk tylko przy w pełni naładowanym) |
| Kaktus-Bandyta | 
|

|
125 | Gatling Needle | 9 (standardowe obrażenia) 10-11 (obrażenia krytyczne) |
| Cytrusowy Kaktus | 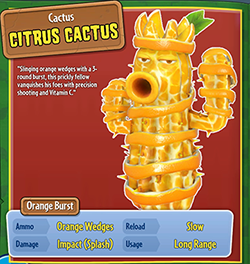
|

|
125 | Orange Burst | 13-17 (standardowe obrażenia/obrażenia krytyczne) 5-15 (rozprysk) |
| Nefrytowy Kaktus | 
|

|
150 | Shatter Shot | 11-26 (standardowe obrażenia) 13-38 (obrażenia krytyczne) 15 (rozprysk) |
Zdolności z użyciem roślin
| Roślina | Obraz |
|---|---|
| Groszkostrzelec | |
| Bomba fasolowa chili | 
|
| Bomba fasolowa sombrero | 
|
| Słonecznik | |
| Uzdrawiający kwiat | 
|
| Mroczny kwiat | 
|
| Pożeracz | |
| Kolczatka | 
|
| Najeżona kolczatka | 
|
| Chesterweed | 
|
| Kaktus | |
| Mina ziemniaczana | 
|
| Czosnkowy dron | 
|
| Orzechowa barykada | 
|
| Mini-mina ziemniaczana | 
|
| Karczochowy dron | 
|
| Żelazna dziewica | 
|
Rośliny doniczkowe
Jest 15 roślin "doniczkowych". Mogą być one sadzone w pustych doniczkach, dzięki czemu mogą asystować w walce z hordami zombie. Raz posadzona roślina nie może być odzyskana (aczkolwiek można mieć wiele sztuk jednej rośliny). Można je zdobyć poprzez kupowanie paczek w sklepie z naklejkami.
Roślin tych można użyć jedynie w Garden Ops, Gardens & Graveyards i Taco Bandits
| Roślina | Obraz | Zdrowie |
|---|---|---|
| Działo groszkowe | 
|
36 |
| Pea Repeater | 
|
80 |
| Karabin groszkowy | 
|
100 |
| Bonk Choy | 
|
100 |
| Bojaźliwy grzyb | 
|
70 |
| Uzdrawiający kwiat | 
|
61 |
| Grzyb rozpylacz | 
|
75 |
| Maziowy grzyb | 
|
100 |
| Smok | 
|
95 |
| Lodowy grzyb | 
|
50 |
| Grzyb zagłady | 
|
100 |
| Ice Peashooter | 
|
42 |
| Fire Peashooter | 
|
70 |
| Bambus | 
|
50 |
| Laser Bean | 
|
100 |
Pozostałe rośliny
| Roślina | Obraz |
|---|---|
| Twin Heal Flower | 
|
| Cherry Strike | 
|
| Coconut Spotting Station | 
|
| Revive Rainbow | 
|
| Tallnut Cannon | 
|
| Tallnut | 
|
| Corn Mortar | 
|
| Tactical Cuke | 
|
| Flax Cannon | 
|
| Mega Flower | 
|